





How to Make a Cake Topper With Cricut: Full Guide
 Published
 Updated
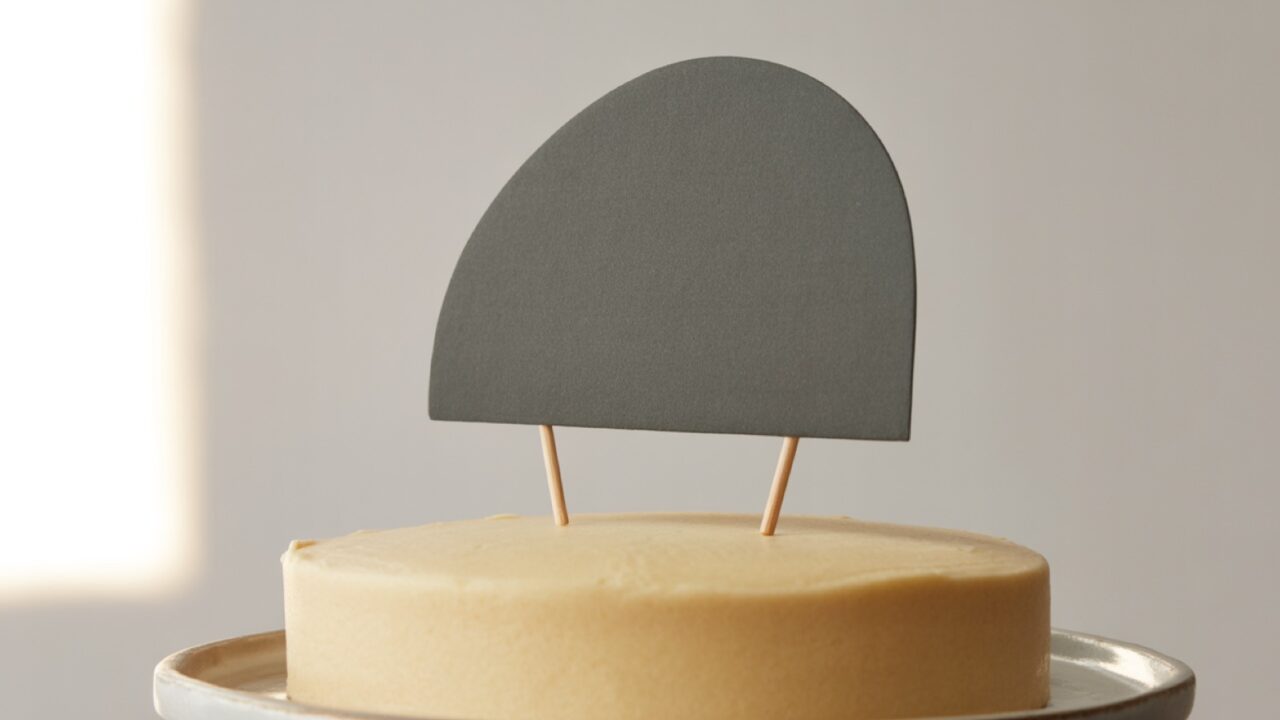
Cut the design from heavy cardstock or glitter card, back it for stiffness, and attach two skewers or a single acrylic pick to the reverse. That is how to make a cake topper with Cricut in outline. The cut takes two minutes; the choices that decide whether it stands up happen before that.
A topper is a small object doing a structural job. It has to be rigid enough not to flop, light enough not to sink into buttercream, and food safe where it touches the cake. Those three requirements rule out most of the material a craft cutter owner already has on the shelf.
What follows covers how to make a cake topper with Cricut in material terms, with real weights, the two backing methods that work, and the sizing that keeps a topper in proportion to the cake. It assumes you can already cut cardstock cleanly; if not, the machine basics guide covers blade and pressure first.
Which Cardstock Actually Works?
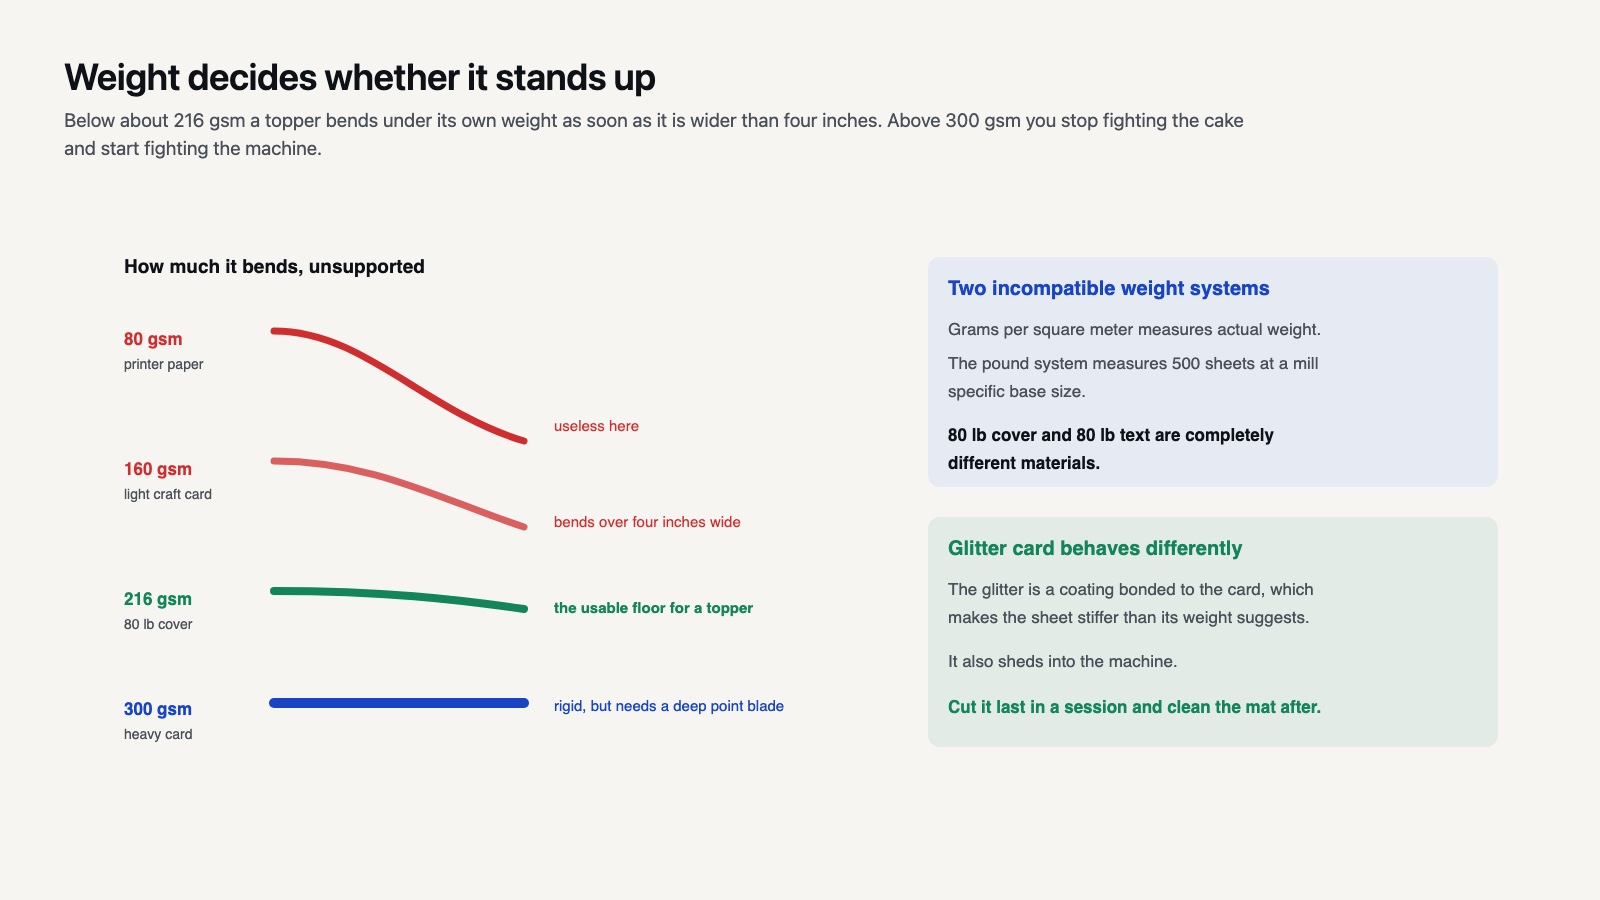
Weight decides everything. Standard printer paper is around 80 gsm and is useless here. Craft cardstock runs from roughly 160 gsm to 300 gsm, and the usable range for a topper starts at about 216 gsm, often sold as 80 lb cover.
Below that the topper bends under its own weight as soon as it is more than about four inches wide. Above 300 gsm you start fighting the machine instead of the cake: heavy card needs a deep point blade, more pressure, and often a second pass, and fine lettering begins to tear at the corners.
Glitter cardstock is the popular choice and behaves differently from plain. The glitter layer is a coating bonded to the card, which makes the sheet stiffer than its weight suggests and also makes it shed into the machine. Cut glitter card last in a session and clean the mat afterwards.
Cricut’s own cardstock instructions set out the basic sequence and the fix for an incomplete cut, which is the More or Less pressure control on the Make It screen rather than a second pass.
Whatever you choose, cut a test shape before the real design. Cricut’s material settings are a starting point rather than a guarantee, and two 216 gsm cards from different suppliers can need different pressure. For repeat work, note the working setting on the packet itself rather than trusting memory.
📐 Technical Note
Cardstock is sold by two incompatible systems. Grams per square meter measures actual weight, while the pound system measures the weight of 500 sheets at a mill specific base size, so 80 lb cover and 80 lb text are completely different materials. When a tutorial quotes pounds without saying cover or text, the number tells you almost nothing.
Ready made topper designs save the drawing stage, and a celebration and seasonal set usually arrives with the name plate, the age numerals and the themed elements already scaled to each other.
How Do You Make the Topper Rigid?
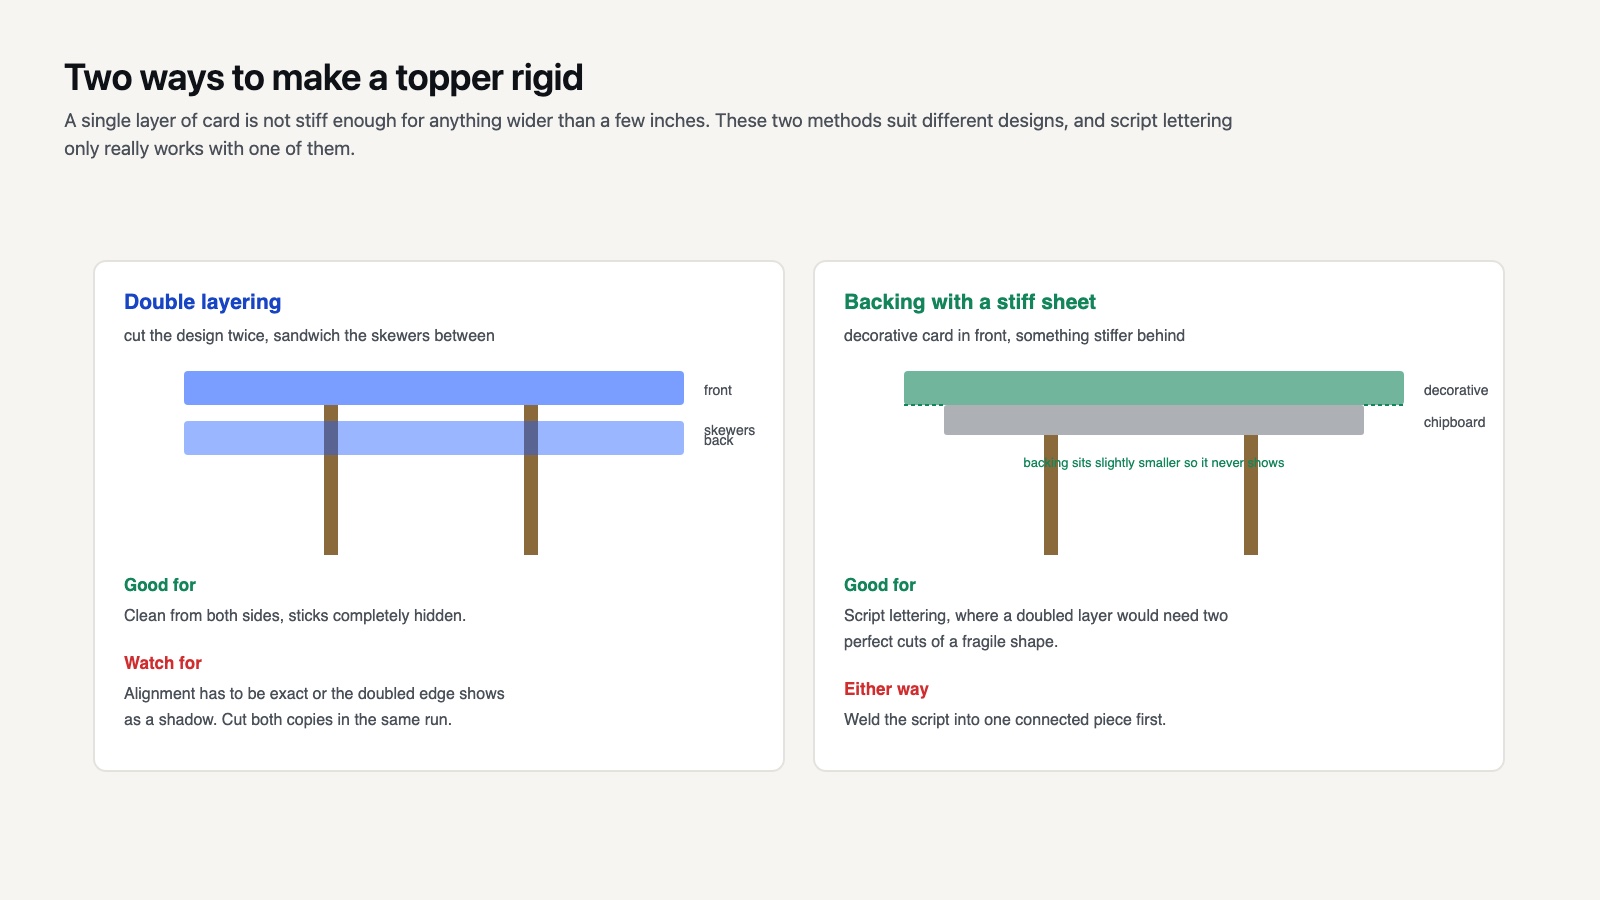
A single layer of card is not rigid enough for anything wider than a few inches. Two methods fix that, and they suit different designs. Both start from a clean cut, which is where the machine settings guides come in.
Double layering
Cut the design twice and glue the layers back to back with the skewers sandwiched between them. This doubles the thickness, hides the sticks completely, and gives a clean finish from both sides, which matters because a topper is usually viewed from more than one angle.
The alignment has to be exact or the doubled edge shows as a shadow. Cut both copies in the same run from the same sheet so any machine drift affects them identically, and use a glue with some open time rather than a fast tacking one.
Backing with a stiff sheet
Cut the design in decorative card and a plain backing shape in something stiffer, slightly smaller so it does not show from the front. Chipboard, thin acrylic and heavyweight kraft all work.
This is the better route for script lettering, where a doubled layer would need two perfect cuts of a fragile shape. Welding the script into one connected piece first is essential either way, and that is the same operation described in the weld and attach notes.
⚠️ Common Mistake to Avoid
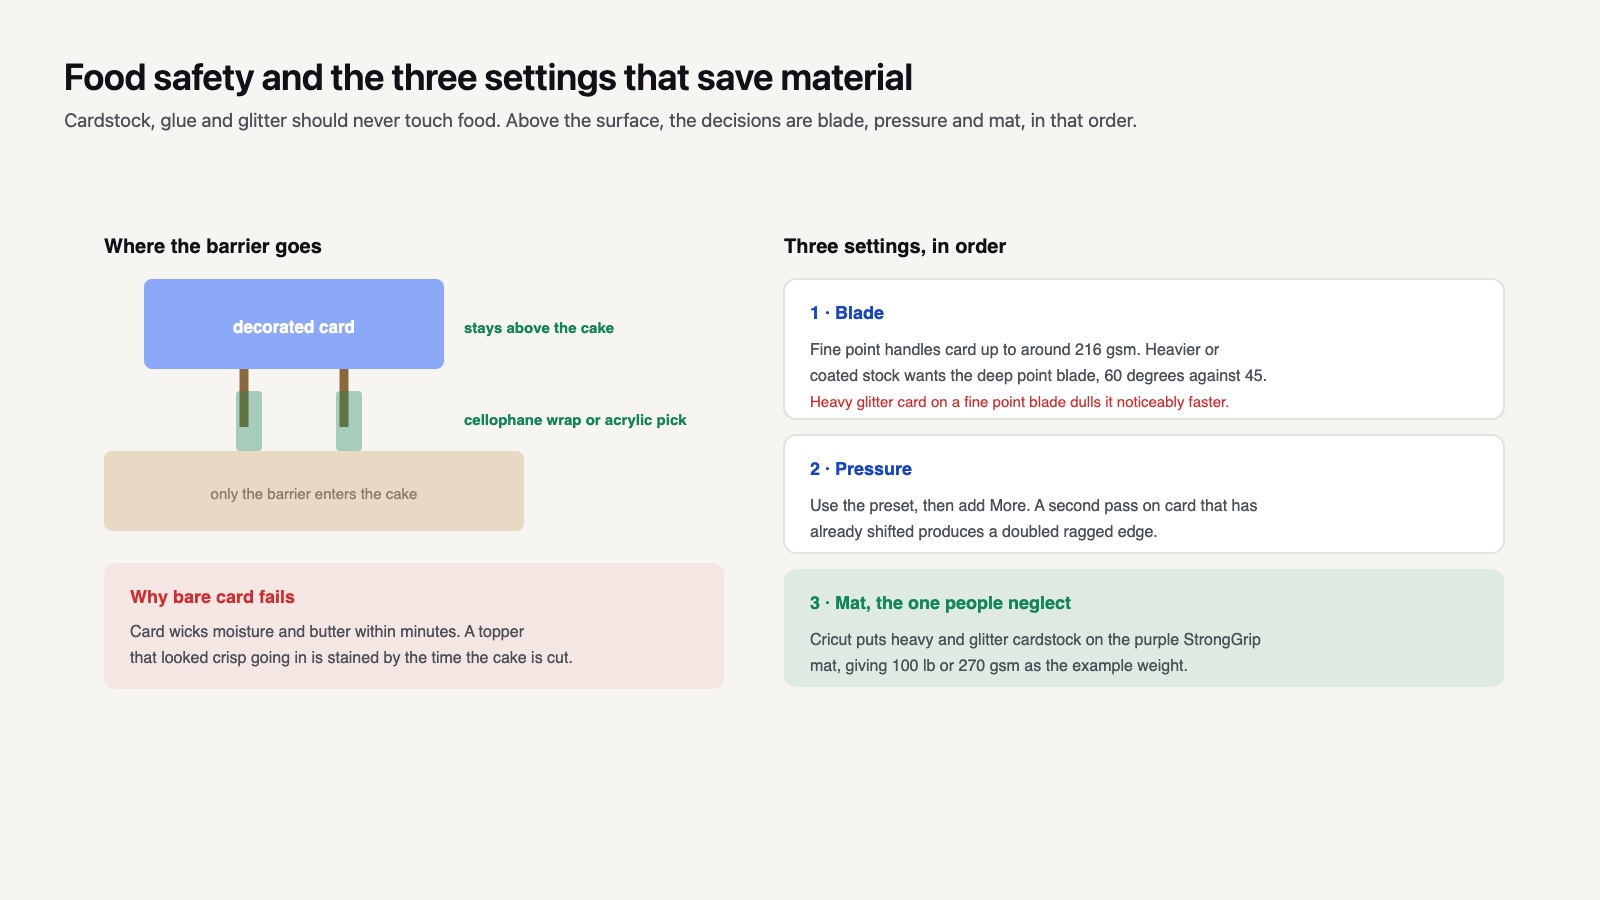
Pushing bare cardstock into the cake. Card wicks moisture and butter within minutes, and a topper that looked crisp when it went in will be stained and drooping by the time the cake is cut. Anything entering the cake needs a food safe barrier: wrap the skewer ends in cellophane or use purpose made acrylic picks, and keep the card itself above the surface.
Sizing a Topper to the Cake
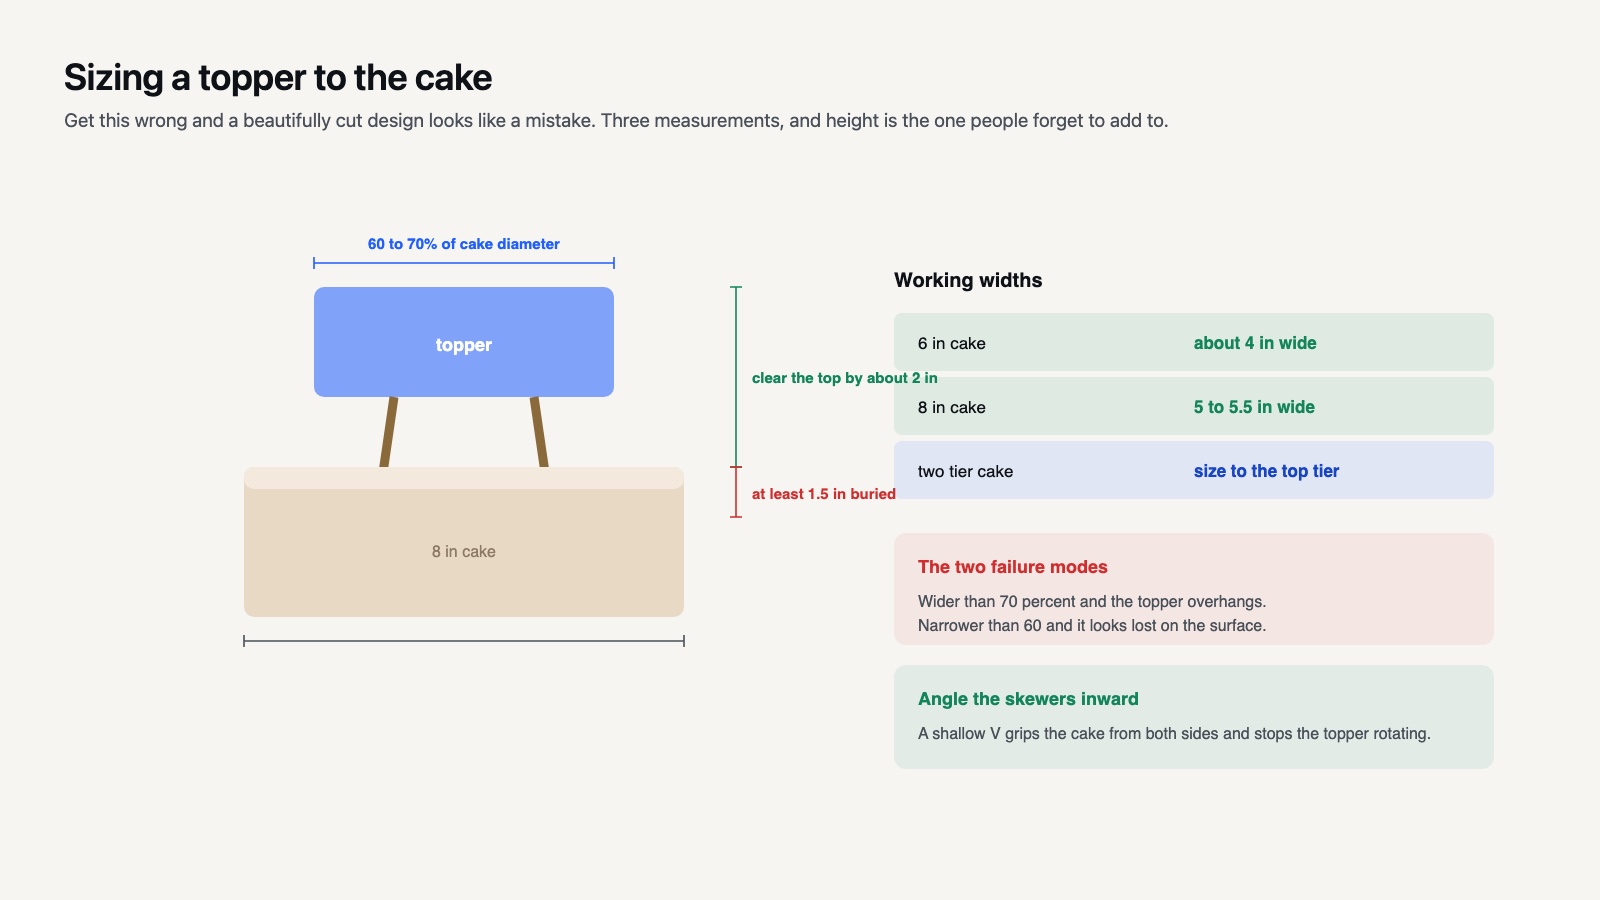
Get this wrong and a beautifully cut design looks like a mistake. The working guide is simple: the topper should be roughly 60 to 70 percent of the cake’s diameter in width, and tall enough to clear the top by about two inches.
On a six inch cake that means a topper around four inches wide. On an eight inch cake, five to five and a half. Wider than that and the topper overhangs; narrower and it looks lost in the middle of the surface.
Height is measured from the cake surface, not from the bottom of the skewer. Add at least an inch and a half to the visible height for the part that disappears into the cake, and add more for a tall cake, because a short stick in a tall cake has nothing to grip.
Ready cut numeral and name sets are drawn to consistent heights, which makes the arithmetic easier; the cut ready alphabets are sized that way deliberately.
For a two tier cake, size to the top tier rather than the base. The topper sits on the top, and matching it to the widest tier produces something that dwarfs the cake it is standing on.
💡 Pro Tip
Angle the two skewers slightly inward rather than parallel. Two sticks pushed in at a shallow V grip the cake from both sides and stop the topper rotating, which parallel sticks never quite do. It costs nothing and it is the difference between a topper that faces the camera and one that has turned sideways by the time the candles are lit.
Beyond Toppers: What Else Cardstock Is For
The same material knowledge covers a whole category of projects, and toppers are usually the entry point rather than the destination.
Cards and invitations are the obvious neighbor, and they use lighter card, around 216 gsm, with a scoring tool for the fold. Scoring rather than folding is what separates a card that looks bought from one that looks homemade, and it needs the score line attached to the cut so both land in the right place.
Party decor scales the same designs up. Banner letters, centerpiece toppers and gift box wraps all use the same cutting settings and the same rigidity problem, solved the same way. A design library built for one project type usually covers the others, which is why project idea collections tend to be organized by occasion rather than by object.
Boxes and three dimensional builds are where cardstock gets demanding. Every fold needs a score, every tab needs a glue area, and the weight that works flat may be too stiff to fold cleanly. Test one small box before cutting twenty for a party.
Paper flowers sit at the other extreme, needing lighter card that will curl and shape under a finger. A 300 gsm sheet that makes an excellent topper will crack rather than curve, so the drawer ends up holding two or three weights rather than one.
Selling Toppers: What to Know First
Once you know how to make a cake topper with Cricut, personalized toppers are one of the most reliable small craft products, and also one of the easiest to get wrong commercially.
Price by the name rather than by the design. A topper reading a single first name takes minutes; a topper reading a long name with an age number and a themed graphic takes four times as long and uses three materials. Flat pricing across those is how people end up working for nothing on the complicated orders.
Character and brand themed toppers are the highest demand and the highest risk. Logos, characters, films and shows are protected by copyright and trademark, and a lookalike cut file does not transfer any permission to you. Personal use and commercial sale are different things, and verifying the license before listing is the seller’s responsibility rather than the file supplier’s. The USPTO trademark basics and the US Copyright Office overview both set out what is covered.
Packaging matters more than for most craft products because a topper arrives fragile and stands up at a party. A flat rigid mailer and a cellophane sleeve cost little and prevent the bent corner that generates a refund request. If you are pricing a product line properly, the design ideas section has more on what sells and why.
Cutting Settings That Save Material
Three settings decide whether heavy card cuts cleanly, and Cricut’s presets get you most of the way rather than all of it.
Blade type first. A fine point blade handles card up to around 216 gsm comfortably; heavier or coated stock benefits from a deep point blade, which has a steeper angle and clears thick material better. Cricut specifies a 60 degree angle on the deep point blade against 45 degrees on the fine point, and recommends it for thick cardstock among other heavy materials. Running heavy glitter card on a fine point blade dulls it noticeably faster.
Pressure second. Use the material preset, then add More pressure if the test cut does not release cleanly. Adding pressure is preferable to adding a second pass, because a second pass on card that has already shifted on the mat produces a doubled ragged edge.
Mat third, and this is the one people neglect. Heavy card needs a StrongGrip mat, and card cut on a tired StandardGrip mat will lift mid cut and tear. Cricut’s mat grip guidance puts heavy and glitter cardstock on the purple StrongGrip mat specifically, giving 100 lb or 270 gsm as an example. A mat that no longer holds a sheet flat when you push a corner is finished, and continuing to use it costs more in material than a new mat does. The same logic applies to label and card projects, where mat grip rather than blade sharpness is usually the limiting factor.
Looking Ahead
The interesting thing about cake toppers is how quickly they teach material thinking. A crafter who has made ten of them stops asking which file to buy and starts asking what weight, what backing and what the thing has to survive. That question transfers to every other project on the machine, which is why toppers are a better first paid product than they look.
Frequently Asked Questions
What is the best cardstock weight for a cake topper?
Around 216 gsm, sold as 80 lb cover, for designs up to about five inches wide. Go heavier, up to 300 gsm, for wider toppers or anything with long thin elements. Below 200 gsm the topper will bend unless it is doubled.
Can I use glitter cardstock for toppers?
Yes, and it is the most popular choice. Expect it to shed into the machine, so cut it at the end of a session and clean the mat and blade housing afterwards. Glitter card is also stiffer than its weight suggests, which works in your favor here.
How do I attach the sticks so they do not show?
Sandwich them between two identical cut layers glued back to back. If you are using a single layer, tape the sticks to the reverse with clear tape and add a small matching cardstock patch over the tape so the back still looks finished.
Do cake toppers need to be food safe?
The part that enters the cake does. Cardstock, glue and glitter should not touch food directly, so wrap the skewer ends or use food safe acrylic picks, and keep the decorated card above the surface of the cake.