





Tumbler Wrap Size Guide: Templates and Measurements
 Published
Updated
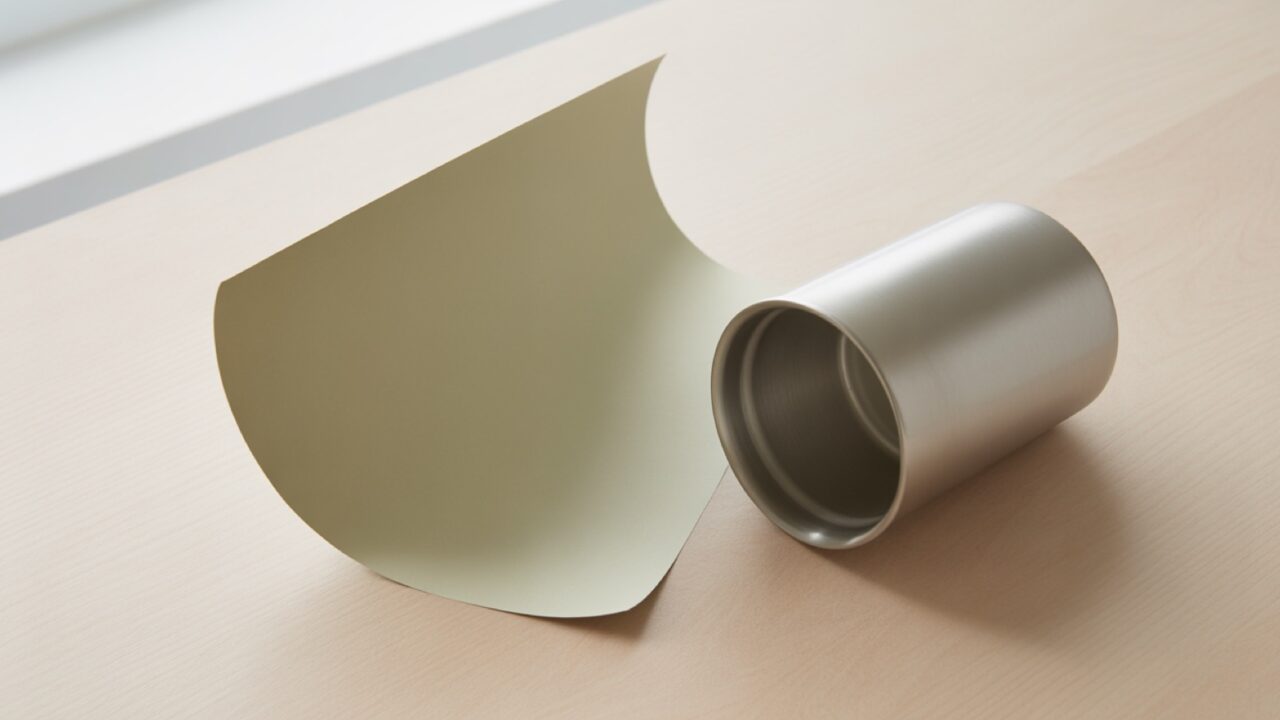
A 20 oz skinny tumbler wrap is roughly 9.3 inches wide at the top and about 8 inches tall, and it is not a rectangle. Because the tumbler tapers, the flat wrap is a shallow arc, wider along its top edge than its bottom, and a rectangular design will leave a wedge shaped gap.
That single geometric fact explains most tumbler wrap size failures. People design on a rectangle because design software offers rectangles, press it onto a cone, and find the seam open at one end. No amount of stretching during application closes it, because the shape was wrong before it reached the press.
What follows is the tumbler wrap size logic, the actual geometry of the flat shape, why supplier templates differ, and the practical sizing for the common blanks. If you are new to pressing drinkware, the heat transfer basics cover the equipment side first.
Why Is the Wrap Curved Rather Than Rectangular?
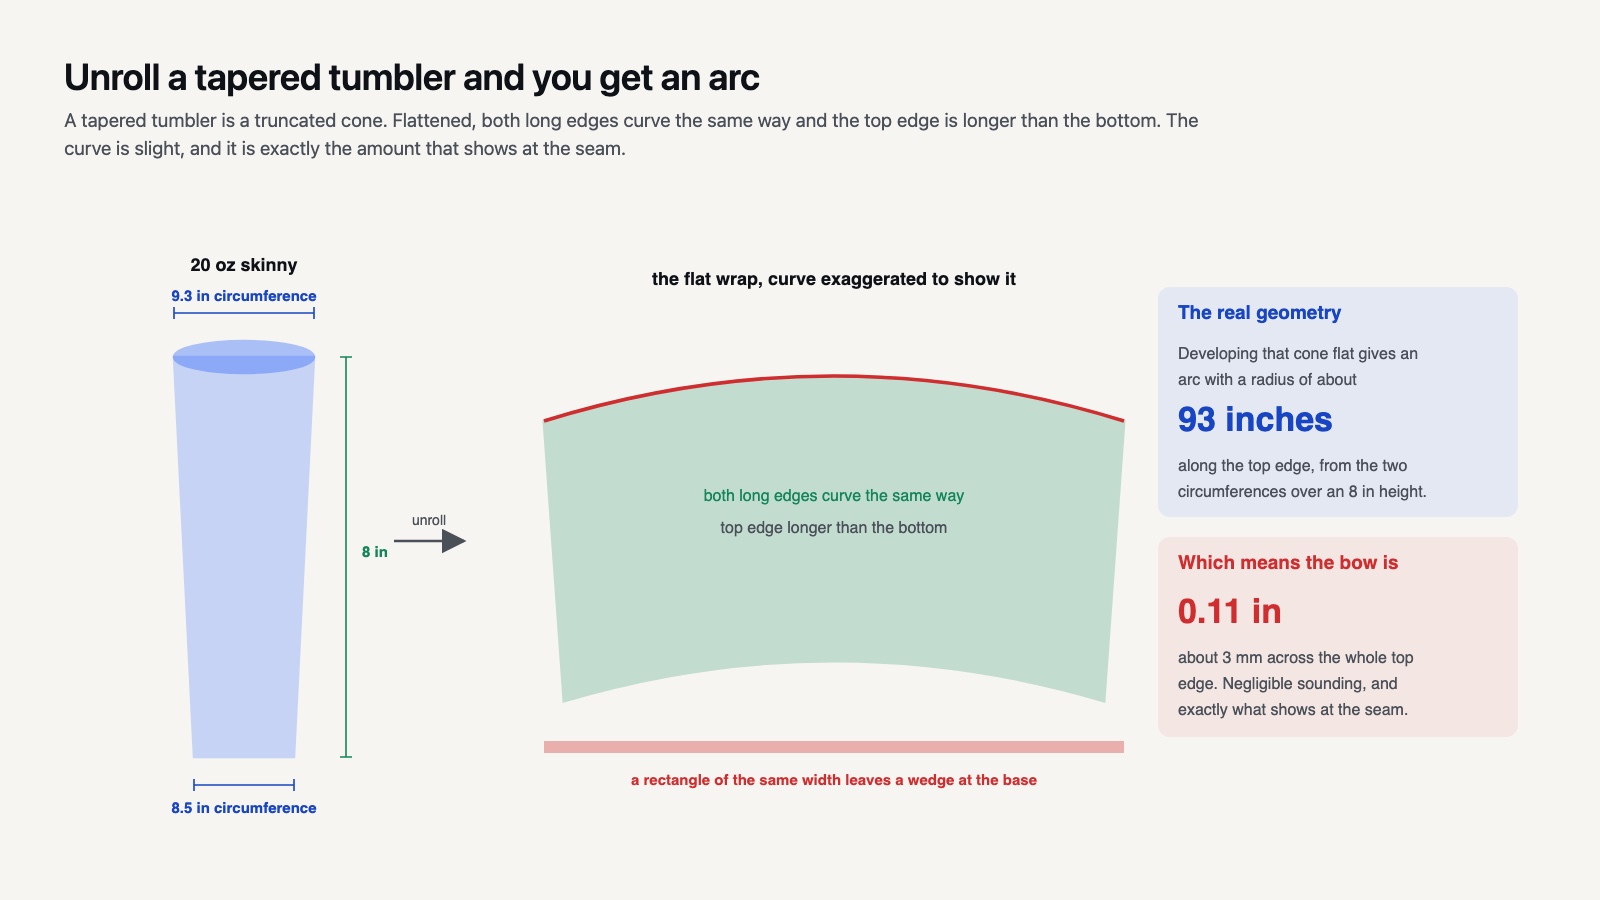
A tapered tumbler is a truncated cone. Unroll a cone and you get a segment of a ring, not a rectangle: both long edges curve in the same direction, and the top edge is longer than the bottom.
The curve is real but subtle, which is why so many people miss it. Take a typical 20 oz skinny with a top circumference near 9.3 inches, a bottom near 8.5 inches and a height of 8 inches. Developing that cone flat gives an arc with a radius of around 93 inches along the top edge, which means the top edge bows upward by only about 0.11 inches, roughly 3 mm, across its whole width.
If the arithmetic is not your thing, you do not have to do it: every blank supplier publishes the finished shape, and ready made tumbler wrap files are drawn on it already. The reason to understand the geometry is so you can tell a correct template from a rectangle someone has relabeled.
Three millimeters sounds negligible. It is exactly the amount that shows as a visible gap or overlap at the seam, and it is the difference between a wrap that meets itself cleanly and one that does not. The taper also means the design is compressed slightly toward the bottom, which matters for lettering that has to read level all the way around.
📐 Technical Note
The flat development of a truncated cone is an annular sector. With top radius R1, bottom radius R2 and slant height L, the outer radius of the sector is L × R1 ÷ (R1 − R2) and the inner radius is L × R2 ÷ (R1 − R2). A straight sided tumbler has R1 equal to R2, the formula collapses, and the wrap genuinely is a rectangle.
🔢 Quick Numbers
- 9.3 in top circumference and 8.5 in bottom on a typical 20 oz skinny, per published blank supplier templates
- About 93 in arc radius along the top edge, from the cone development of those two circumferences over an 8 in height
- About 0.11 in of upward bow across the top edge, from the same calculation
- 150 to 210 seconds at 350 to 400°F for ceramic drinkware, per the Sawgrass settings chart
Common Tumbler Sizes and Wrap Dimensions
The tumbler wrap size figures below are approximate starting points for sizing a canvas, not specifications. Only the 20 oz skinny row is derived from measured circumferences; the rest are typical rather than exact, and every one of them should be replaced by your supplier’s own template before you cut. The next section explains why.
Typical wrap dimensions
| Blank | Wrap width | Wrap height | Shape |
|---|---|---|---|
| 20 oz skinny, tapered | about 9.3 in top | about 8 in | Shallow arc |
| 20 oz skinny, straight | about 9.3 in | about 8 in | Rectangle |
| 30 oz tapered | about 11 in top | about 7.5 in | Arc, more taper |
| Sippy or kids cup | about 8 in | about 5 in | Arc |
| 11 oz mug | about 9 in | about 3.7 in | Rectangle, handle gap |
Heights in that table are printable heights rather than overall blank heights, and the difference is typically half an inch once the rim and base are excluded. Measuring the printable band rather than the whole vessel is what keeps a kids cup design from running off the top.
Note the mug row. A handle forces a gap in the design, so a mug wrap is not a full wrap at all: it is two panels or one panel centered on the side opposite the handle. Designs built for tumblers rarely transfer to mugs for that reason alone.
Why Does Every Supplier Publish a Different Template?
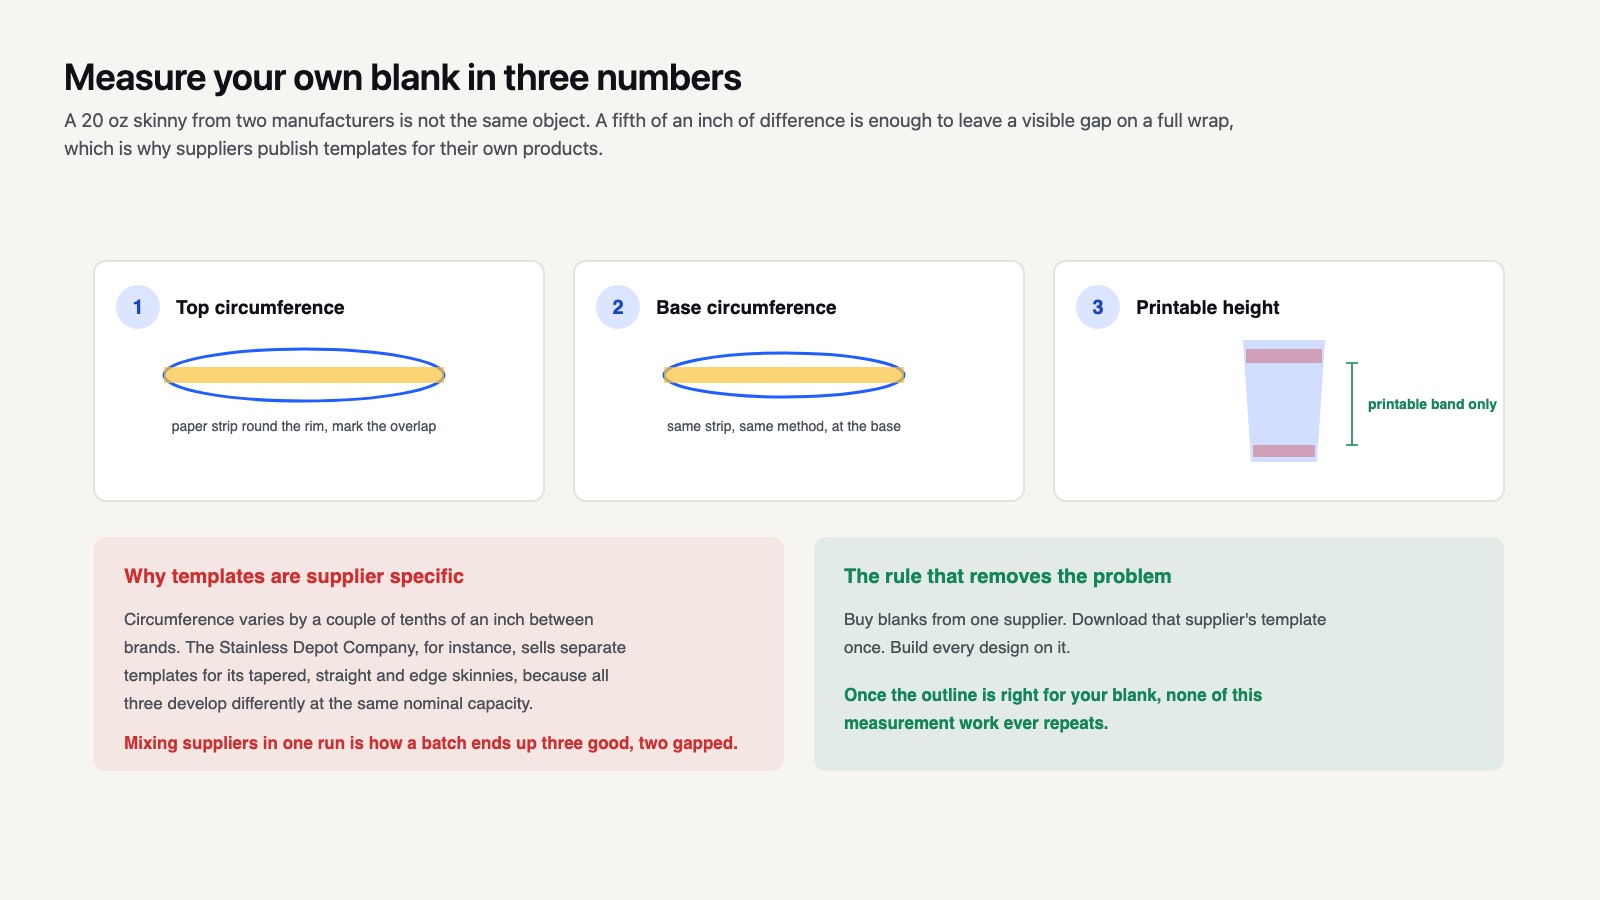
Because a 20 oz skinny from two manufacturers is not the same object. Circumference varies by a couple of tenths of an inch between brands, and a fifth of an inch is enough to leave a visible seam gap on a full wrap.
This is why blank suppliers publish templates for their own specific products rather than a generic one. The Stainless Depot Company, for example, sells separate templates for its tapered skinny, straight skinny and edge variants, because those three have different developments even at the same nominal capacity.
The practical rule is straightforward. Buy blanks from one supplier, download that supplier’s template once, and build every design on it. Switching supplier means re checking the template, and mixing suppliers within one production run is how a batch ends up with three good wraps and two with gaps.
If no template exists for your blank, measure it. Wrap a strip of paper around the top rim, mark the overlap, and measure the length. Repeat at the base. Measure the vertical height of the printable area. Those three numbers feed straight into the cone development, and they are more reliable than any figure found online.
💡 Pro Tip
Add 0.25 inches of overlap to the width, never to the height. A small horizontal overlap hides the seam and is invisible on a curved surface; extra height pushes the design over the rim or under the base, where it either creases or gets trimmed off. Build the overlap into the file so it survives every reprint.
Designing Within the Safe Area
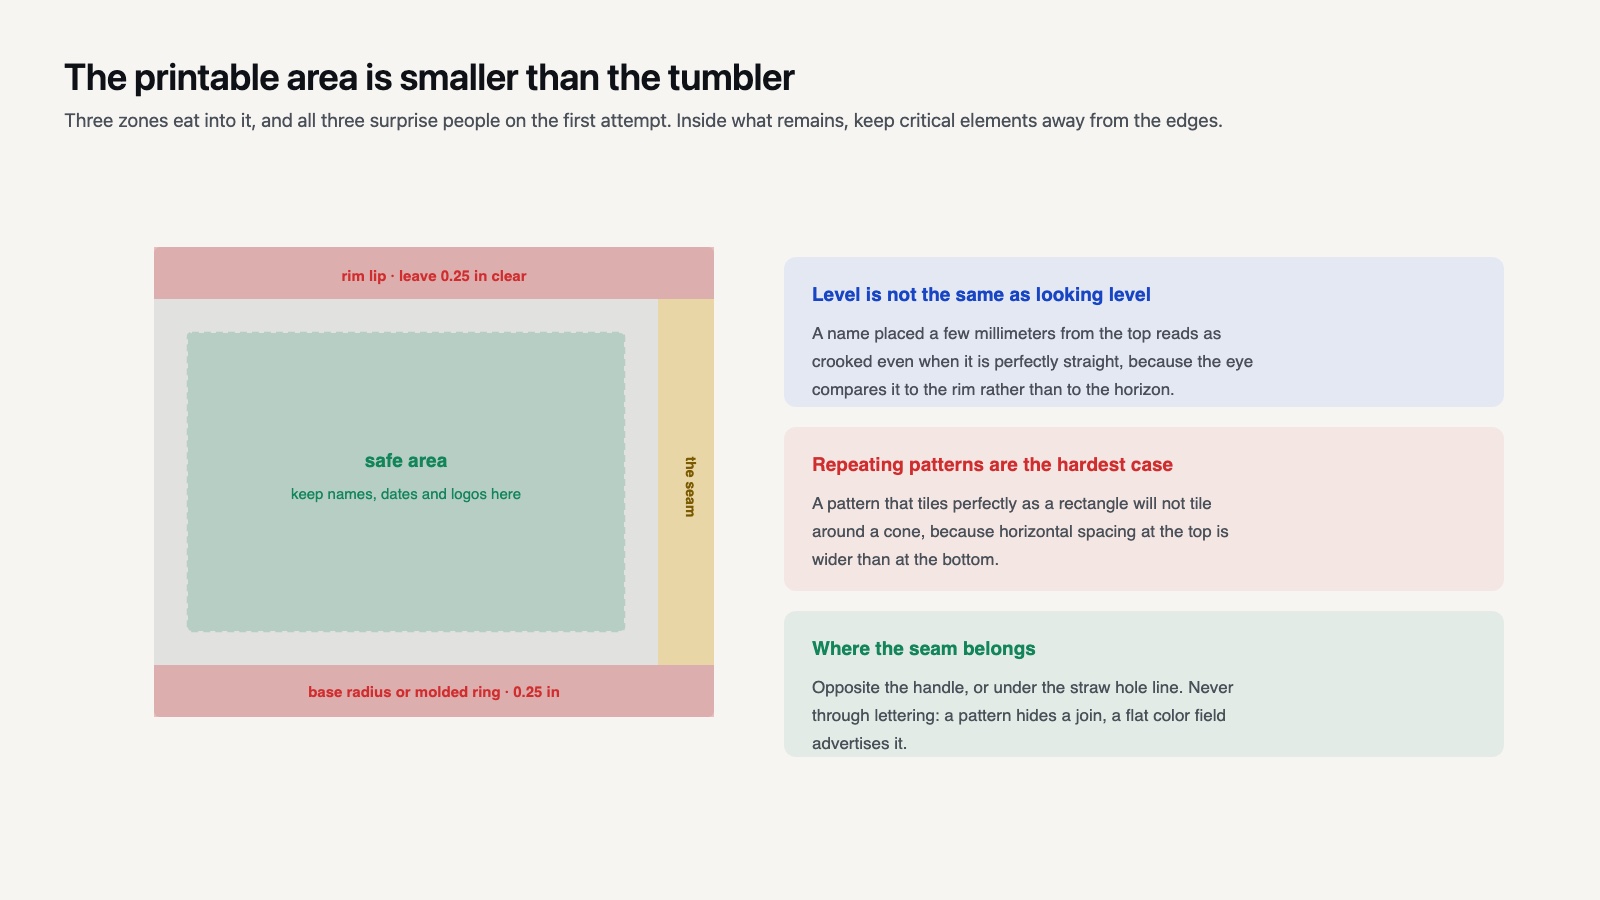
The printable area is smaller than the tumbler. Three zones eat into it and all three surprise people on the first attempt.
The top rim usually has a lip or a rolled edge that the wrap cannot follow. Leave a quarter inch clear below it. The base often has a slight radius or a molded ring, so leave the same at the bottom. And the seam, wherever you put it, will always be slightly visible under raking light, so place it where it matters least rather than pretending it will vanish.
Within what remains, keep critical elements away from the edges. A name or a date placed a few millimeters from the top will read as crooked even if it is perfectly level, because the eye compares it to the rim rather than to the horizon.
Repeating patterns need the most care. A pattern that tiles perfectly as a rectangle will not tile around a cone, because the horizontal spacing at the top is wider than at the bottom. Either accept a slight mismatch at the seam or use a design without a strict repeat. Purpose built tumbler pattern files handle this by using organic rather than geometric repeats.
⚠️ Common Mistake to Avoid
Scaling a wrap design to fit a different tumbler. Enlarging a 20 oz wrap to cover a 30 oz blank changes both dimensions proportionally, but the two blanks have different ratios of circumference to height. The result overhangs top and bottom while still leaving a gap at the seam. Start from the correct template every time instead.
How Do You Apply the Wrap Without a Spiral?
Method depends on what the wrap is made of, and the two routes have almost nothing in common.
Sublimation wraps are printed on transfer paper, taped to the blank and pressed, and they need a coated blank. Sawgrass publishes press settings for drinkware and the times are long compared with fabric, because heat has to pass through a steel or ceramic wall. Their settings reference gives 150 to 210 seconds for ceramic mugs at 350 to 400°F as the comparable figure.
Adhesive vinyl wraps are cut, weeded and applied with transfer tape, no heat involved. This works on any smooth blank, coated or not, and is the only route for powder coated tumblers that are not sublimation ready. Permanent film is the correct choice here, and Oracal 651 is the usual reference product, though every craft vinyl decal on drinkware remains hand wash only whatever its outdoor rating says.
Whichever route you take, work from the center outward and let the wrap find the taper rather than forcing it. A wrap pushed down at one edge first will spiral, and a spiraled wrap cannot be recovered. The vinyl application guide covers the burnishing technique that applies equally here.
Designing for Sublimation Versus Vinyl
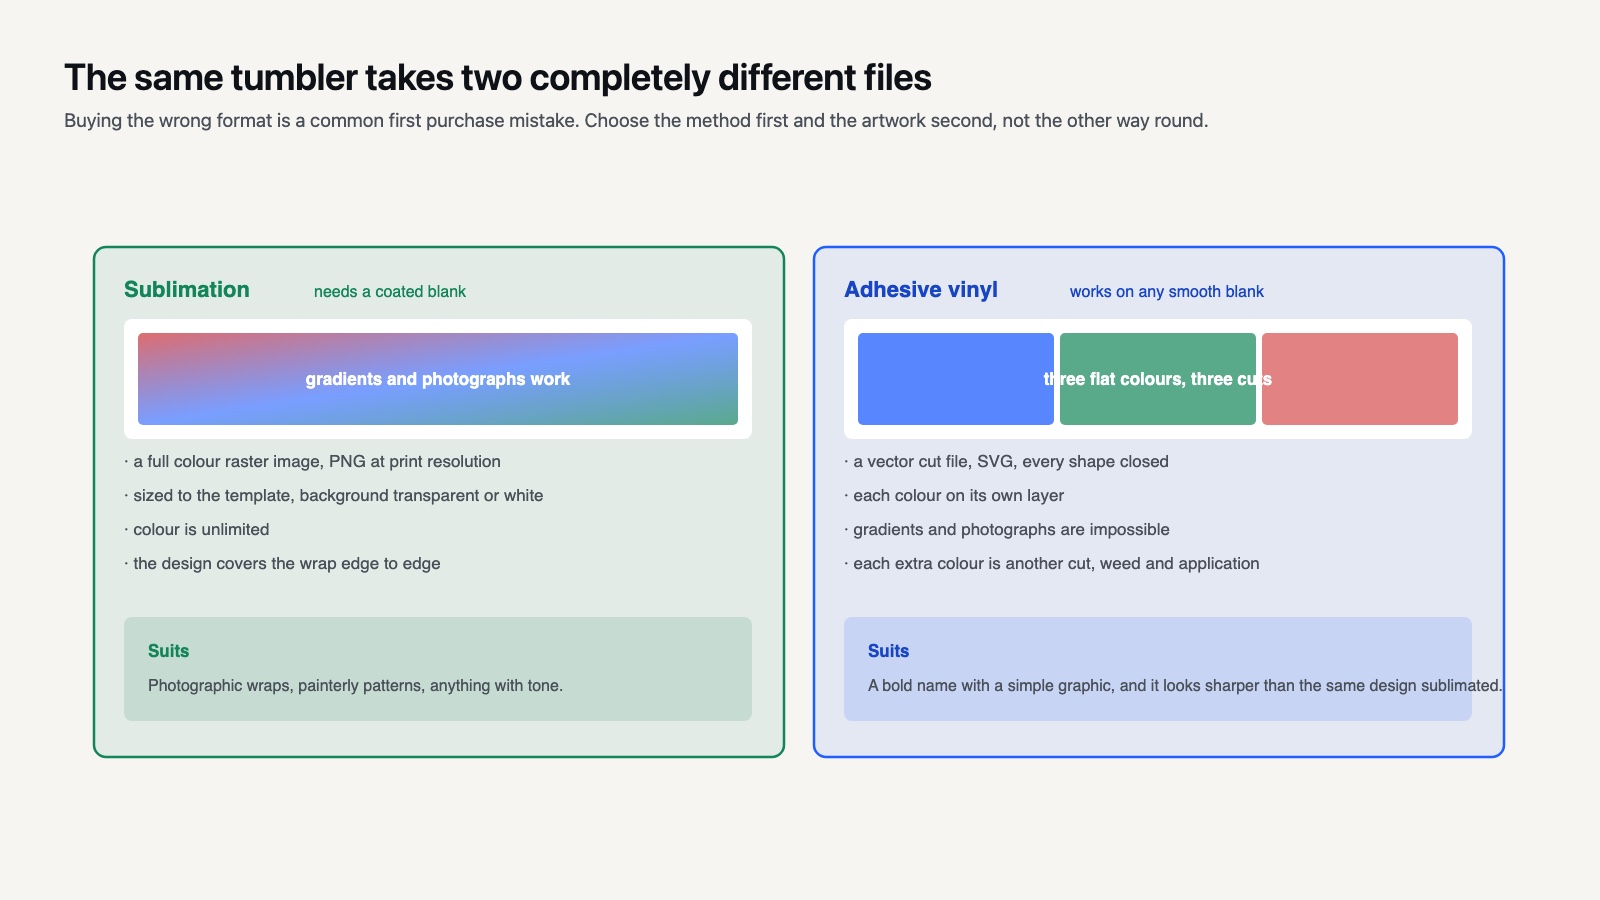
The same tumbler takes two completely different files depending on the method, and buying the wrong one is a common first purchase mistake.
Sublimation needs a full color raster image, a PNG at print resolution, sized to the template and with the background transparent or white depending on the blank. Color is unlimited, gradients and photographs work, and the design covers the whole wrap edge to edge.
Vinyl needs a vector cut file, an SVG, with every color on its own layer and every shape closed. Gradients are impossible, photographs are impossible, and each additional color is another cut, weed and application cycle. Three colors is a sensible ceiling on a curved surface.
That difference also shapes what the design should be. A photographic wrap belongs on a sublimation blank; a bold name with a simple graphic suits vinyl and will look sharper than the same design sublimated. Choosing the method first and the artwork second saves buying files you cannot use, which is why artwork collections are usually split by format rather than by theme.
What to Get Right Before You Cut Twenty
Batch production is where small template errors become expensive, so prove the wrap on one blank first.
Print or cut a single wrap in the cheapest material you have and dry fit it on the blank without applying it. Hold it in place and look at the seam, the top clearance and the bottom clearance. Ninety seconds of checking saves a run.
Then press one for real and look at it the next day. Adhesive needs time to grip and sublimation needs the blank to cool fully, and problems that are invisible immediately after application often show up overnight as lifted edges or a shifted seam.
Keep the proven file as a template rather than as a design. Once the outline is correct for your supplier’s blank, every future design drops into the same shape and none of this measurement work repeats. Most people who produce drinkware regularly end up with three or four proven templates and a library of artwork that fits all of them, which is the same organizing principle behind ready sized PNG design sets.
Where Seams Should Go
Every full wrap has a seam, and choosing its position is a design decision rather than an accident of application.
The default is the side opposite the handle on anything that has one, and directly under the straw hole line on a tumbler lid. Both put the join where it is least often facing the person holding the cup. For a tumbler with no orientation cue, place the seam where the design is busiest, because a pattern hides a join and a flat color field advertises it.
Never place a seam through lettering. A name split across the join will never line up perfectly, and the eye is far more forgiving of a break in a background than in a letterform. Build the design so the text sits centered on the front with clear space either side.
On sublimation there is a second consideration: the transfer paper join produces a faint line of its own where the overlap doubles the paper thickness. Taping the overlap flat and pressing with even pressure minimizes it, but on a dark solid color it will still be findable. Designs with texture across the whole surface, such as the dimensional wrap sets, hide it better than flat color ever will.
Frequently Asked Questions
Is a tumbler wrap the same size as the tumbler circumference?
Only for a straight sided blank. On a tapered tumbler the wrap has to match the top circumference along its top edge and the bottom circumference along its bottom edge, which is why the flat shape curves. Using the top measurement as a rectangle width leaves the bottom too wide.
How much overlap should a tumbler wrap have?
About a quarter inch of horizontal overlap. That is enough to hide the seam without creating a visible double thickness ridge. Any more and the overlap shows as a raised line under the fingertips.
Why does my wrap leave a gap at the bottom?
Almost always because the design was built as a rectangle on a tapered blank. The width that closes at the top leaves a wedge at the base. Rebuild on the correct arc template rather than trying to stretch the material.
Can I use one template for all 20 oz tumblers?
No. Nominal capacity does not fix the dimensions, and blanks from different suppliers differ by enough to matter. Use the template published for the specific blank you buy, and re check it if you change supplier.