




PNG for Tumbler Sublimation: Best Settings & Sizes
 Published
Updated
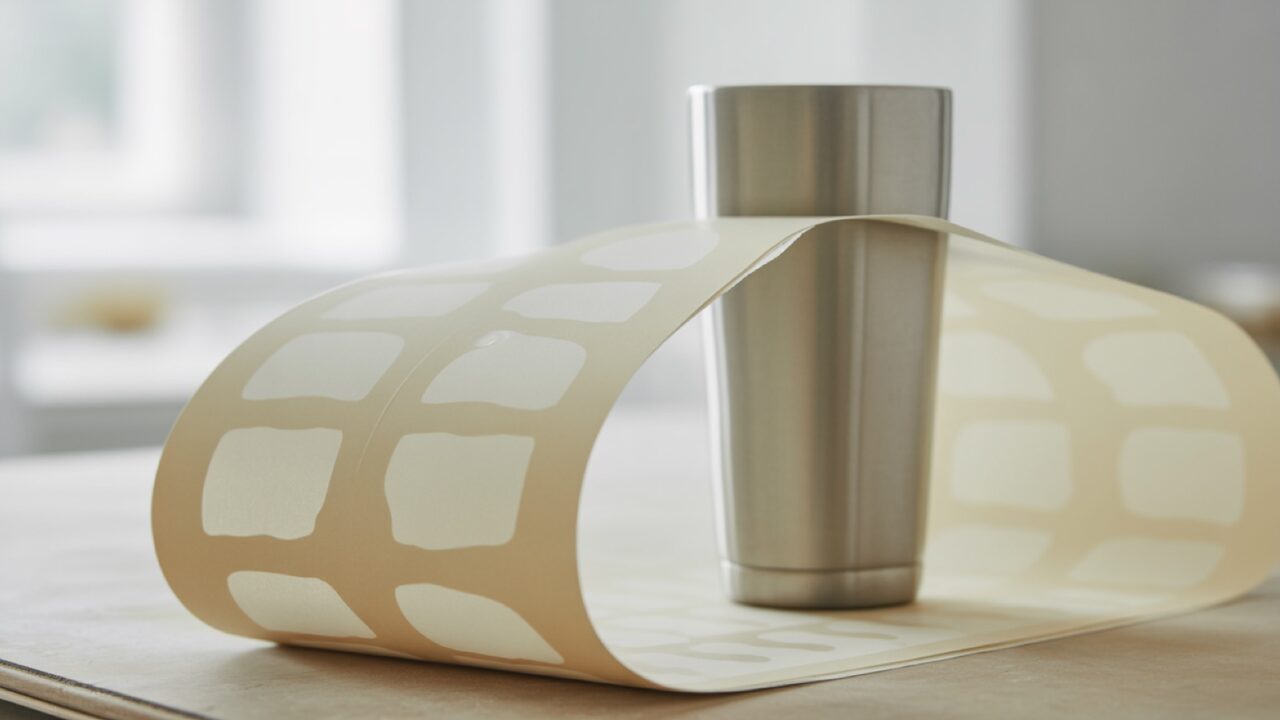
A PNG for tumbler sublimation should be a transparent, RGB file saved at 300 DPI, sized to match your tumbler’s printable wrap area, which is about 9.3 by 8 inches on a typical 20oz skinny tumbler. Use 300 DPI so the design stays crisp after pressing, keep a transparent background, and never enlarge a small PNG past its native pixel size.
Getting the file right before it ever touches your printer is the difference between a clean, vibrant tumbler and a blurry, faded mess. Below you will find the exact settings, working wrap dimensions for the most common tumbler shapes, and answers to the questions crafters ask most when preparing a PNG for tumbler sublimation. The general rules for any sublimation file, not just tumblers, are in the sublimation PNG guide.
Why PNG is the right format for sublimation tumblers
PNG is the preferred format for tumbler sublimation because it supports a transparent background and lossless compression, so the colors and edges of your artwork stay sharp from screen to mug press. Unlike JPG, a PNG file keeps every pixel intact and does not introduce the blocky compression artifacts that show up badly on glossy tumbler coatings.
Sublimation itself relies on heat turning solid dye into gas, which then bonds with a polyester coating. You can read the science behind dye-sublimation printing for the full process, but the practical takeaway is simple: the printer and press can only reproduce what your file already contains. A weak PNG produces a weak transfer, no matter how good your equipment is.
When you prepare a PNG for tumbler sublimation, you are building the master file that controls resolution, color mode, and the printable area. Get those three things right and the rest of the workflow becomes predictable.
📐 Technical Note
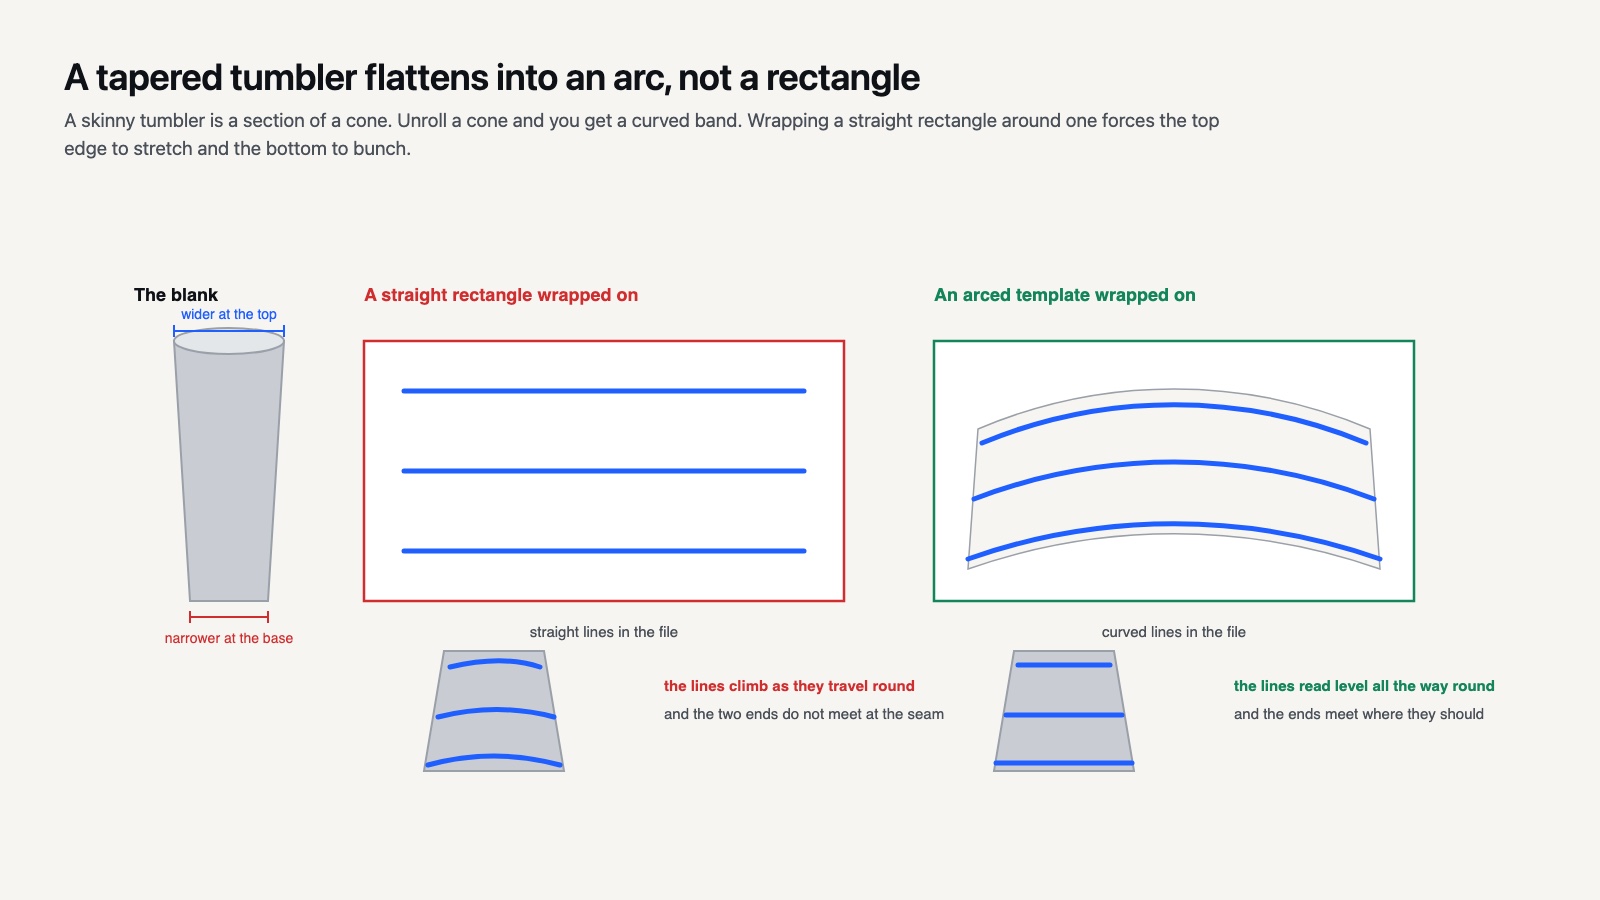
A tapered tumbler is a section of a cone, and flattening a cone gives you an arc, not a rectangle. That is the whole reason tapered templates look curved. Wrap a straight rectangle around a tapered blank and the top edge is forced to stretch while the bottom bunches, so a horizontal line drawn straight in your file climbs as it travels round the cup and misses itself at the seam by a visible margin. No press technique corrects this. It has to be handled in the file.
Best PNG settings for tumbler sublimation
The best PNG settings for tumbler sublimation are 300 DPI resolution, RGB color mode, a transparent background, and a canvas sized at 100 percent of the final print so no scaling is needed at print time. These four settings cover almost every problem crafters run into.
Resolution: always 300 DPI
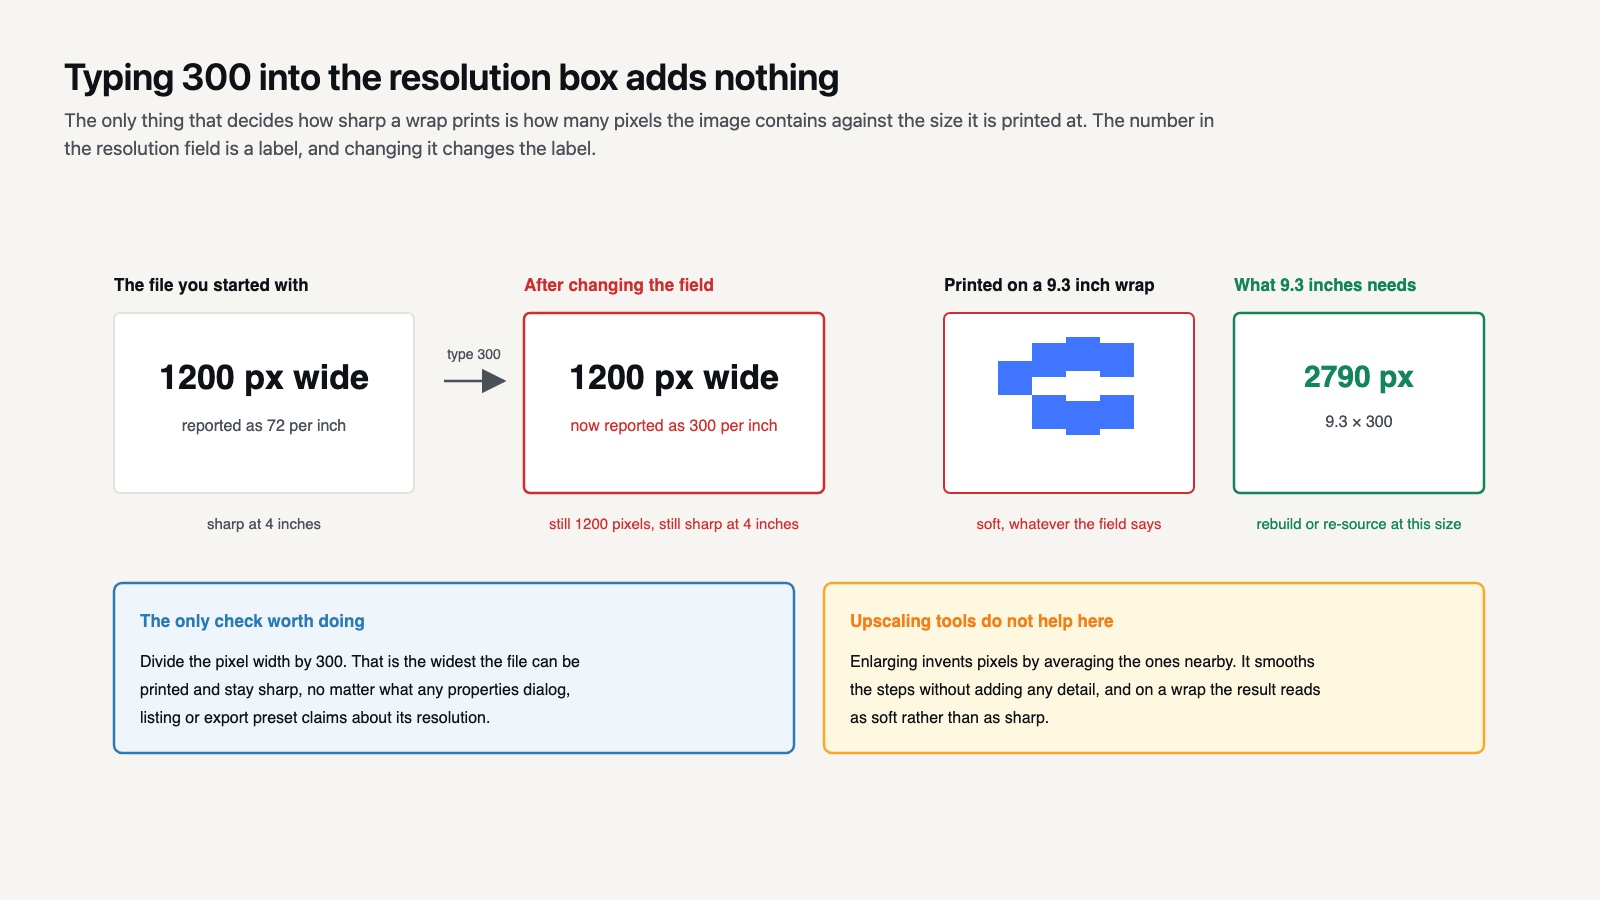
Set your document resolution to 300 DPI before you start designing. At 300 DPI a 9.3 inch wide wrap needs about 2790 pixels across. If your PNG is only 1000 pixels wide and you stretch it to fill the tumbler, the printer spreads those pixels thin and the result looks soft. The same arithmetic applies to any print-ready PNG, not just wraps. Resolution cannot be added back once a file is small, so design at full size from the beginning.
Color mode: RGB, not CMYK
Most sublimation printers use a RIP or driver that expects RGB input and handles the color conversion internally for the sublimation ink set. Sending CMYK can mute your colors. Keep your PNG in RGB and let your printing software manage the rest. Bright reds, oranges, and neons especially depend on staying in RGB, and they are also the colors that shift most between sublimation and other transfer methods.
Background: transparent
Export with a transparent background so only your artwork transfers. A white background in the file can press as a faint box or off-color halo on a colored tumbler. Transparency also lets you position a design freely on the wrap template without fighting a solid rectangle. On a colored or patterned blank a leftover white background is immediately obvious.
About SVG DROP: SVG DROP draws and tests SVG, PNG, and sublimation-ready cut files for Cricut, Silhouette, and Cameo crafters. Our team prepares files at print-ready resolution and tests them on real machines, so the dimensions and settings in this guide reflect what we use day to day when producing tumbler designs for our shop.
What size should a PNG be for a tumbler?
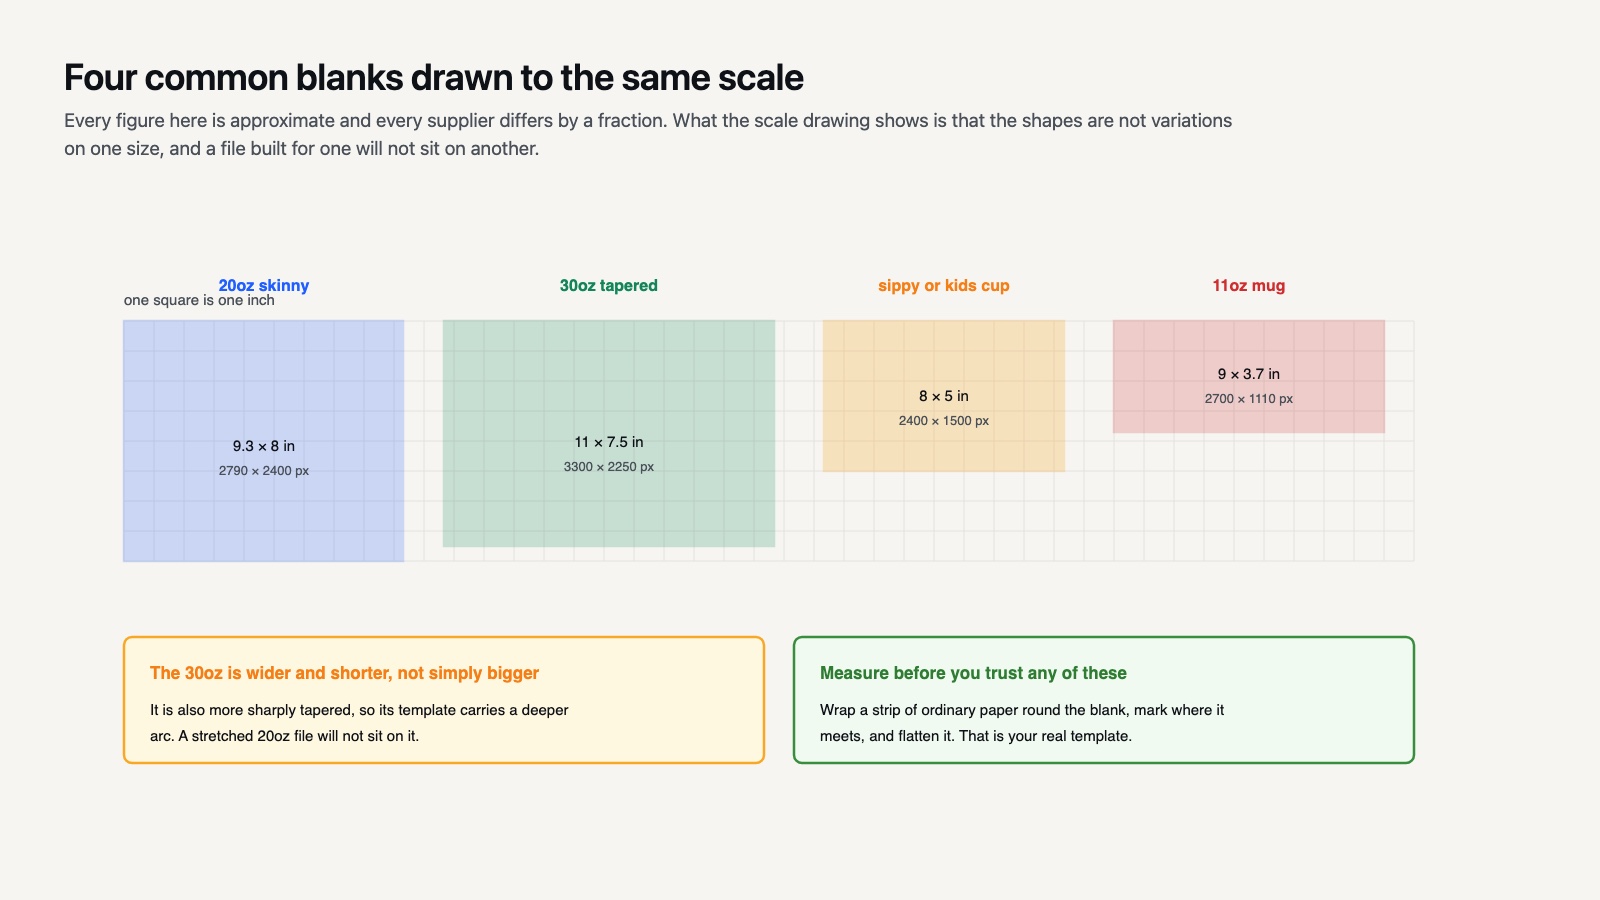
A PNG for a 20oz skinny tumbler runs about 9.3 inches wide by 8 inches tall at 300 DPI, and a 20oz straight tumbler is close enough to the same that one file usually covers both. Every figure here is approximate on purpose. Blanks from different suppliers vary by a fraction of an inch, and on a wrap that fraction is exactly what leaves a visible gap at the seam.
The table below lists working dimensions for the shapes crafters buy most, converted to pixels at 300 DPI. Treat every row as a starting point, then measure the blank in front of you. Most suppliers publish a template for their own tumblers, and the tapered skinny templates sold alongside the blanks are the most reliable source of a given shape’s real measurements. The tumbler wrap size guide works through how to measure one yourself when no template exists.
| Tumbler size & shape | Wrap dimensions (W x H) | DPI | Pixel size (W x H) |
|---|---|---|---|
| 20oz skinny, tapered | about 9.3 in x 8 in | 300 | about 2790 x 2400 px |
| 20oz skinny, straight | about 9.3 in x 8 in | 300 | about 2790 x 2400 px |
| 30oz tapered | about 11 in at the top x 7.5 in | 300 | about 3300 x 2250 px |
| Sippy or kids cup | about 8 in x 5 in | 300 | about 2400 x 1500 px |
| 11oz mug | about 9 in x 3.7 in | 300 | about 2700 x 1110 px |
Add a small bleed of about 0.1 to 0.25 inch on the height of straight tumblers so the design wraps fully top to bottom without a thin uncovered line. Tapered skinny tumblers need a curved or arched template rather than a flat rectangle, because a straight image wraps crooked on a cone shape. The design styles that forgive this best are the loose, repeating ones.
Skinny tapered vs straight: why the shape matters
A straight tumbler has parallel sides, so a flat rectangular PNG wraps evenly. A skinny tumbler is slightly cone shaped, which means a flat design will tilt as it wraps. For skinny blanks, use a tapered or arched template, or rely on a print provider template built for that exact tumbler so your text and patterns line up at the seam.
📌 Did You Know?
The polymer coating on a sublimation tumbler is the whole product as far as the process is concerned. A bare stainless cup will not take sublimation dye at all, and a powder coated one will not either, because neither surface has anything for the gas to bond with. What you are buying when a blank is sold as sublimation ready is that coating, which is also why the same shape costs noticeably more in a sublimation version than in a plain one.
Planning around the seam
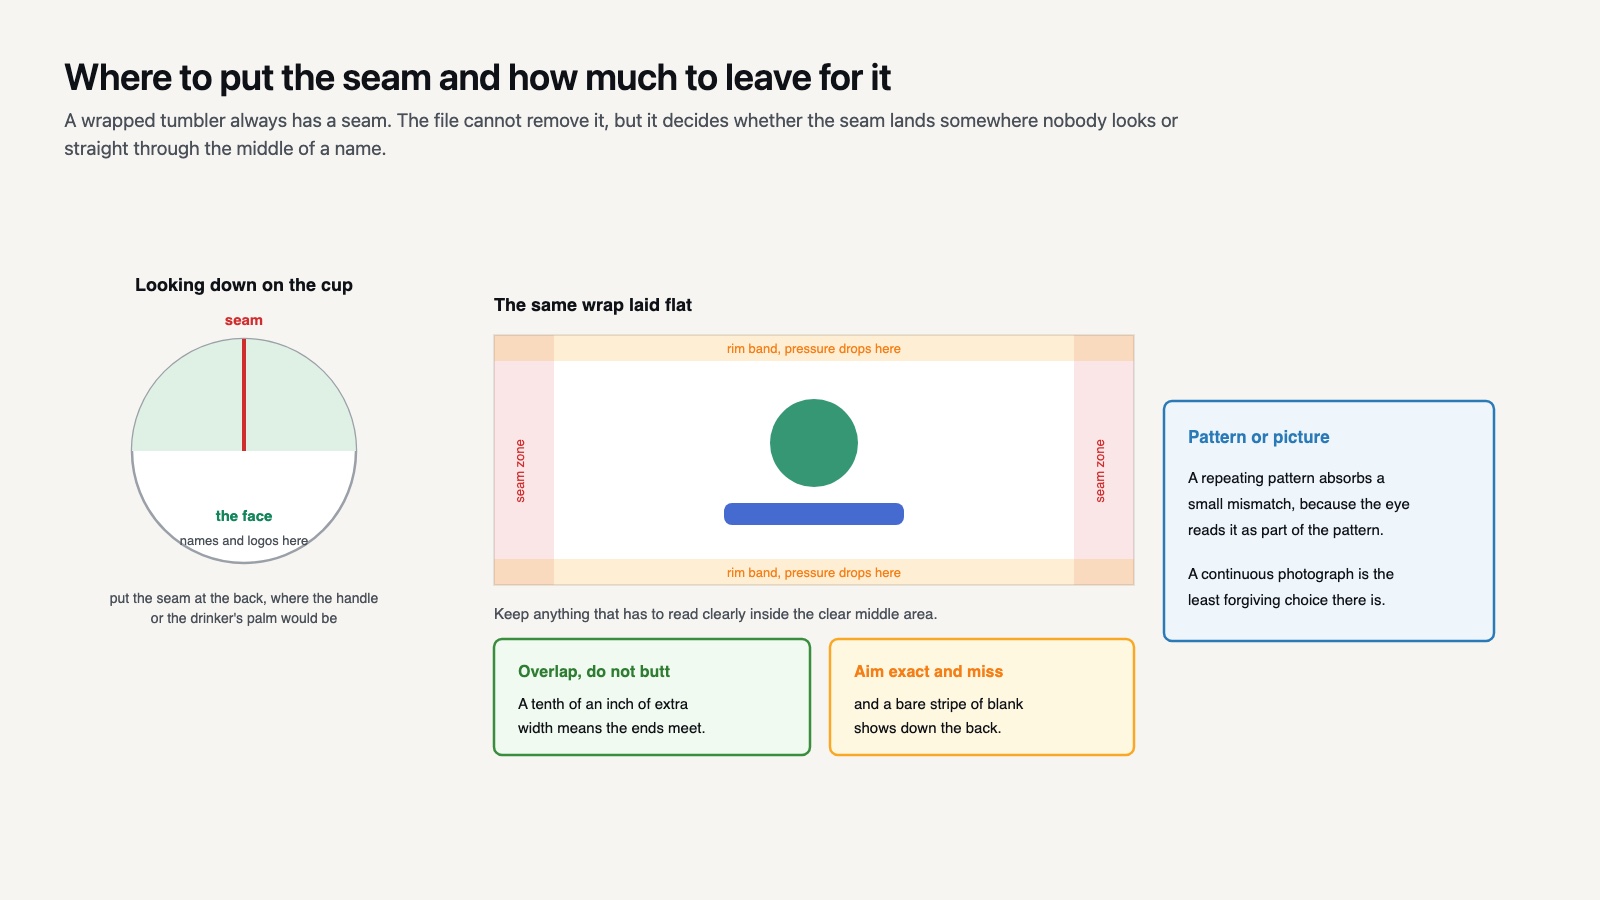
Every wrapped tumbler has a seam, the vertical line where the two edges of your transfer meet. It is the one part of the job the file can make easy or impossible, and it is worth designing around before you place a single element.
The seam will never be invisible. Even a perfectly cut wrap leaves a hairline where the paper edges butt together, and a small overlap leaves a faint ridge you can feel. The goal is not to hide it but to put it somewhere it does not matter.
In practice that means treating the back of the tumbler as the seam zone and keeping anything that must read correctly away from it. Names, dates and logos belong on the front. A repeating pattern is the most forgiving choice because a slight mismatch reads as part of the pattern, while a continuous photographic image is the least forgiving, since the eye finds the break instantly.
Give yourself a small overlap rather than aiming for a perfect butt joint. A tenth of an inch of extra width means the two edges meet with a little to spare, and the overlap lands on the back where nobody looks. Aiming for an exact join and missing it by the same tenth leaves a bare stripe of blank showing through, which is far more obvious than a slight doubling.
One more practical point: the top and bottom edges of a tumbler curve inward, and the last few millimetres at each end are hard to press evenly. Keeping important detail a short distance in from both edges avoids a faded band at the rim, which is the most common complaint about an otherwise good wrap.
How many DPI is best for sublimation tumblers?
300 DPI is the best resolution for sublimation tumblers because it gives enough detail for sharp edges and smooth gradients at typical wrap sizes without creating files that slow your printer. Going above 300, such as 600 DPI, rarely produces a visible improvement on a tumbler and mostly increases file size and processing time.
What matters more than chasing a higher DPI number is making sure the file is genuinely 300 DPI at full print size, not a small image with the DPI tag changed. A true 300 DPI PNG at 9.3 inches wide will be roughly 2790 pixels across, and no amount of resizing adds pixels that were never there. If you check the pixel dimensions and they fall short, the design needs to be rebuilt or replaced at the correct size rather than upscaled.
⚠️ Common Mistake to Avoid
Setting the DPI field on an existing image does nothing to the image. Opening a 1200 pixel wide PNG, typing 300 into the resolution box and saving gives you a file that reports 300 DPI and still contains 1200 pixels, which prints as a sharp four inch design and a soft nine inch one. The only way to gain real detail is to rebuild or re-source the artwork at the pixel count the finished size needs.
Preparing and exporting your PNG step by step
Once you understand the settings, the workflow is short and repeatable. Follow the same order every time so nothing gets missed.
- Create a new document at the wrap size for your tumbler, set to 300 DPI and RGB.
- Build or place your artwork at full size, keeping important text away from the seam edges. Pattern-led designs are the most forgiving here.
- Remove or hide the background layer so the canvas is transparent.
- For skinny tumblers, apply a tapered template so the design wraps straight.
- Export as PNG-24 with transparency enabled.
- Open the exported file and confirm the pixel dimensions match the table above.
If you would rather skip the setup, you can start from ready-made files. Browse our PNG sets that are already built at print-ready resolution, or explore the wider library of SVG DROP cut files for matching designs across projects. Starting from a tested file removes most of the guesswork around size and transparency.
💡 Pro Tip
Print the template outline on ordinary paper first and wrap it round the blank with a strip of tape. It takes a minute, costs nothing, and tells you whether the width is right before you commit sublimation paper and a blank to finding out. Keep the paper mock-up: it becomes your reusable pattern for that supplier’s tumbler, and it is more trustworthy than any published figure including the ones in this table.
🔢 Quick Numbers
Three checks settle a wrap before it is printed. Pixel width divided by 300 gives the real printed inches, whatever the file claims. A 0.1 inch overlap allowance is the difference between the two edges meeting and a bare stripe at the seam. And roughly 0.25 inch of clearance at the top and bottom rims keeps important detail out of the band a press cannot reach evenly.
Common mistakes that ruin a sublimation tumbler
Most failed tumblers trace back to a handful of avoidable file errors. Knowing them ahead of time saves blanks and transfer paper.
The first is upscaling a small PNG. Stretching a 72 DPI web graphic to tumbler size produces blur that no print setting can fix. The second is leaving a white background, which presses as a visible box. The third is ignoring the tumbler shape and forcing a flat design onto a tapered skinny, which throws off alignment at the seam. The fourth is saving as JPG somewhere in the chain, which strips transparency and adds compression noise.
A quick pre-flight check catches all four: open the final PNG, confirm it is 300 DPI at full size, confirm the background is transparent, and confirm the template matches your blank’s shape. Two minutes of checking beats a wasted afternoon of pressing.
Dial in these settings once and you will reach for the same recipe on every project: 300 DPI, RGB, transparent, sized to the wrap. Your tumblers will come out sharp and color-rich, batch after batch. The press itself is the other half of the result, and Sawgrass publishes time and temperature figures by substrate that the settings guide works through blank by blank.
Frequently asked questions
Can I use a JPG instead of a PNG for tumbler sublimation?
You can, but it is not recommended. JPG does not support transparency, so a colored or patterned tumbler will show the background box, and its compression can add visible artifacts. A PNG keeps a transparent background and lossless detail, which is why it is the standard choice for sublimation tumblers.
Why does my tumbler design look faded after pressing?
Fading usually comes from one of three sources: a low-resolution file that was enlarged, a file saved in CMYK that muted the colors, or pressing time and temperature being off. Start by confirming your PNG is a true 300 DPI RGB file at full size, then adjust your press settings if the file checks out.
Do I need a different PNG size for a 30oz tumbler?
Yes, and the difference is larger than most people expect. A 30oz tapered tumbler is noticeably wider around the top and shorter in the printable band than a 20oz skinny, in the region of 11 inches across the top by 7.5 inches tall rather than 9.3 by 8. It is also more sharply tapered, so the arc on the template is deeper. Rebuild the design at the larger size rather than stretching a 20oz file, and check it against a template for the exact blank you own.