






Cricut Not Cutting Through: Troubleshooting Guide
 Published
 Updated
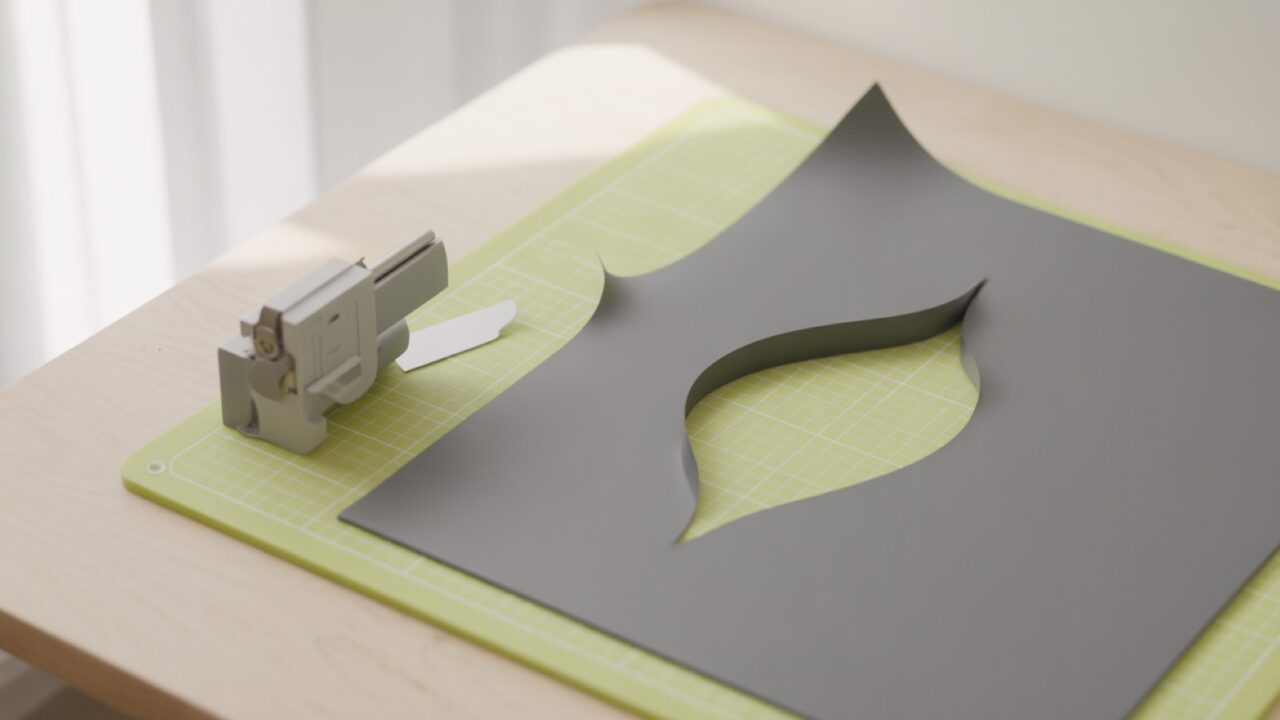
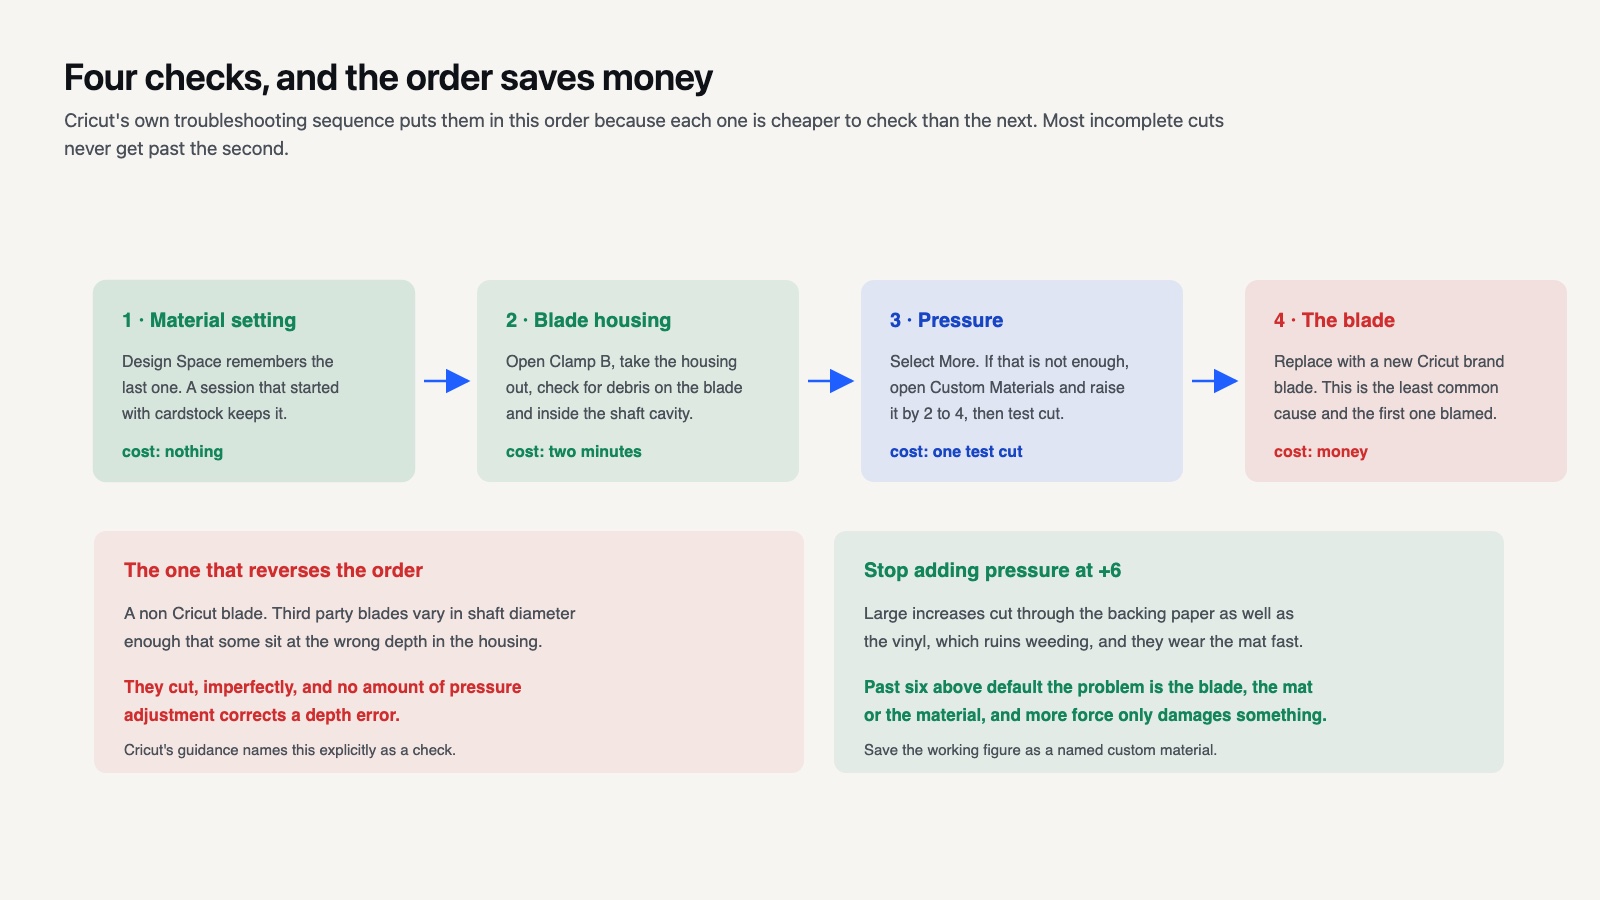
A Cricut not cutting through vinyl needs four checks in order: the material setting, debris in the blade housing, pressure, and then the blade itself. Cricut’s own troubleshooting sequence puts them in that order because each one is cheaper to check than the next.
With a Cricut not cutting through material, the instinct is to blame the blade first and order a replacement. In practice a dull blade is the least common of the four, and a new blade fitted into a housing full of vinyl scraps cuts no better than the old one did. Diagnosing in order costs nothing and usually ends before you spend anything.
This walks through each stage with the specific checks that matter, then covers the material specific cases where the general fixes do not apply. If your machine is cutting but the results are ragged rather than incomplete, that is a different problem and the machine basics guide covers it.
Start With the Material Setting
The most common cause is the least interesting one: the setting does not match the material in the machine.
This happens more than people admit because Design Space remembers the last setting, and a session that starts with cardstock and moves to glitter vinyl will quietly keep the cardstock profile. Cricut’s cutting pressure guidance makes checking the setting the first step for exactly this reason.
Material names also mislead. Premium Vinyl, Removable Vinyl and Glitter Vinyl are three different profiles with different pressures, and a third party film has no profile at all. For anything not made by Cricut, pick the nearest branded equivalent and expect to adjust.
Third party film is where this bites hardest. A roll bought from a sign supplier rather than a craft store has no profile in Design Space at all, and the nearest branded equivalent is a guess. Keeping a note of the working setting per roll, alongside the vinyl application notes for that material, turns a recurring problem into a one time one.
On older machines with the Smart Set dial, the dial overrides the software. A dial left on Paper will cut paper settings no matter what Design Space says on screen, and this catches people returning to a machine after a break.
💡 Pro Tip
Put a small test shape in the corner of every project rather than running a separate test cut. A half inch circle costs nothing in material, cuts in two seconds, and you can peel it before the main design finishes. If it has not released cleanly, stop the job and fix the setting rather than losing the whole sheet.
Why Does Cleaning the Blade Housing Fix So Much?
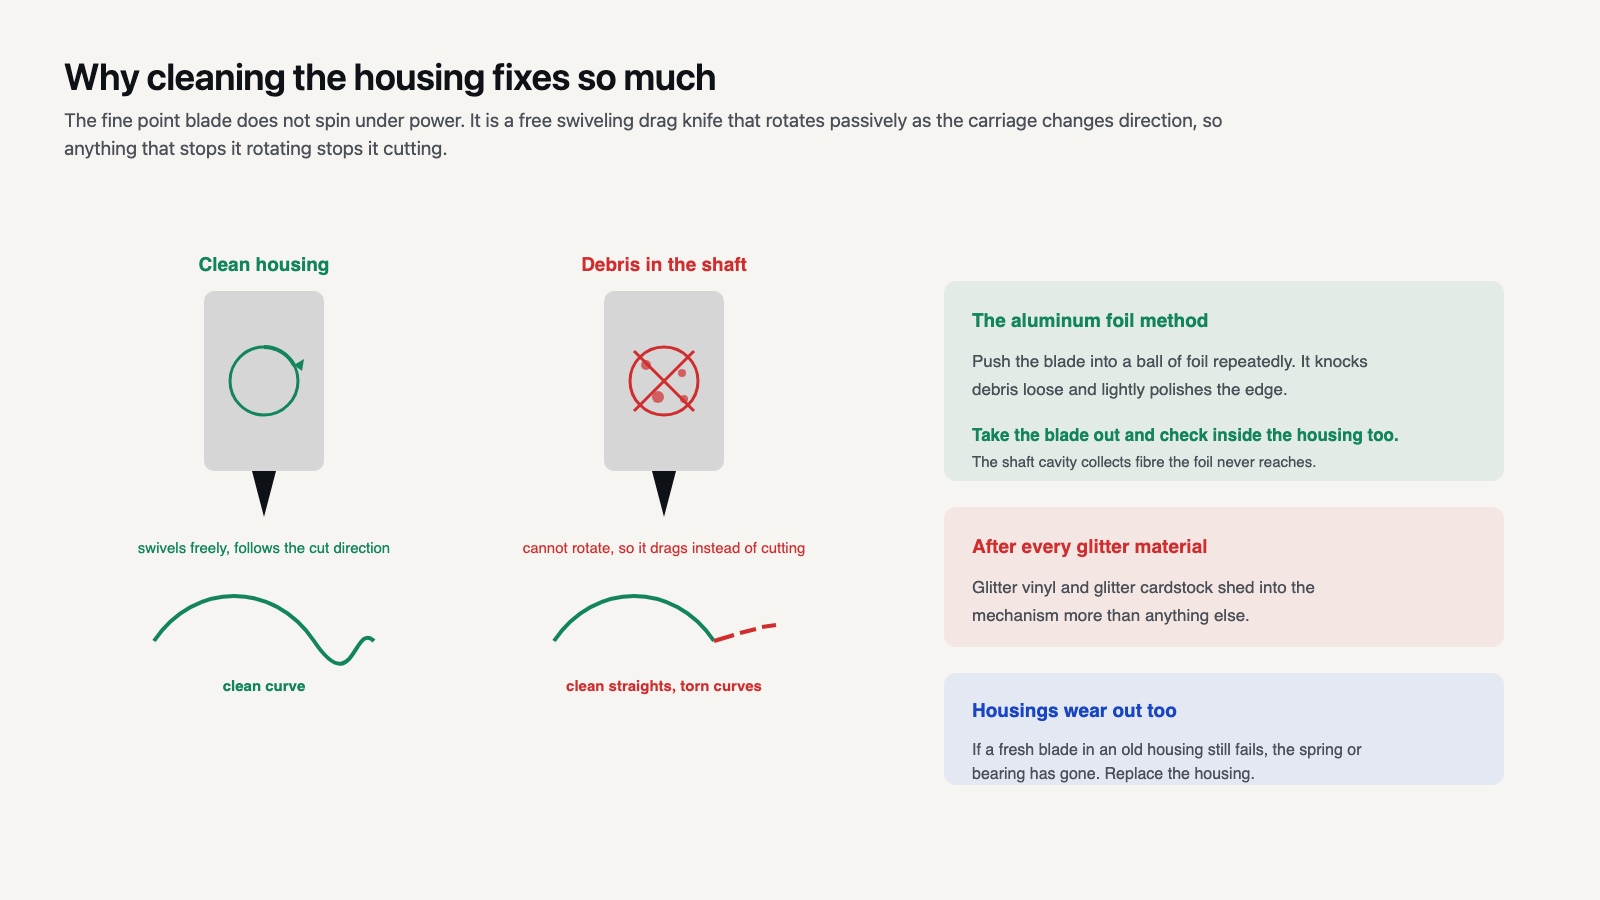
Cricut’s second step is to open Clamp B, remove the housing, and inspect it for debris stuck to the blade or lodged inside the housing. This is the fix that most often works and most often gets skipped.
Vinyl offcuts, glitter particles and paper fiber collect around the blade shaft and stop it rotating freely. A blade that cannot swivel drags instead of cutting, which produces exactly the symptom of an incomplete cut: clean lines on the straights and torn or uncut curves.
The standard cleaning method is a ball of aluminum foil. Push the blade into it repeatedly, which knocks debris loose and gives the edge a light polish at the same time. Take the blade out of the housing and check inside the housing too, because the shaft cavity collects fiber that the foil trick never touches.
Housings themselves wear out, which surprises people who have replaced three blades in the same housing. The spring and the shaft bearing both degrade, and a housing that lets the blade wobble will never cut cleanly however new the blade is. If a fresh blade in an old housing still fails, replace the housing. That is the last part in the chain you can replace yourself, and it matters most on fine work such as small labels and card details.
Do this after any glitter material, every time. Glitter vinyl and glitter cardstock shed into the mechanism more than anything else, and a housing that has cut glitter without cleaning will underperform on the next three jobs.
⚠️ Common Mistake to Avoid
Using a non Cricut blade and then troubleshooting everything else. Cricut’s guidance specifically says to confirm you are using a Cricut brand blade, and third party blades vary in shaft diameter enough that some sit at the wrong depth in the housing. They will cut, imperfectly, and no amount of pressure adjustment corrects a depth error.
How Much Should You Increase the Pressure?
Cricut gives a specific figure rather than telling you to experiment blindly: select More pressure, and if that is not enough, open Custom Materials Settings and increase the pressure for that material by 2 to 4, then test cut.
Two to four is a small step and that is deliberate. Large pressure increases cut through the backing paper as well as the vinyl, which ruins weeding because the design has nothing to stay attached to, and they wear the mat out fast.
Save the adjusted figure as a custom material with its own name rather than editing the built in profile. A custom entry called Third Party Glitter 651 tells you in six months what the number was for, and it leaves the stock profiles intact for when you go back to Cricut branded film.
If you are already 6 or more above the default and still not cutting through, stop adding pressure. At that point the problem is the blade, the mat or the material, and more force will only damage something.
When It Really Is the Blade
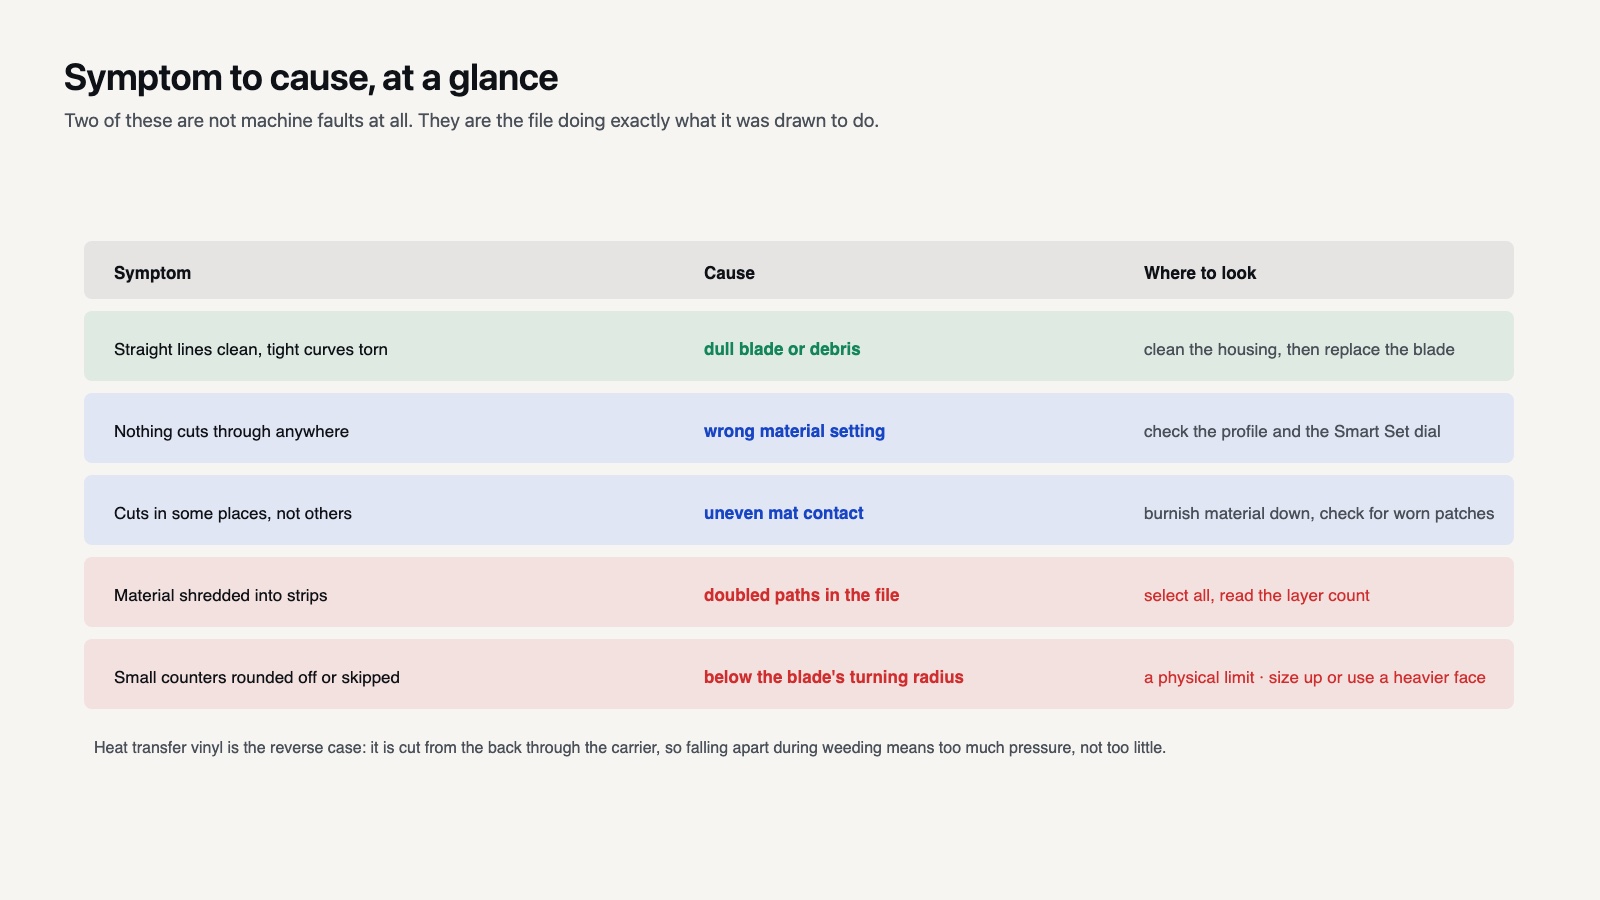
Blades dull gradually and the symptom is specific: straight lines stay clean while tight curves and small letters tear or go uncut. A blade that has failed completely is rare; a blade that has lost its edge on fine detail is normal after a few hundred cuts.
Cricut’s advice is direct, that replacing a worn blade with a new Cricut brand blade often resolves a range of issues. The practical point is that the blade is a consumable, not a component. Most people replace theirs far too late, having spent weeks fighting settings.
Blade type matters as much as sharpness. The fine point blade covers vinyl, iron on and light cardstock. Heavy and coated material wants the deep point blade, which Cricut specifies at a 60 degree angle against the fine point’s 45, with harder steel. Their blades and tools reference lists which material belongs with which.
Keep the old blade rather than throwing it away. A blade too dull for fine script still cuts plain shapes perfectly well, and having a designated rough work blade extends the life of the sharp one considerably. Anyone cutting a lot of detailed lettering files ends up running two housings for this reason.
📌 Did You Know?
The fine point blade does not spin under power. It is a free swiveling drag knife that rotates passively as the carriage changes direction, which is why debris in the housing is so damaging: it stops the rotation that the cut depends on. The rotary blade on the Maker is the exception and is genuinely driven.
Is the Mat Actually the Problem?
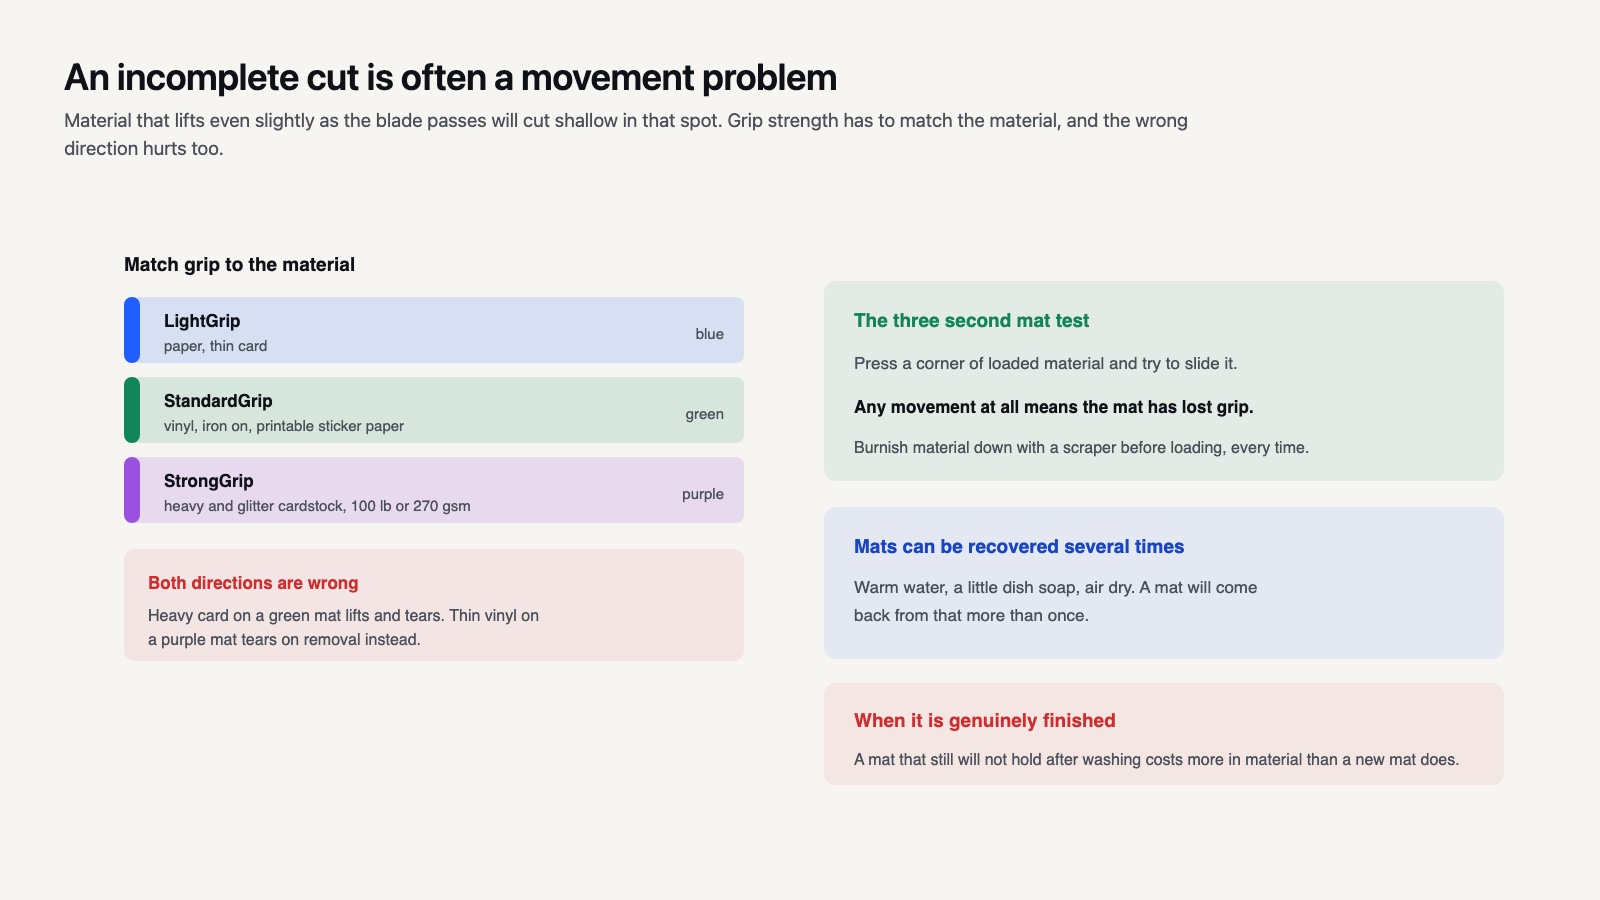
An incomplete cut is often a movement problem rather than a depth problem. Material that lifts even slightly as the blade passes will cut shallow in that spot.
Test the mat by pressing a corner of loaded material and trying to slide it. Any movement at all means the mat has lost grip. A mat can be washed with warm water and a little dish soap, air dried and recovered several times before it is genuinely finished, but a mat that will not hold after cleaning is finished.
Grip strength also has to match the material. Cricut’s mat grip guidance puts heavy and glitter cardstock on the purple StrongGrip mat, citing 100 lb or 270 gsm as the example weight. Cutting heavy card on a green StandardGrip mat produces lifted edges and incomplete cuts even with a perfect blade.
The other direction matters too. A StrongGrip mat under thin vinyl holds so tightly that the design tears on removal, which reads as a bad cut but is actually a bad recovery. Use the lightest grip that holds the material still.
Material Cases the General Fixes Miss
Four materials behave differently enough to need their own answer.
Glitter vinyl and glitter cardstock are thicker than their plain equivalents and shed into the housing. Expect a higher pressure setting, and clean after every session. Some designs need a second pass, which is the correct fix here even though it is the wrong fix elsewhere.
Heat transfer vinyl is cut from the back through the carrier sheet, so cutting all the way through is precisely what you do not want. If your HTV falls apart during weeding, the pressure is too high rather than too low. Reduce it, and check that the film is shiny side down on the mat. The HTV walkthrough covers the orientation and mirroring rules.
Thin removable vinyl is softer than permanent film and cuts at lower pressure. A setting tuned for Oracal 651 will cut through 631’s backing. This is the one case where the answer to an apparently bad cut is less pressure, not more.
Cardstock varies enormously between suppliers at the same stated weight. Cricut’s cardstock instructions point to the More and Less pressure controls rather than to a fixed number, which is an honest admission that the material is inconsistent. Note your working figure on the packet.
When the File Is the Problem
Sometimes the machine is cutting exactly what it was told to, and what it was told is wrong.
A design with doubled paths will have the blade trace the same line twice, which on thin material perforates it into shreds. A design with open paths will have the blade start and stop unpredictably. Both look like machine faults and neither is.
Check by selecting everything in Design Space and reading the layer count. A five color design reporting sixty layers has a problem in the file rather than in the machine. Cleaning that up is an editing job, covered in the grouping and welding notes.
Very small detail is the other file side cause. Below about a quarter inch, letter counters and fine serifs are smaller than the blade can turn inside, so the machine rounds them off or skips them. That is a physical limit rather than a setting, and the only fix is a larger design or a heavier typeface. Files drawn specifically for cutting, such as our cut ready alphabets, are thickened to stay above that threshold.
✅ Key Takeaways
- Check the material setting first. It is wrong more often than anything else is broken.
- Clean the blade housing before adjusting anything. Debris stops the blade swiveling.
- Increase pressure in steps of 2 to 4 and save the result as a named custom material.
- Match mat grip to material weight, and replace a mat that will not hold after washing.
- If straight lines cut and curves tear, the blade is dull. If nothing cuts, it is setting or mat.
Putting It All Together
Almost every case of a Cricut not cutting through is one of four things, and the order matters because the cheap checks catch most cases. Setting, housing, pressure, blade, with the mat sitting alongside all of them. Working that sequence takes five minutes and will resolve the problem far more often than buying parts will. For the material specific numbers behind each step, the Cricut section collects the settings guides in one place.
Frequently Asked Questions
How often should I replace a Cricut blade?
There is no fixed interval, because it depends entirely on what you cut. Glitter, cardstock and coated materials dull a blade far faster than plain vinyl. Judge by symptom rather than by date: when tight curves start tearing while straight lines stay clean, the edge has gone.
Can I sharpen a Cricut blade?
Not properly. The aluminum foil trick cleans the blade and marginally improves a slightly dulled edge, and it is worth doing, but it does not restore a worn blade to new. Treat it as maintenance rather than as repair.
Why does my Cricut cut through in some places and not others?
Uneven contact between material and mat. Either the mat has lost grip in patches, the material is not pressed down fully, or the material itself varies in thickness. Burnish the material onto the mat with a scraper before loading, and check the mat for worn areas.
Should I use multiple cuts instead of more pressure?
Only for thick specialty materials such as glitter cardstock. On ordinary vinyl a second pass often cuts a slightly different line from the first, giving a doubled ragged edge. Increase pressure in small steps first, and reserve multiple cuts for material the machine genuinely cannot get through in one pass.