




How to Install Fonts for Cricut on Any Device
 Published
Updated
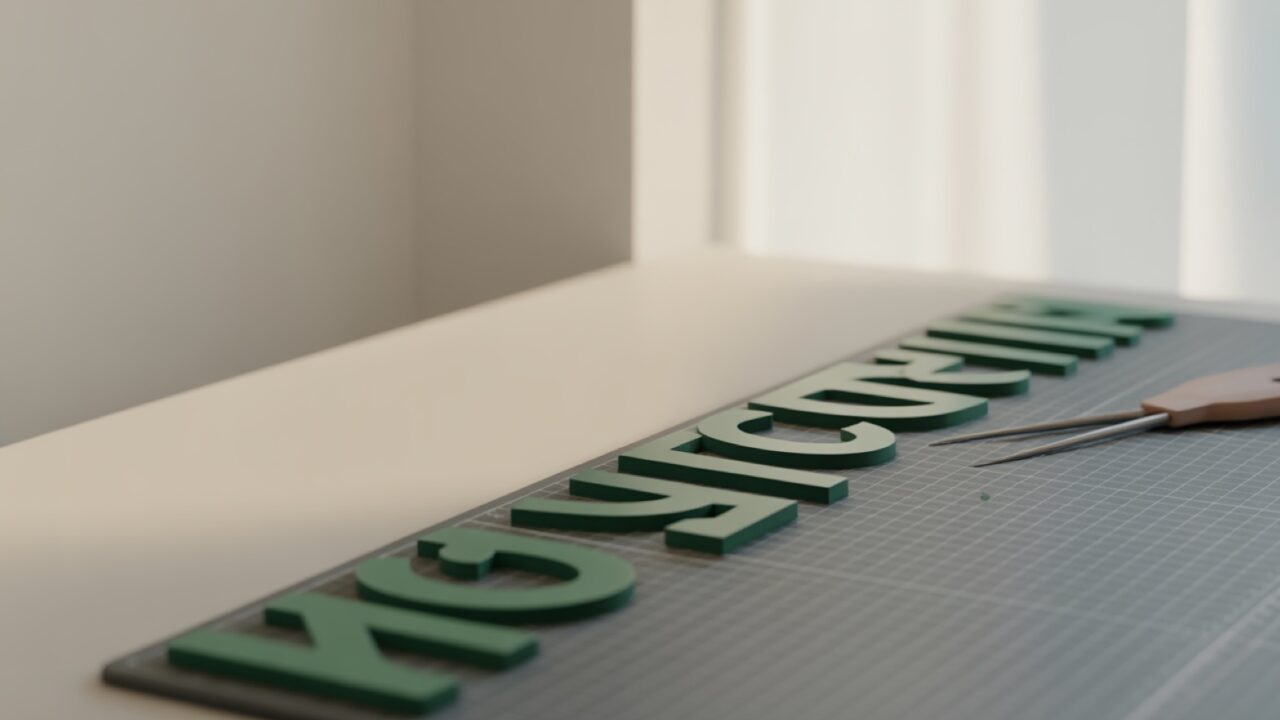
To install fonts for Cricut, download a font file, add it to your operating system or the Cricut Design Space app, then restart Design Space so the new font appears in the text panel. The process works on Windows, Mac, iOS, and Android, and once a font is installed on your device, Cricut reads it automatically.
Custom fonts turn a plain cut file into something personal, and that holds for a wedding sign, a layered T-shirt design, or labels for the pantry. The good news is that Cricut does not store fonts of its own beyond the built-in library. It simply borrows every font already installed on your device. That means learning how to install fonts for Cricut is really about learning how your computer or phone handles fonts, and then giving Design Space a quick refresh.
This guide walks through font installation on each major platform, explains the difference between system fonts and Cricut Access fonts, and answers the questions crafters ask most often. By the end you will be able to add any TTF or OTF font and use it in your next project. What Design Space then does with that font, including writing and cutting behaviour, is covered in the Design Space fonts guide.
Why custom fonts matter for Cricut projects
The fonts built into Design Space are a solid starting point, but they are the same ones every other Cricut owner can reach. When you want a project to feel original, a custom font is the fastest way to set your work apart. A hand-lettered script can give a wedding invitation warmth that a default sans-serif never will, and a bold display face can make a vinyl decal read clearly from across a room.
Custom fonts also help you match a brand or a theme. If you sell finished products at a craft fair or online, consistent typography across your signs, tags, and packaging makes the whole line look professional. Because Cricut pulls from your device library, every font you install becomes a permanent part of your toolkit, ready for any future cut. That is why learning how to install fonts for Cricut once pays off across dozens of projects.
📐 Technical Note
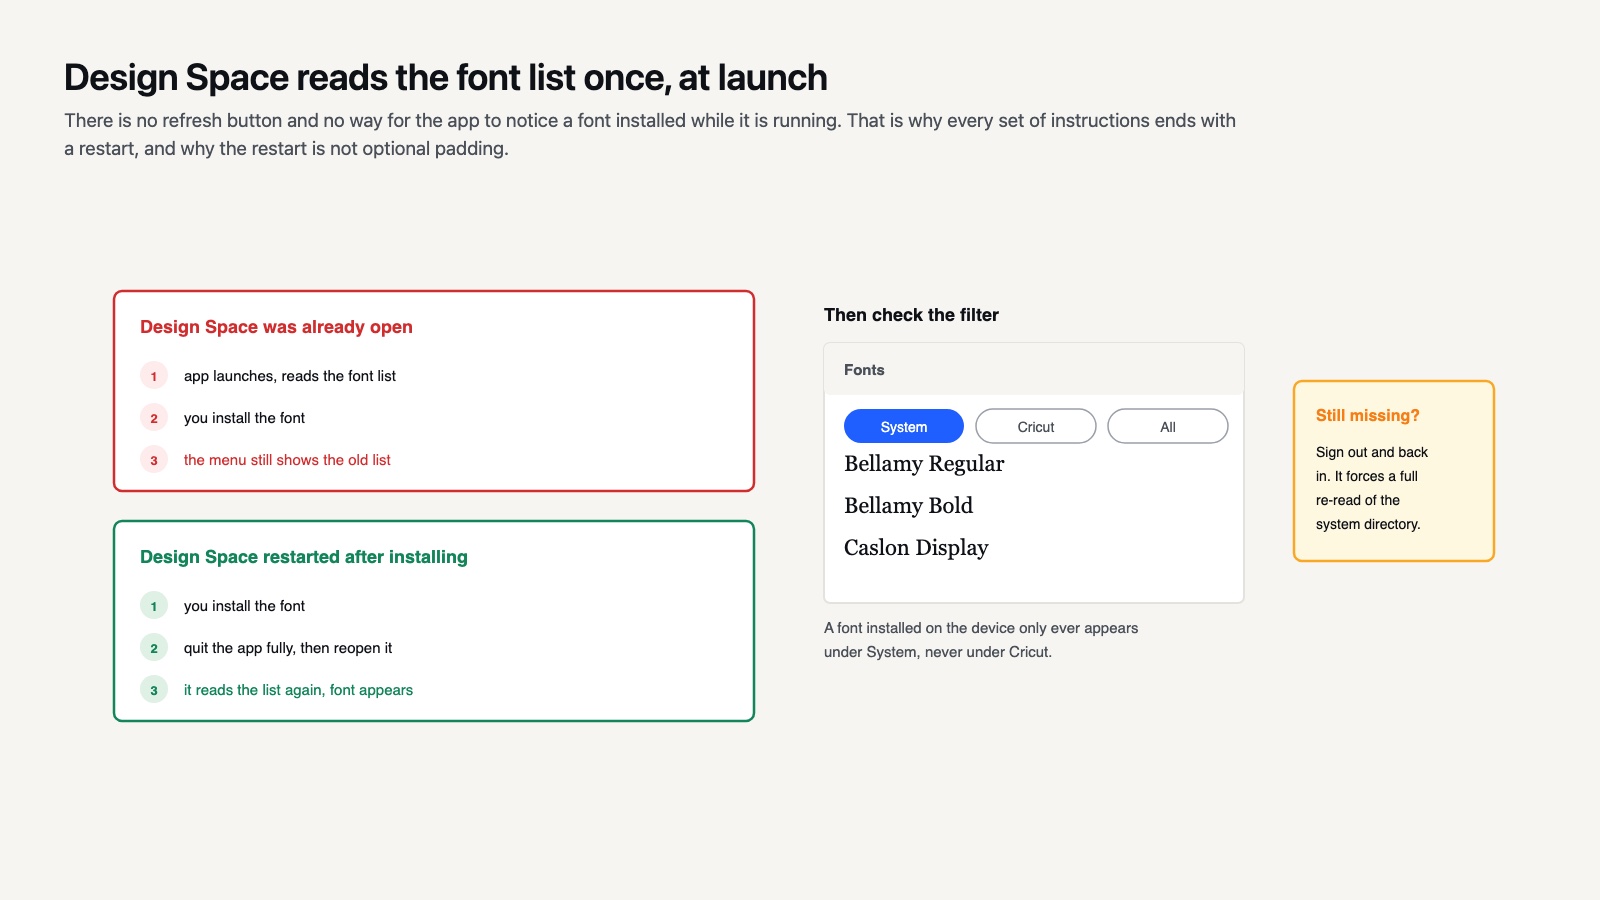
Design Space reads the font list once, when it starts. It has no way to notice a font installed while it is running, which is why every set of instructions ends with a restart and why the restart is not optional padding. On a Mac, closing the window is not closing the app either: use Command-Q, or the process stays alive with the old list and the font still will not appear when you reopen the window.
What you need before you install a font for Cricut
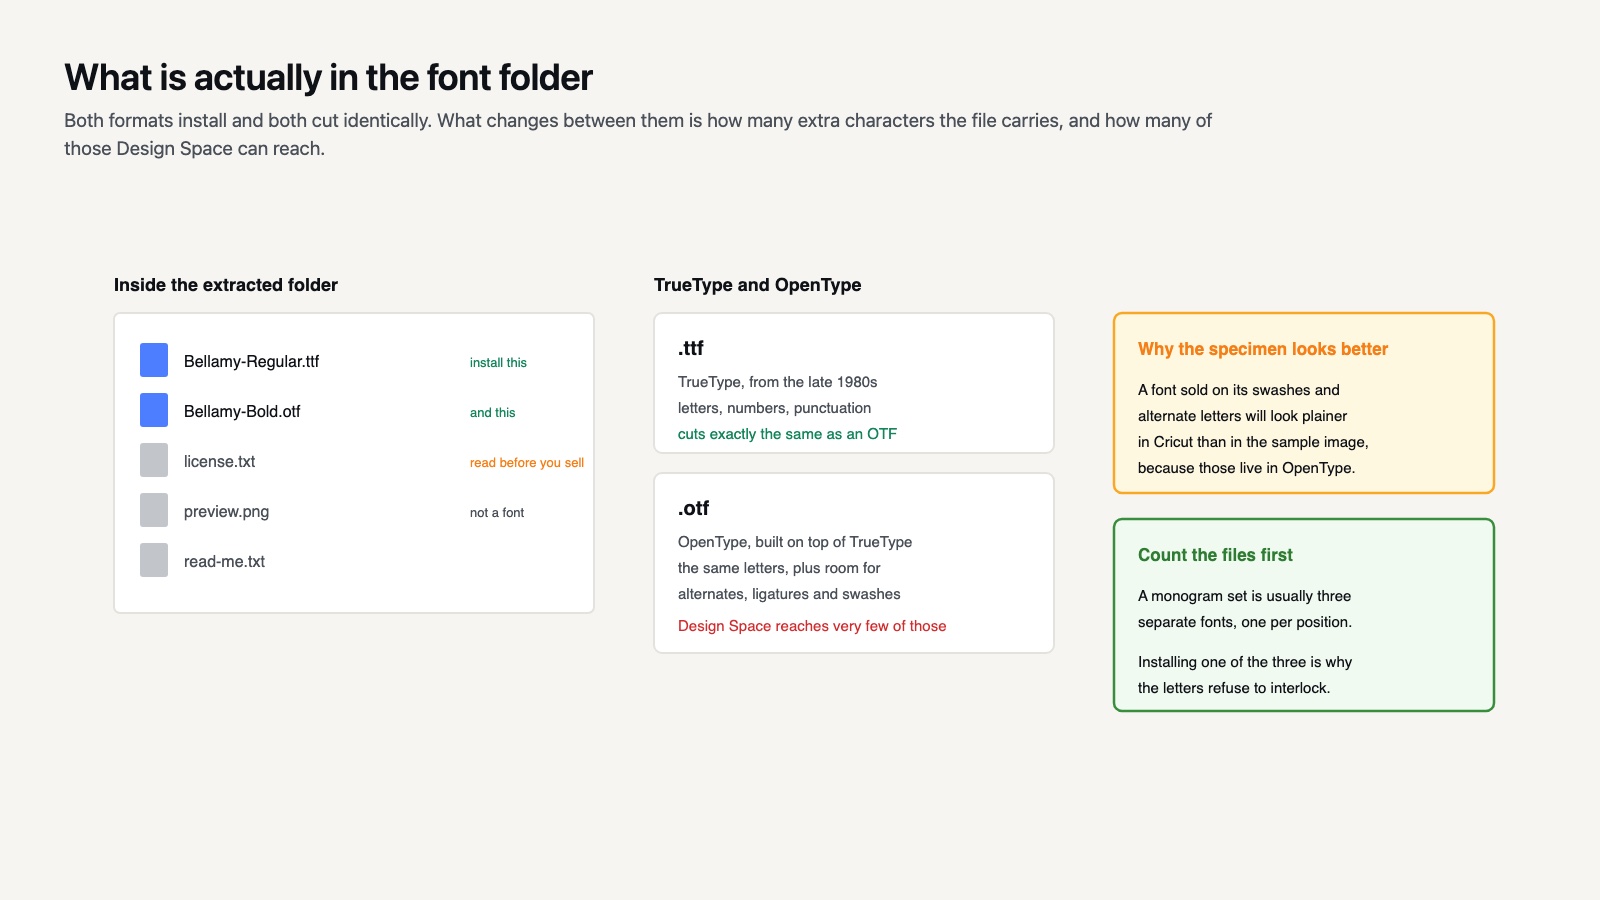
Before you start, gather two things: the font file itself and a clear idea of where it lives. Most craft fonts arrive as a ZIP archive that contains a TrueType file (.ttf) or an OpenType file (.otf). A monogram set often contains three separate files rather than one, so check what is in the folder before you install. Both formats work with Cricut. Always unzip the archive first, because the operating system cannot install a font while it is still compressed.
If you are shopping for design assets, many of our craft fonts and cut files are built to coordinate so your lettering matches the artwork. Keep the downloaded files in a folder you can find again, such as Downloads or a dedicated Fonts folder, in case you need to reinstall later.
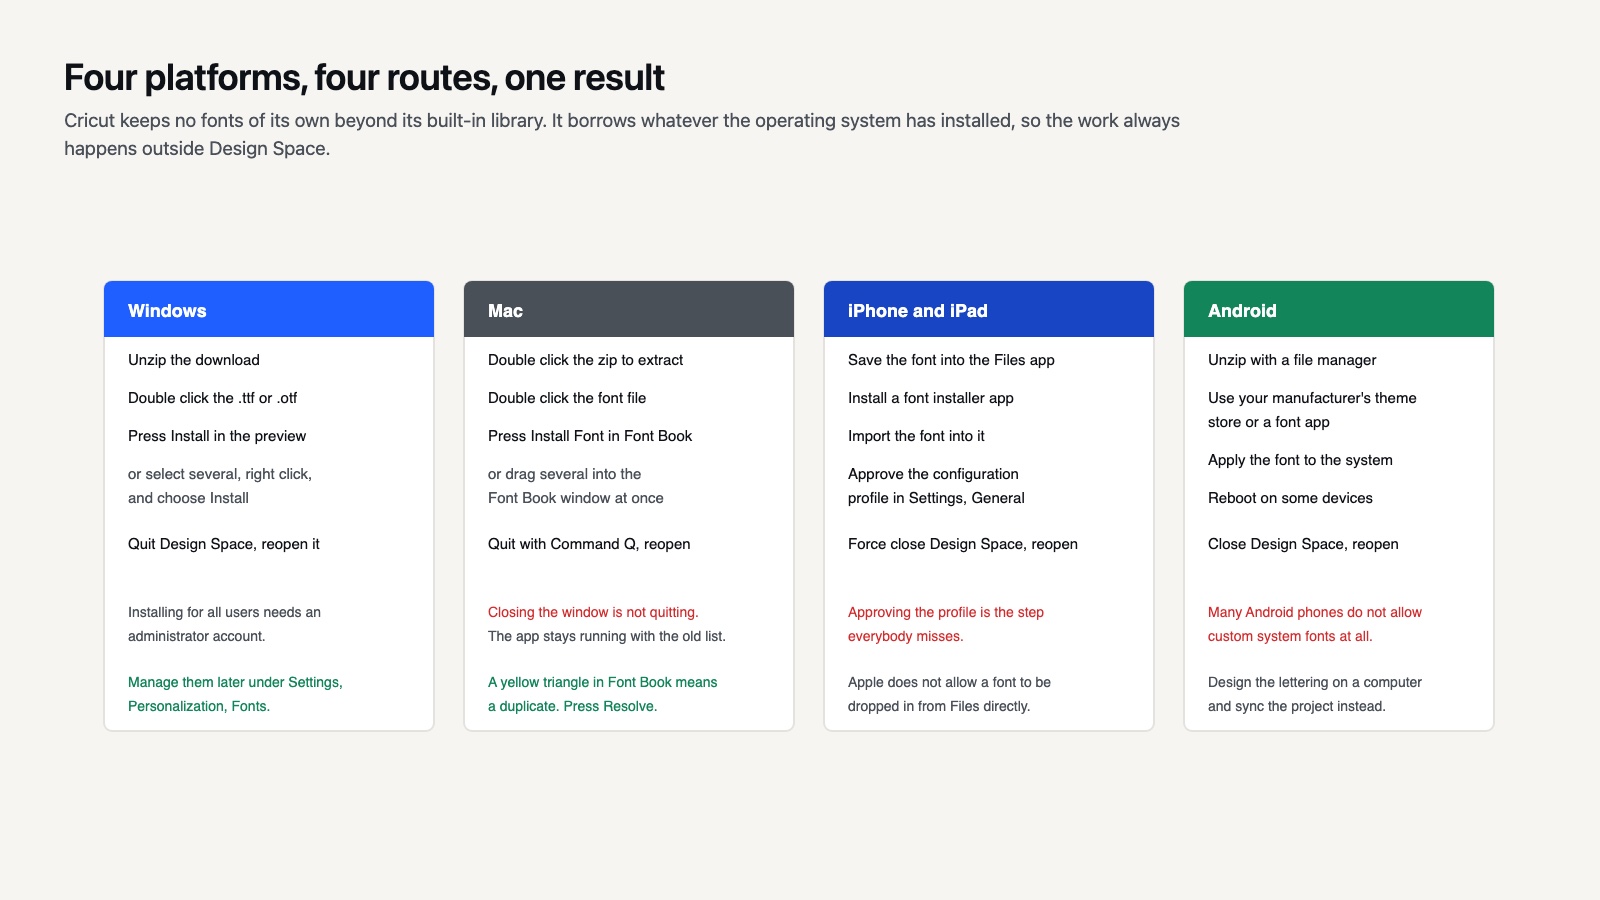
How to install fonts for Cricut on Windows
Windows makes font installation quick once the file is unzipped. Here is the reliable method.
- Download the font and unzip the folder if it arrived as a ZIP file.
- Open the folder and double-click the .ttf or .otf file to preview it.
- Click the Install button at the top of the preview window. Installing for all users needs an administrator account, which matters on a work or shared machine.
- To install several fonts at once, select them all, right-click, and choose Install.
- Close Cricut Design Space completely, then reopen it.
- Open a project, add a text box, and find your font in the System list.
If the font does not appear, sign out of Design Space and sign back in. A full restart forces the app to re-read the Windows font directory.
How to install fonts for Cricut on Mac
Mac uses the built-in Font Book app to manage fonts, and it is just as fast as Windows.
- Download the font and double-click the ZIP file to extract it.
- Double-click the .ttf or .otf file to open it in Font Book.
- Click Install Font in the preview window.
- For multiple fonts, drag the files into the Font Book window or use the plus button.
- Quit Cricut Design Space using Command-Q, then relaunch it.
- Add a text layer and select your font from the System fonts.
If a font shows a yellow warning triangle in Font Book, click Resolve to clean up any duplicate or damaged copies before using it in Cricut. The same check is worth running before you build a layered lettering design, since a damaged font can cut one weight correctly and another as empty boxes.
⚠️ Common Mistake to Avoid
Installing the same font twice under slightly different names is what produces a Design Space list with three near-identical entries, only one of which renders properly. It usually happens when a font is bought once and downloaded again later, or when a family is installed both as separate weights and as a single collection file. Clear the duplicates from Font Book or the Windows font settings rather than guessing which entry in the menu is the good one.
How to install fonts for Cricut on iPhone and iPad (iOS)
On iOS you need a font installer app from the App Store, because Apple does not let you drop a font into the system directly from Files. Apps such as iFont or AnyFont handle this with a configuration profile.
- Download your font file and save it to the Files app.
- Install a font installer app like iFont or AnyFont from the App Store.
- Open the installer app and import the .ttf or .otf file from Files.
- Tap Install, then open the Settings app to approve the configuration profile under General, then Profiles.
- Force-close the Cricut Design Space app and reopen it.
- Add text to your project and choose the new font from the System list.
Approving the profile is the step crafters miss most often, so check Settings if a font installs but never shows up in Cricut.
How to install fonts for Cricut on Android
Android handling varies by manufacturer, and many phones limit system font changes. The most dependable route for Cricut is to use the same kind of installer app approach.
- Download the font file to your device and unzip it with a file manager if needed.
- Install a font tool that supports your phone, such as the manufacturer theme store or a dedicated font app.
- Import the .ttf or .otf file into the app and apply it to the system.
- Some Samsung and other devices require a reboot for system fonts to register.
- Close Cricut Design Space from recent apps and open it again.
- Add a text box and look for the font in the System fonts.
If your phone does not allow custom system fonts, design that lettering on a computer instead and sync the project through your Cricut account. The same limitation is why Canva handles font uploads through its own Brand Kit rather than through the device.
📌 Did You Know?
TrueType and OpenType are not really rivals. OpenType was built on top of TrueType in the late 1990s and can carry either kind of curve description inside the same wrapper, which is why a .otf and a .ttf of the same typeface usually cut identically. What OpenType adds is room for alternate characters, ligatures and swashes. Design Space reaches very few of those, so a font whose selling point is its alternates will look plainer in Cricut than in the specimen image.
How to organize and manage your installed fonts
As your collection grows, a little organization saves time. Keep a master Fonts folder on your computer with the original unzipped files, sorted into subfolders by style such as Script, Serif, and Display. That way, if you switch computers or need to reinstall after a system update, you can add everything back in minutes.
On Windows you can review installed fonts under Settings, then Personalization, then Fonts, where you can also remove ones you no longer use. On Mac, Font Book lets you create collections and disable fonts you rarely touch, which keeps the Cricut font list from becoming cluttered. Trimming unused fonts not only tidies the menu, it can also help Design Space load text panels a little faster on older machines.
A quick note on licensing: keep a simple text file alongside each font recording where you bought it and whether it allows commercial use. This habit protects you if you ever sell finished pieces, and it makes it easy to find the same font again when you want a coordinating weight or style. Font licences are genuinely separate from cut file licences, which the guide to commercial use terms sets out.
How do I use installed fonts in Cricut Design Space?
Once the font is installed, using it is simple. Open Design Space, start or open a project, and click the Text tool, which Cricut documents in its text reference. Type your words, then open the font menu and switch the filter to System fonts to see everything installed on your device. Cricut Access fonts and your custom fonts can be combined freely in the same project. Select your text, pick the installed font, and adjust the size and spacing to taste before you cut.
Why are my installed fonts not showing up in Cricut?
If a font is missing after installation, the cause is almost always one of three things. First, Design Space was open during installation, so it never re-read the font folder; close it completely and reopen. Second, the font filter is set to Cricut rather than System, hiding your custom fonts. Third, the file was never properly installed because it stayed inside the ZIP archive. Reinstall from the unzipped file and restart. Cricut also documents which alphabets its font engine can render on its font language support page, which explains fonts that install correctly and then show boxes instead of accented characters.
What is the difference between system fonts and Cricut fonts?
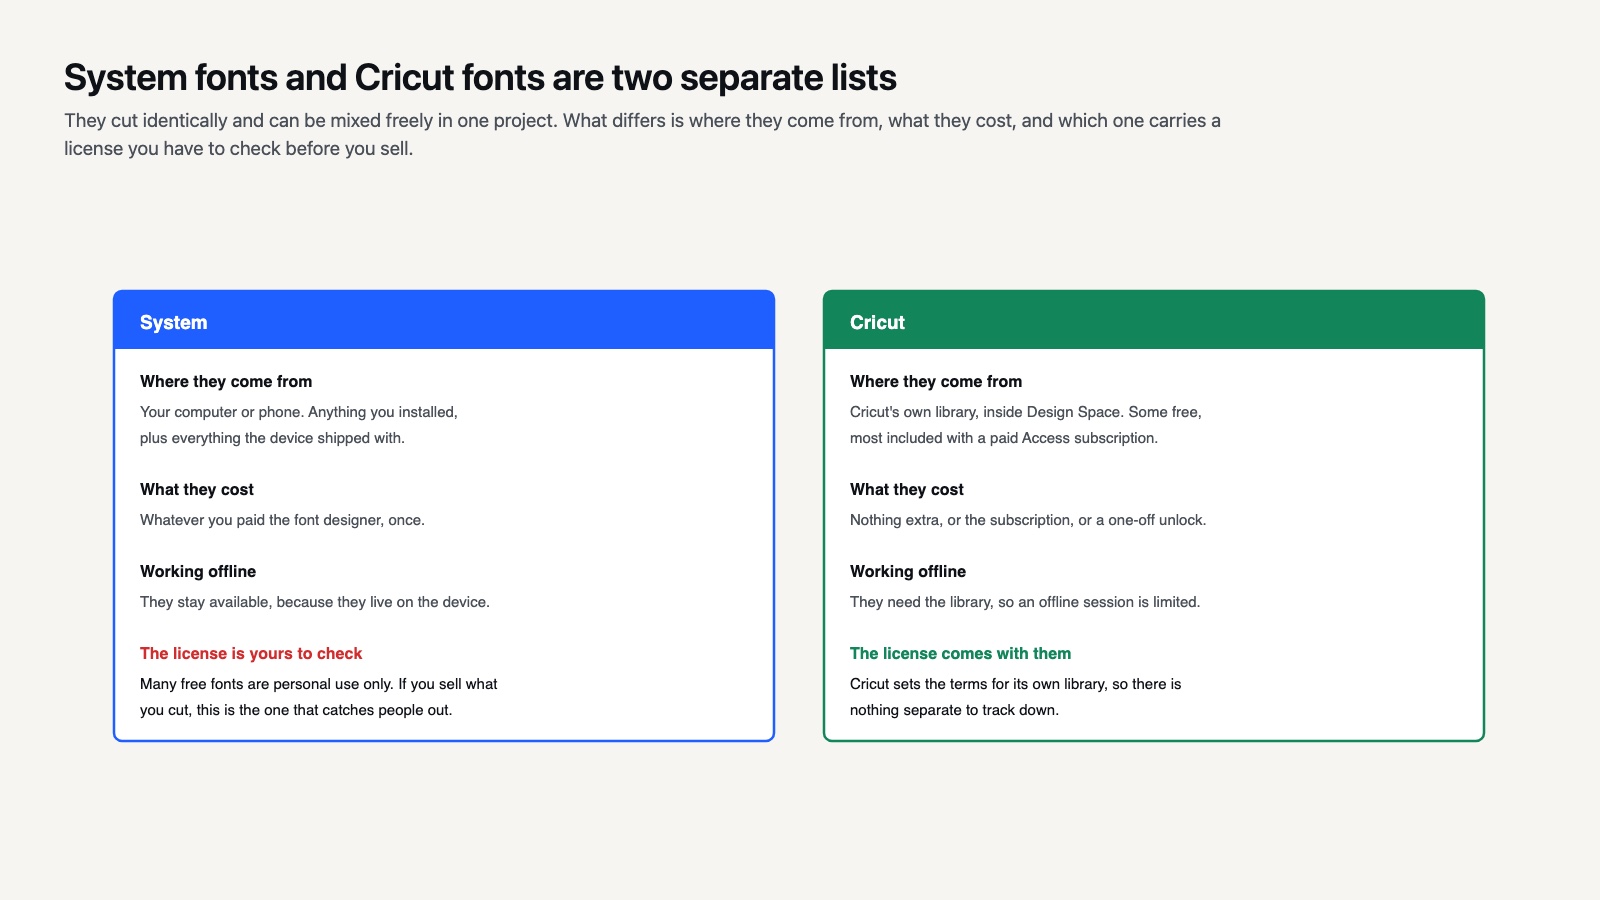
System fonts are the standard digital typefaces installed on your computer or phone, the same kind described in this overview of a computer font. Cricut fonts, by contrast, are the typefaces inside Design Space, some free and many included with a paid Cricut Access subscription. Custom fonts you install yourself always appear under the System filter. Both types cut the same way, so you can mix a purchased craft font with a Cricut Access font in one design without any extra steps.
💡 Pro Tip
Type your actual text before you commit to a font rather than judging it from the specimen image. Craft script fonts are frequently drawn beautifully for the handful of words in the specimen and thinly everywhere else, and a name with a capital K, a double L or a descender that clashes with the next letter will show you that in seconds. Testing the real word costs nothing and saves buying a font you cannot use for the job you bought it for.
Tips for cutting installed fonts cleanly
Installing the font is only half the job; cutting it well is the other half. Decorative script fonts often have thin connecting strokes that a machine can struggle with at small sizes. As a rule, keep script text at least three quarters of an inch tall so the blade can track the curves without tearing the material. For very fine fonts, weld the letters together in Design Space so the script flows as one connected piece, which also makes weeding much easier.
If a font has separate layered elements, group the text before resizing so every part scales together. When you cut on adhesive vinyl, run a test cut on a scrap first to dial in pressure, because thin font strokes need a sharper, lighter touch than bold block letters. Choosing the right material setting for your font weight is the single biggest factor in getting a clean result, and for apparel the press settings matter just as much as the cut.
About SVG DROP: SVG DROP draws and tests SVG and PNG cut files plus craft fonts for Cricut, Silhouette, and Cameo machines. Our team tests every file on real cutting machines so makers get clean cuts and reliable layering on the first try. Browse the full library and project ideas at SVG DROP.
Frequently asked questions
Do I need to install fonts every time I use Cricut?
No. Once a font is installed on your device, it stays available until you delete it. You only restart Design Space the first time so it can detect the new font, then it loads automatically in future sessions.
Can I use free fonts for Cricut projects?
Yes, free fonts work the same way as paid ones. Check the license, though, because many free fonts are for personal use only. If you plan to sell what you make, choose a font with a commercial-use license, and see our FAQ for guidance on licensing craft files.
What font file types does Cricut accept?
Cricut reads any font your device can install, which means TrueType (.ttf) and OpenType (.otf) files both work. Always unzip the download first, since Cricut cannot see a font that is still inside a compressed folder.