




How to Make a Custom T-Shirt With SVG
 Published
Updated
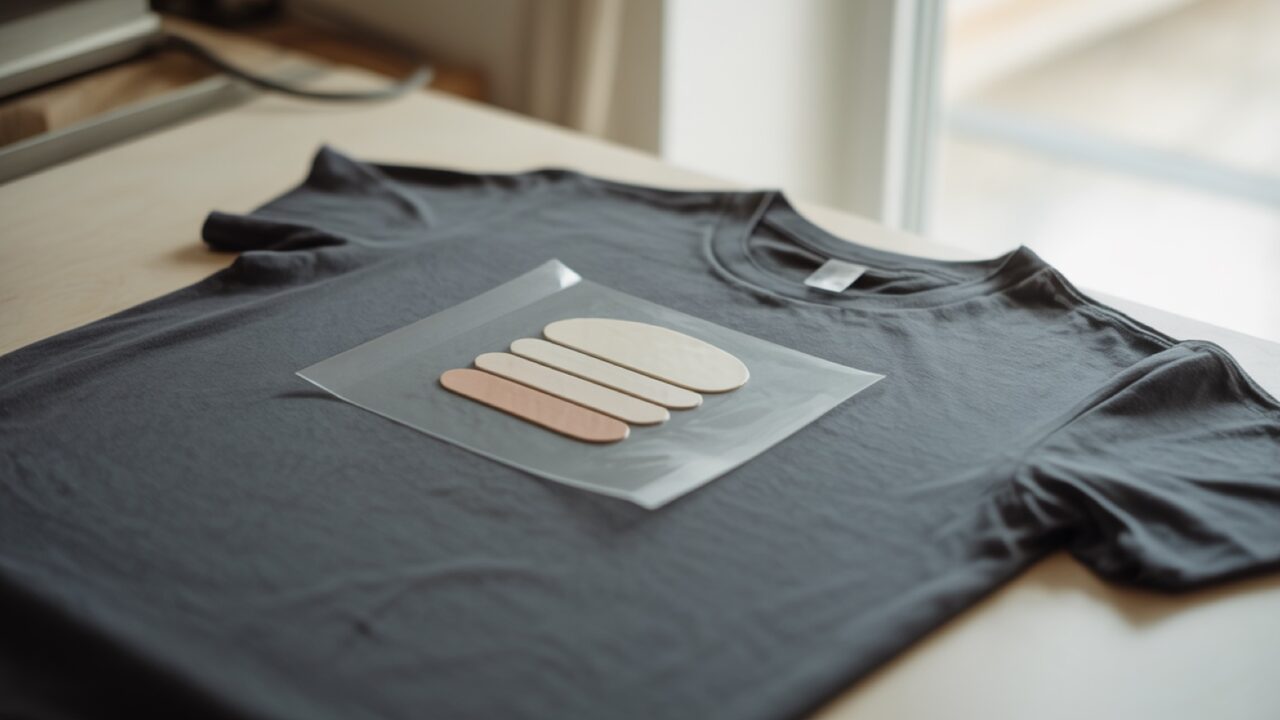
To make a custom t-shirt with SVG, open your cut file in Cricut Design Space or Silhouette Studio, size it to fit the shirt, mirror the design, cut it from heat transfer vinyl, weed away the excess, then heat press it onto the fabric at the temperature your HTV brand recommends. The whole process takes about 30 minutes.
Custom apparel is one of the most rewarding things you can make with a cutting machine. A blank shirt costs a few dollars, an SVG file is reusable, and a single sheet of heat transfer vinyl can decorate several garments. Once you learn how to make a custom t-shirt with SVG, you can produce gifts, small-batch merch, matching family sets, or team apparel from your kitchen table. This guide walks through every stage, from picking the right file to peeling the carrier sheet after pressing, plus the small details that make the difference between a homemade look and a finished product people want to wear. Which film you buy is its own decision, covered in the HTV comparison.
What you need before you start
Gather your supplies first so the project flows without interruptions. You do not need a professional studio, just a few reliable basics:
- A cutting machine such as a Cricut or a Silhouette Cameo
- An SVG cut file sized for apparel (browse SVG DROP cut files for ready-to-use designs)
- Heat transfer vinyl (HTV), also called iron-on vinyl
- A weeding tool or fine hook
- A heat press or a household iron
- A pre-washed cotton or cotton-blend t-shirt
- A Teflon sheet or thin cotton cover cloth
- A standard cutting mat in good condition
Pre-washing the shirt removes sizing chemicals and prevents shrinkage after the design is applied. Skip fabric softener, because it can stop the vinyl from bonding properly. A worn-out mat that no longer grips the vinyl is a common cause of shifted cuts, so replace it once it stops holding material firmly.
⚠️ Common Mistake to Avoid
Fabric softener and dryer sheets are the quiet cause of most peeling that starts weeks later. Both leave a waxy film on the fibres that heat transfer adhesive cannot grip properly, and the effect survives a wash. A shirt that has been through a softener cycle before you press it will hold the design at first and start lifting at the corners after a few wears. Pre-wash new blanks with detergent only, and tell customers the same when you sell.
How do you make a custom t-shirt with SVG step by step?
Making a custom t-shirt with SVG is a six-step process: choose your file, size it, mirror it, cut the HTV, weed the excess, and heat press it onto the shirt. Follow the ordered steps below and you will have a finished garment in under an hour.
- Choose and import your SVG. Upload your cut file into Cricut Design Space or Silhouette Studio, whose free edition will not take an SVG without the Designer upgrade. SVG files stay crisp at any scale, which is why they beat low-resolution PNGs for cutting. After importing, ungroup the design if you plan to change colors or remove elements.
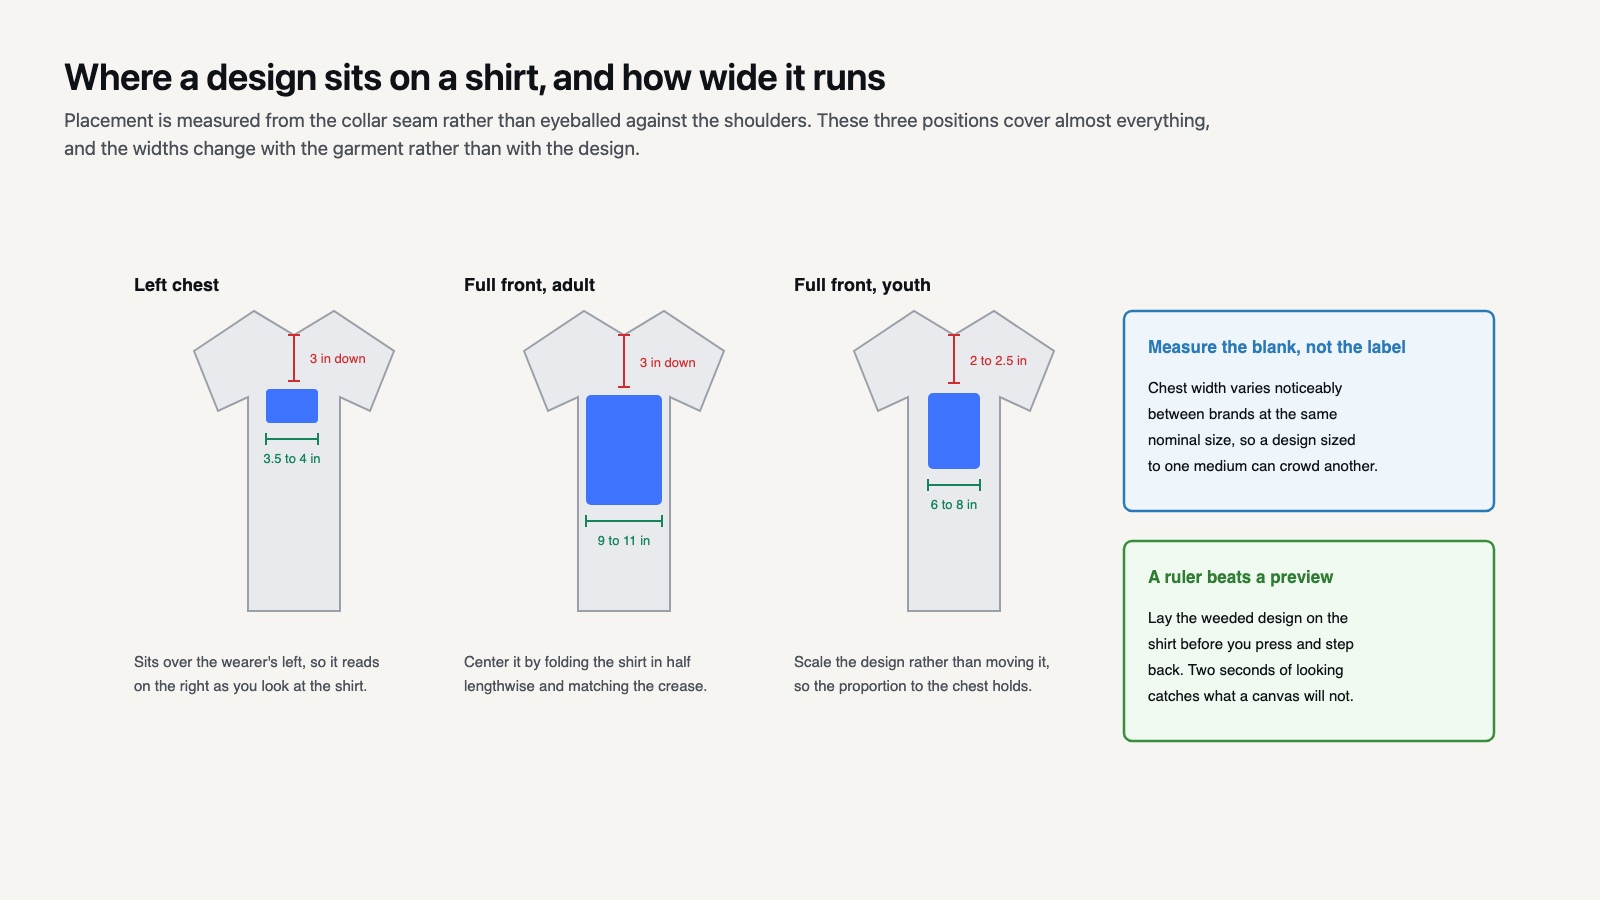
- Size the design to the shirt. A standard adult left-chest logo runs about 3.5 to 4 inches wide. A full front graphic usually sits between 9 and 11 inches wide for adult sizes, while youth sizes scale down to roughly 6 to 8 inches. Place a ruler across the shirt to confirm before you commit.
- Mirror the design. This is the step beginners forget. Because HTV is cut face-down on its shiny carrier, you must flip the image horizontally. In Design Space toggle “Mirror” for each mat; in Silhouette Studio use the flip option in the Transform panel. Mirroring matters most for text, where a missed flip is obvious.
- Cut from heat transfer vinyl. Load the HTV shiny (carrier) side down on the mat. Select the iron-on or heat transfer material setting so the blade cuts the vinyl layer but not the carrier sheet. Run a test cut if you are using a new brand, since blade depth varies between materials.
- Weed the excess. Peel away all the vinyl that is not part of your design, including the centers of letters like A, O, and R. The Cricut shirt walkthrough shows the same stage on a real garment. A bright work surface and a fine weeding hook make this far easier. Work slowly around small details so you do not lift pieces you meant to keep.
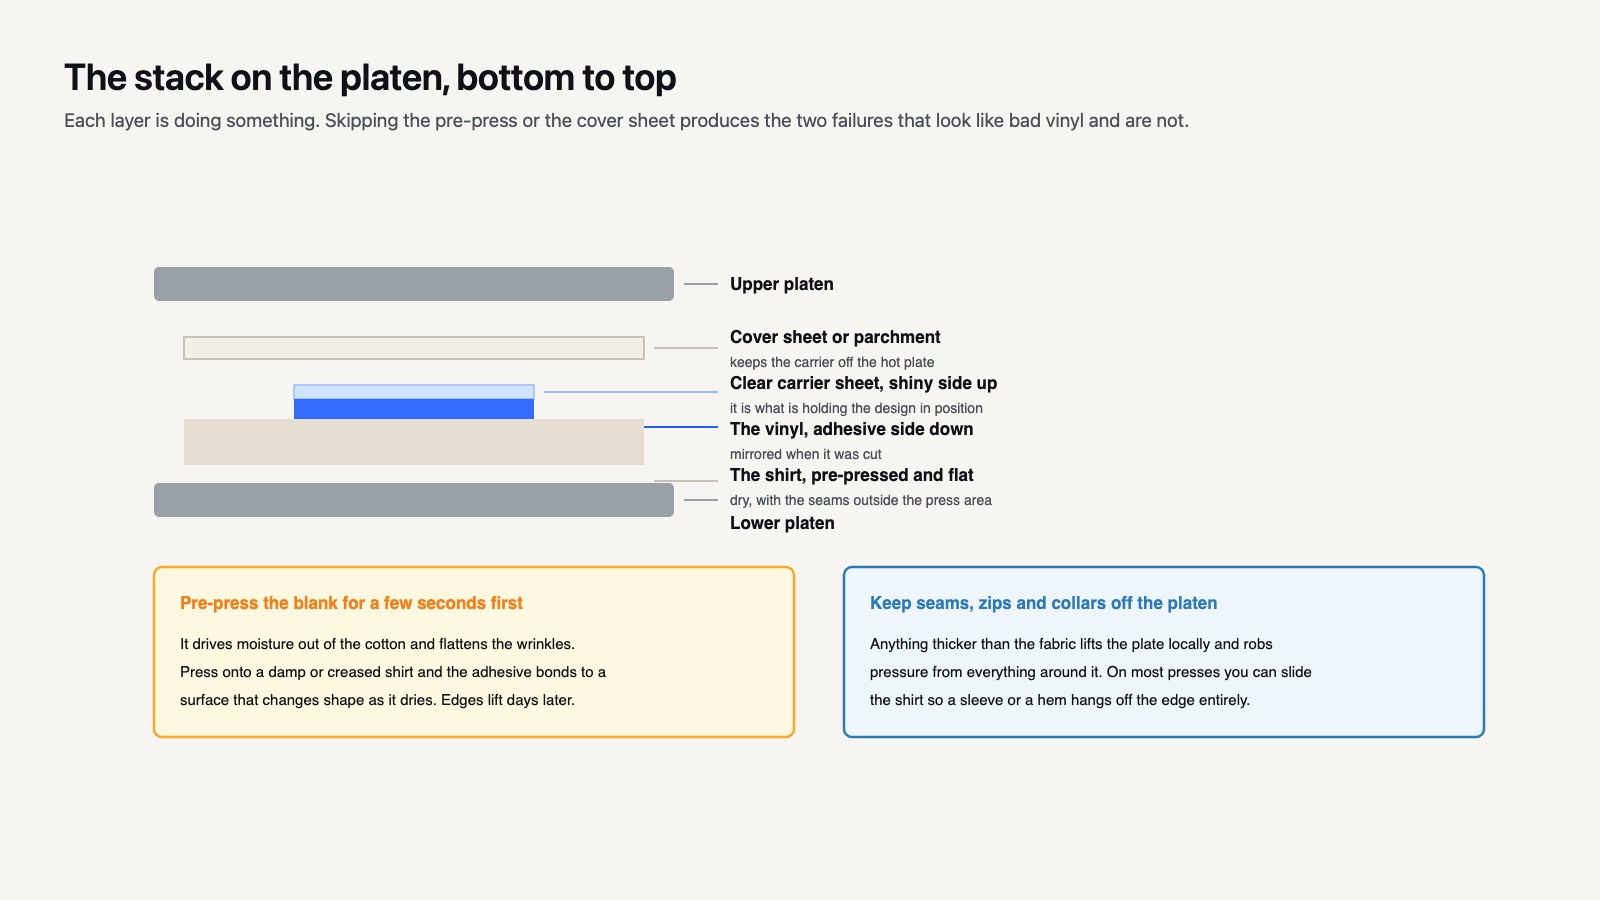
- Heat press the design. Position the weeded design on the shirt, carrier side up, and apply heat and pressure. See the temperature guidance below for exact settings, then peel the carrier when the instructions tell you to.
What temperature do you press HTV at?
Most heat transfer vinyl presses between 305 and 320 degrees Fahrenheit (150 to 160 degrees Celsius) for 10 to 15 seconds with firm, even pressure. The exact figure belongs to the film, not to a general rule, and it varies by product within a single brand. Siser publishes its whole range in one material reference chart, and the roll your vinyl came on carries the same numbers. Treat the figures below as typical starting points rather than settings:
- Standard cotton or cotton-blend with everyday HTV: 315 F (155 C) for 15 seconds
- Glitter HTV: 320 F (160 C) for 15 to 20 seconds
- Polyester or performance fabric: 270 F (130 C) for 10 to 15 seconds to avoid scorching
- Holographic or specialty HTV: follow the roll exactly, as these often need a lower temperature and a cold peel
Pre-press the blank shirt for about 5 seconds first to remove moisture and wrinkles. After the main press, follow the carrier instructions for a warm peel or a cold peel. If any edges lift, lay a cover sheet over the design and press again for a few seconds. For a deeper look at the material itself, the overview of heat transfer vinyl explains how the adhesive layer bonds to fabric under heat.
About SVG DROP: SVG DROP draws and tests SVG and PNG cut files for Cricut, Silhouette, and Cameo crafters. Every design is tested for clean cutting and reliable weeding so makers can move straight from download to finished project. Our team works with these files daily, which means the sizing, mirroring, and pressing advice here comes from real production experience.
🔢 Quick Numbers
Three measurements cover almost every shirt you will make. A left chest logo sits around 3.5 to 4 inches wide and roughly 3 inches down from the collar seam. A full front adult graphic runs 9 to 11 inches wide, positioned so the top edge lands about 3 inches below the collar. Youth sizes take the same design at 6 to 8 inches. Measure the actual blank rather than trusting the size label, because chest width varies noticeably between brands at the same nominal size.
Can you use a regular iron instead of a heat press?
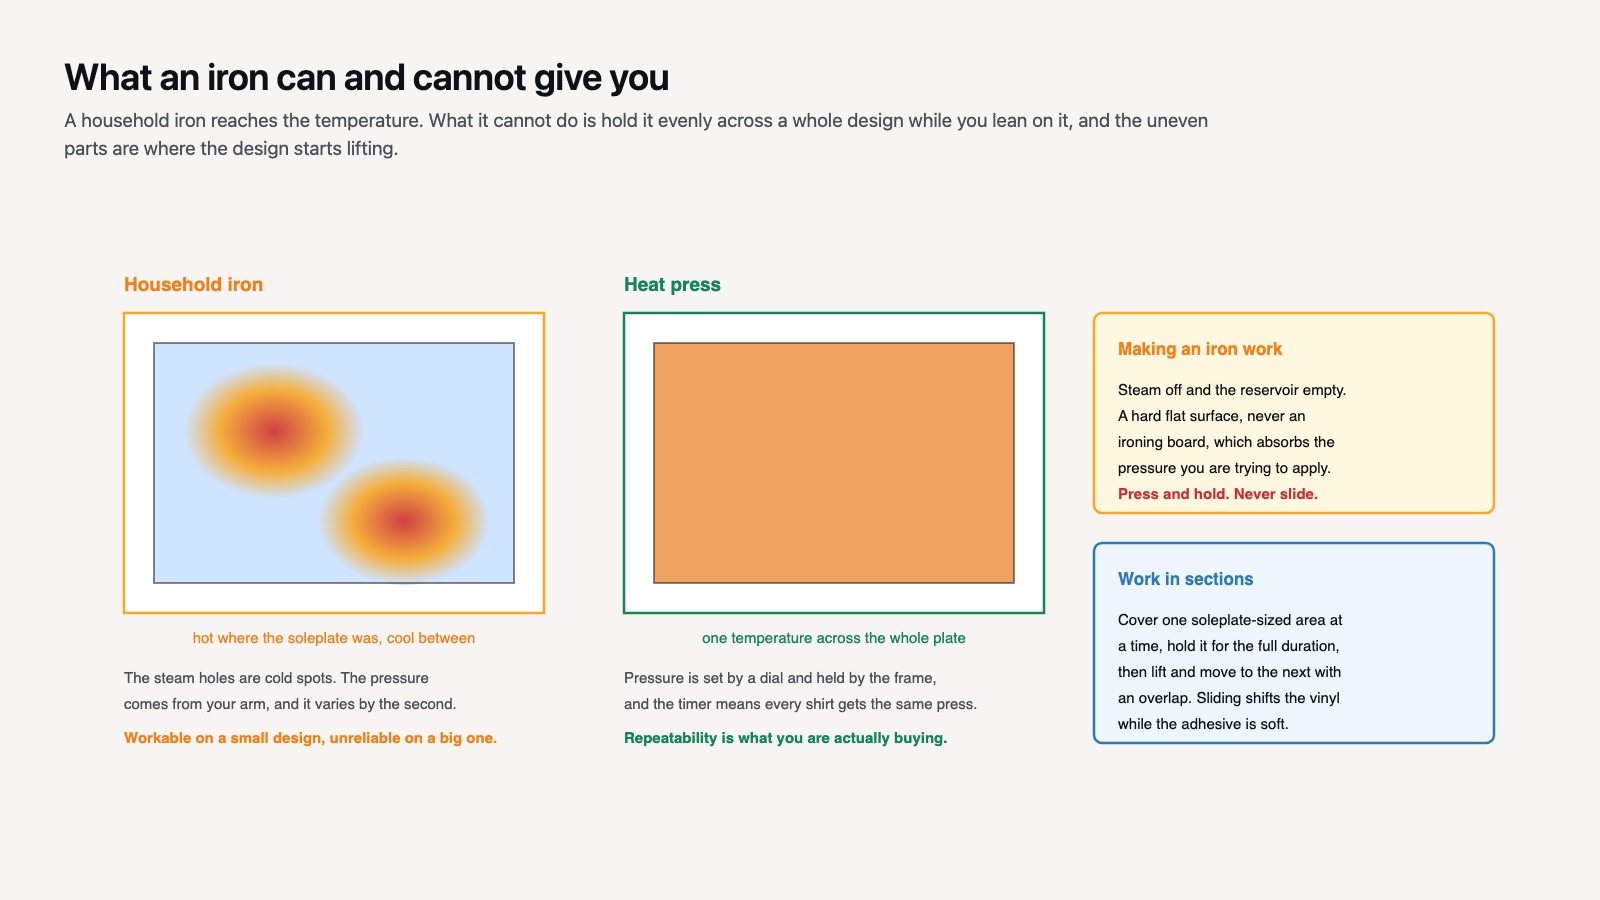
Yes, a household iron can apply HTV, though a heat press gives more consistent results because it delivers even temperature and steady pressure across the whole design. If you use an iron, set it to the cotton setting with steam turned off, empty the water reservoir, and press one section at a time using firm downward force for 15 to 20 seconds per area. Avoid sliding the iron, since motion can shift the vinyl. Place a thin cotton cloth or Teflon sheet between the iron and the carrier sheet to protect both. Use a hard, flat surface rather than an ironing board, because a padded board absorbs the pressure you need for a solid bond. For frequent projects, a dedicated heat press is worth the investment, but an iron is fine for getting started.
How to layer multiple colors of HTV
Multi-color designs look impressive and are easier than they seem once you understand the order of operations. Cut each color separately, mirror every layer, and weed them one at a time. Apply the bottom color first with a short tack press of about 3 to 5 seconds, just long enough to set it. Then position the next color on top, line it up using the design edges as a guide, and tack it down too. Only the final layer gets the full press time, and the layering rules for each film set the limit on how many passes a stack can take. This staged approach keeps earlier layers from over-baking while you build the design. Save textured materials like glitter or flock for the top layer, because pressing other vinyl over them can crush the texture and weaken the bond.
Choosing the right SVG for apparel
Not every SVG is ideal for a shirt. Designs with very thin lines or tiny isolated pieces are difficult to weed and may not stick well over time. Look for files with bold shapes and reasonable spacing between elements. Single-color designs are the easiest entry point, while multi-color layered designs add depth once you are comfortable with registration and stacking. Because SVG files scale without losing quality, the same file works for a toddler tee and an adult hoodie, so you build a library you can reuse for years. Knowing how to make a custom t-shirt with SVG well starts with selecting the right artwork before you ever touch the machine. Quotes, monograms, and simple line-art icons are reliable starting projects that weed quickly and press cleanly.
💡 Pro Tip
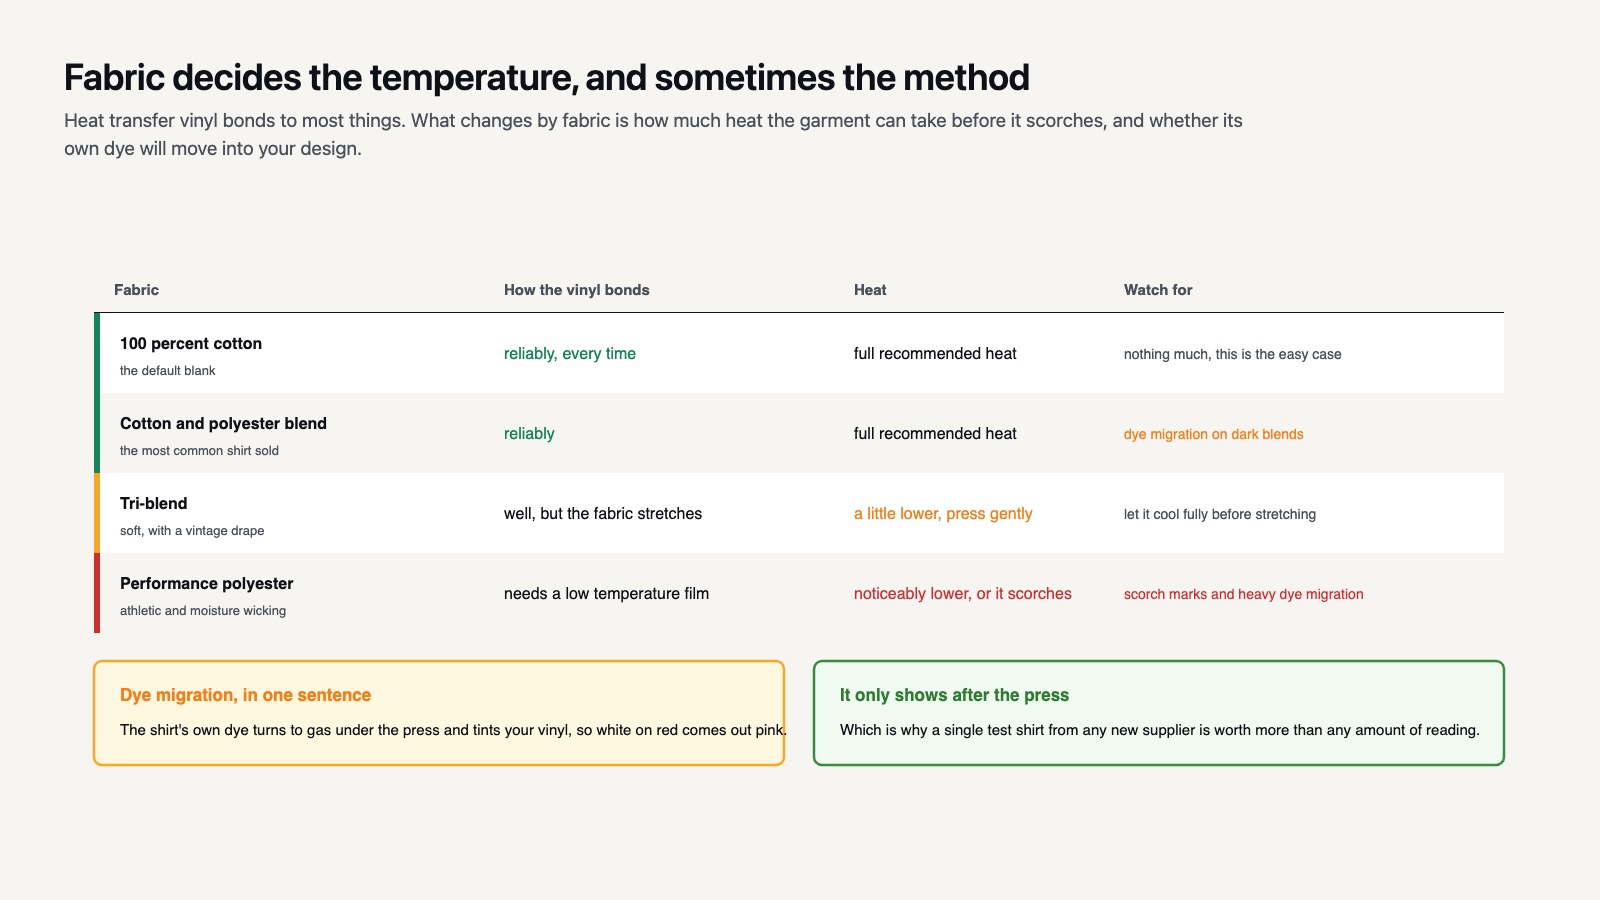
Cut a scrap of your blank fabric and press a test square of the same vinyl onto it before the real shirt. It takes two minutes and it tells you three things at once: whether the temperature scorches that fabric, whether the peel is warm or cold on this particular roll, and whether the shirt dye migrates into a light colored film. Dye migration in particular only shows up after the press, when a white design on a red shirt turns pink, and by then the garment is finished.
Tips for professional-looking shirts
Small details separate a homemade look from a polished one. Keep these habits in mind as you build your skills:
- Always run a small test cut when switching vinyl brands so your blade depth is dialed in.
- Layer light colors first and heavier or textured vinyl like glitter last when stacking multiple HTV pieces.
- Use a lint roller on the shirt before pressing to remove fibers that can show through.
- Center the design by folding the shirt in half lengthwise and lining the crease up with the middle of your artwork.
- Turn finished shirts inside out and wash cold, then hang or tumble dry low to extend the life of the design.
- Keep a simple log of which temperature and time worked for each vinyl brand so you can repeat your best results.
Choosing well-made files also saves frustration, because clean vector paths weed faster and cut more accurately. If you ever run into questions about file formats, our FAQ covers the most common ones, and what a commercial license actually permits is worth reading before you list a shirt for sale.
Now that you have the full workflow, the best next step is to make one practice shirt with a simple single-color design. Each garment teaches you something about your machine, your vinyl, and your press, and within a few projects the routine becomes second nature. Start simple, keep notes, and your results will improve quickly. When you want ideas rather than technique, the t-shirt design ideas roundup is a good place to browse.
The fabrics and blanks that work best
HTV bonds most reliably to 100 percent cotton and cotton-poly blends, which is why they are the go-to choice for beginners. Tri-blends accept vinyl well too and give a softer, vintage drape, though their stretch means you should press gently and let the shirt cool fully before stretching it. For athletic or moisture-wicking polyester, switch to a low-temperature HTV and reduce your heat to avoid scorch marks and dye migration, where the shirt color bleeds into light vinyl. At that point sublimation or DTF may suit the garment better than vinyl does. Always test a single blank from a new supplier before committing to a batch, since fabric content can vary even within the same color. Choosing quality blanks pays off, because a smooth, tightly woven surface holds detail far better than a thin, loosely knit shirt.
Frequently asked questions
Do I have to mirror every SVG for a t-shirt?
Yes, whenever you cut heat transfer vinyl you must mirror the design, because HTV is cut face-down on its carrier sheet. The only time you skip mirroring is when you cut adhesive vinyl for stickers or decals, which is cut face-up.
Why is my vinyl peeling after washing?
Peeling usually means the press temperature or time was too low, the pressure was uneven, or fabric softener was used on the shirt. Re-press the design with a cover sheet at the recommended temperature, wash garments inside out in cold water, and avoid softener to keep the bond strong.
Can I sell shirts made from SVG files I download?
It depends on the license attached to the file. Many SVG DROP designs allow small-business use, but limits vary, so check the license terms for each file. Our FAQ page outlines what commercial use is permitted and how attribution works.