




How to Curve Text in Cricut: Curve, Offset and Weld
 Published
 Updated
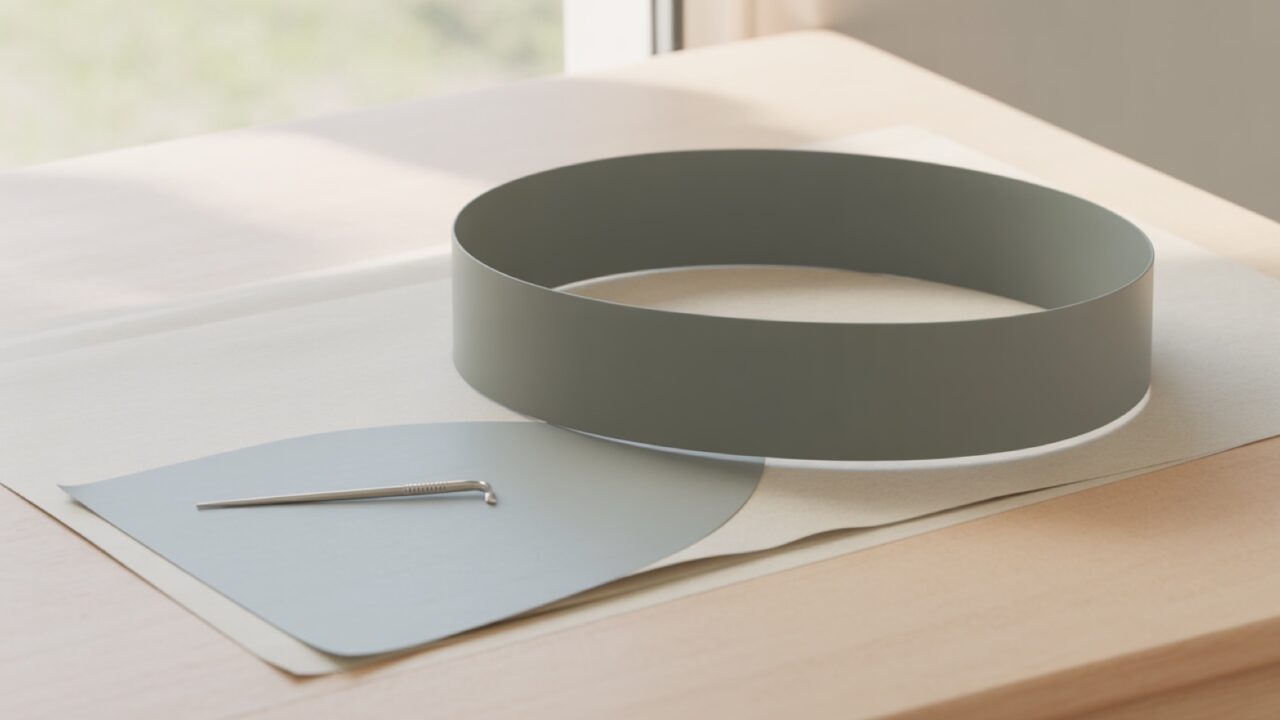
To curve text in Cricut Design Space, select the text object, open the Effects menu in the toolbar above the Canvas, and drag the Curve slider. Dragging right bends the text downward and dragging left bends it upward. Curved text stays fully editable until you weld or flatten it.
That editability is the detail worth holding on to when you learn how to curve text in Cricut. Most of the frustration around Design Space text comes from performing operations in the wrong order, and Curve is the clearest example. Bend first and you can still retype, respace and resize. Weld first and the curve is locked into a shape you can only redraw.
Curve, Offset, Weld, Attach and Slice are the five tools that shape text into something cuttable. They look interchangeable in the toolbar and they are not. Knowing what each one destroys is the whole skill, and it is worth learning before a project rather than during one. The Design Space beginner guide covers the Canvas itself if the layout is still unfamiliar.
Curving Text Around an Arc
How to curve text in Cricut, step by step: select the text, find Effects in the top toolbar, and use the Curve slider. The Cricut text reference describes the same route and confirms the direction of travel: right for a downward curve, left for upward.
Three behaviors catch people out. The curve applies to the whole text object, so you cannot bend half a line and leave the rest straight. The effect is a circular arc only, which means there is no way to flow text along a wave or an arbitrary path. And letter spacing changes visibly as the curve tightens, because the letters are being redistributed around a circle rather than along a line.
That last point is why curved text often needs respacing afterwards rather than before. Set the curve, then adjust letter spacing until the gaps look even again, then stop touching it.
Curved text also behaves differently on the mat than it looks on screen if the design is later mirrored for heat transfer vinyl, which is worth previewing before cutting a whole sheet. The HTV walkthrough covers when mirroring applies.
For a design that wraps a circle completely, two text objects curved in opposite directions is the standard approach: one arcing over the top, one arcing under the bottom. Circular monograms and tumbler wrap lettering are almost always built this way, since a single object cannot curve through 360 degrees in a readable direction.
💡 Pro Tip
Curve before you size, not after. Changing the point size of curved text re-runs the arc calculation and the curve visibly tightens or loosens, which means a design that looked right at 4 inches will not look right at 6. Fix the physical size first, then curve, then space.
What Does Offset Actually Do?
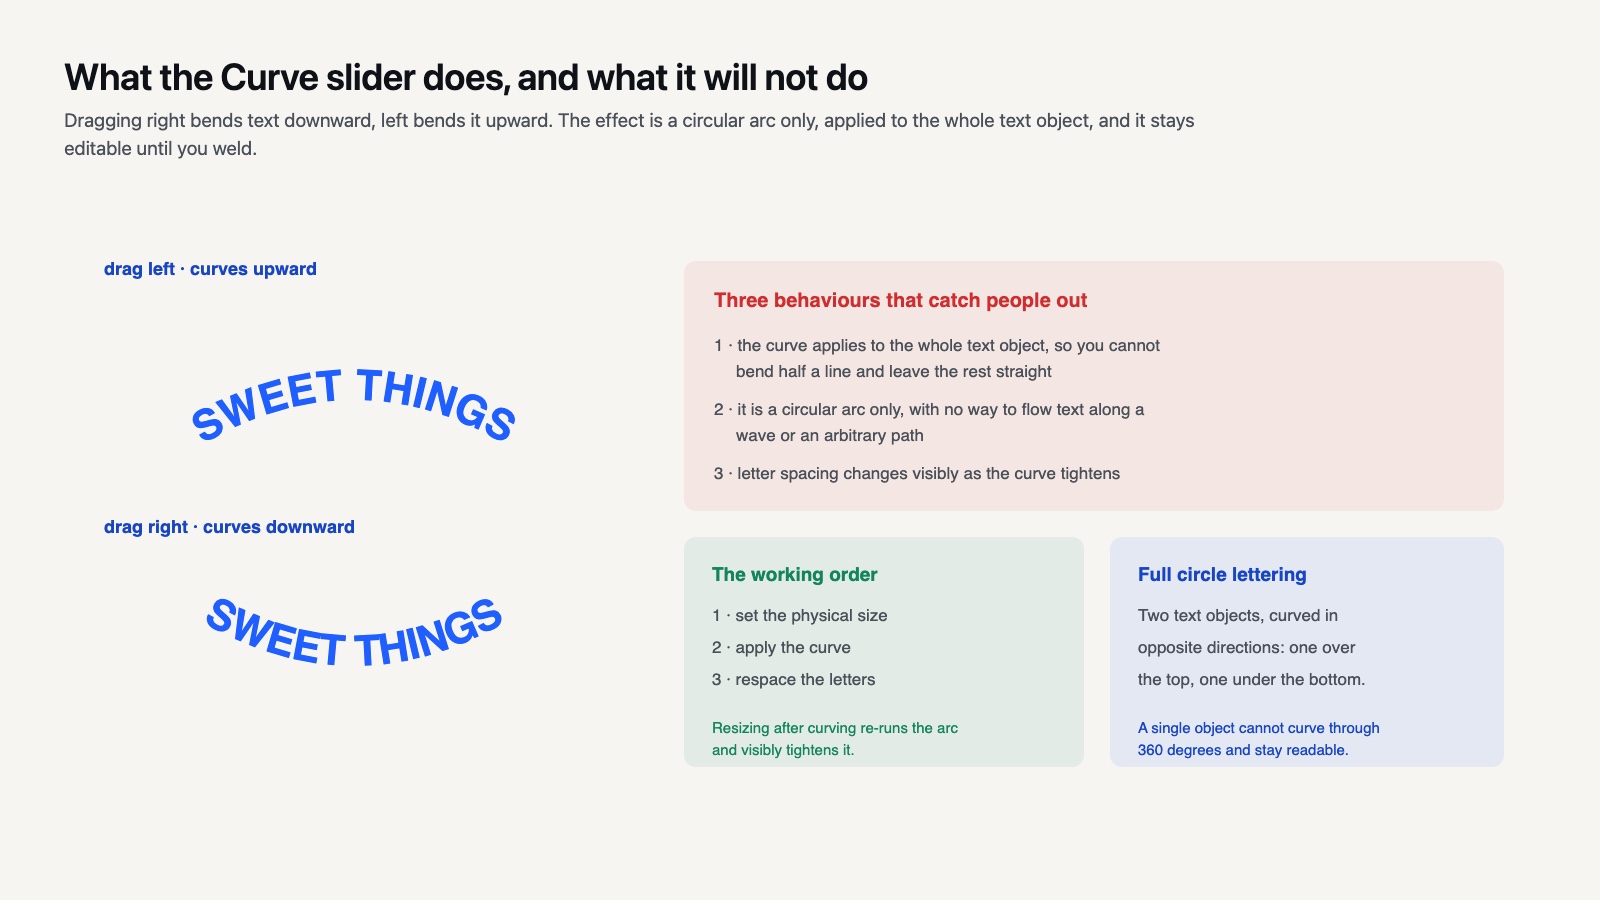
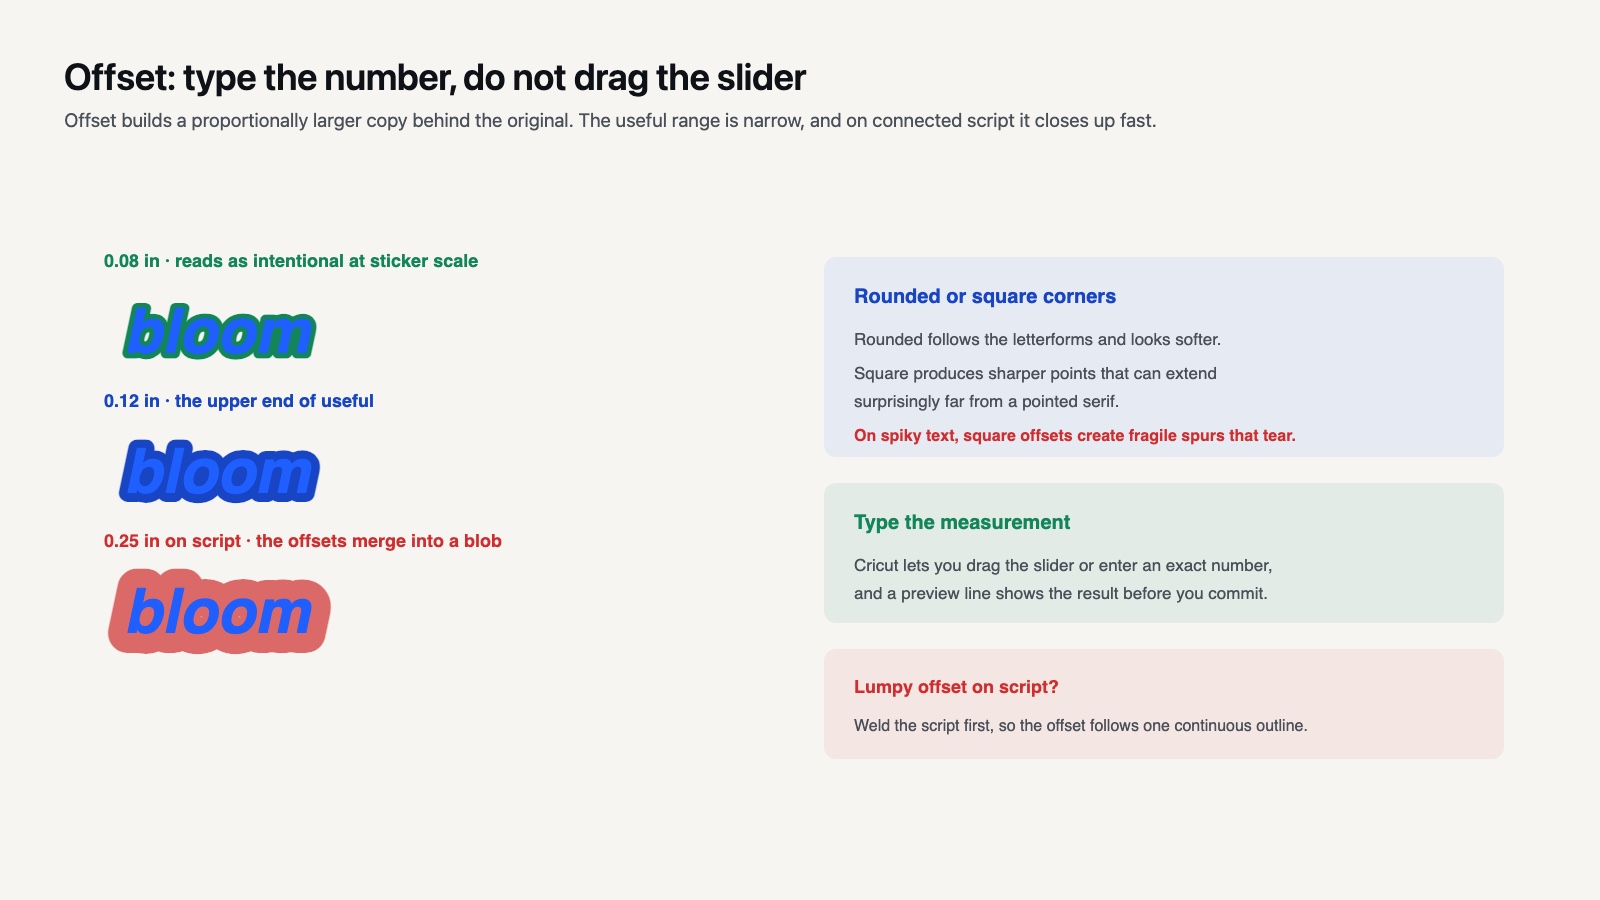
Offset creates a proportionally larger or smaller copy of a layer, sitting behind or inside the original, and it is how you produce an outline, a shadow or a sticker border in one step.
Cricut’s Offset documentation notes that you can either drag the slider or type an exact measurement, and a preview line appears on the Canvas so you can judge the result before committing. Typing the number is the right habit for anything you will repeat.
The useful sizes are narrow. Around 0.08 to 0.12 inches gives a border that reads as intentional at sticker scale. Push past about 0.25 inches on script text and the offsets of adjacent letters merge into a blob, which is sometimes the effect you want and is usually not.
Offset also has a corner setting, rounded or square. Rounded follows the letterforms and looks softer; square produces sharper points that can extend surprisingly far from a pointed serif. On text with fine spikes, square offsets create thin fragile spurs that tear during weeding, which is why cut ready font sets are drawn with thicker strokes than screen fonts.
Weld, Attach and Slice: Which One and When
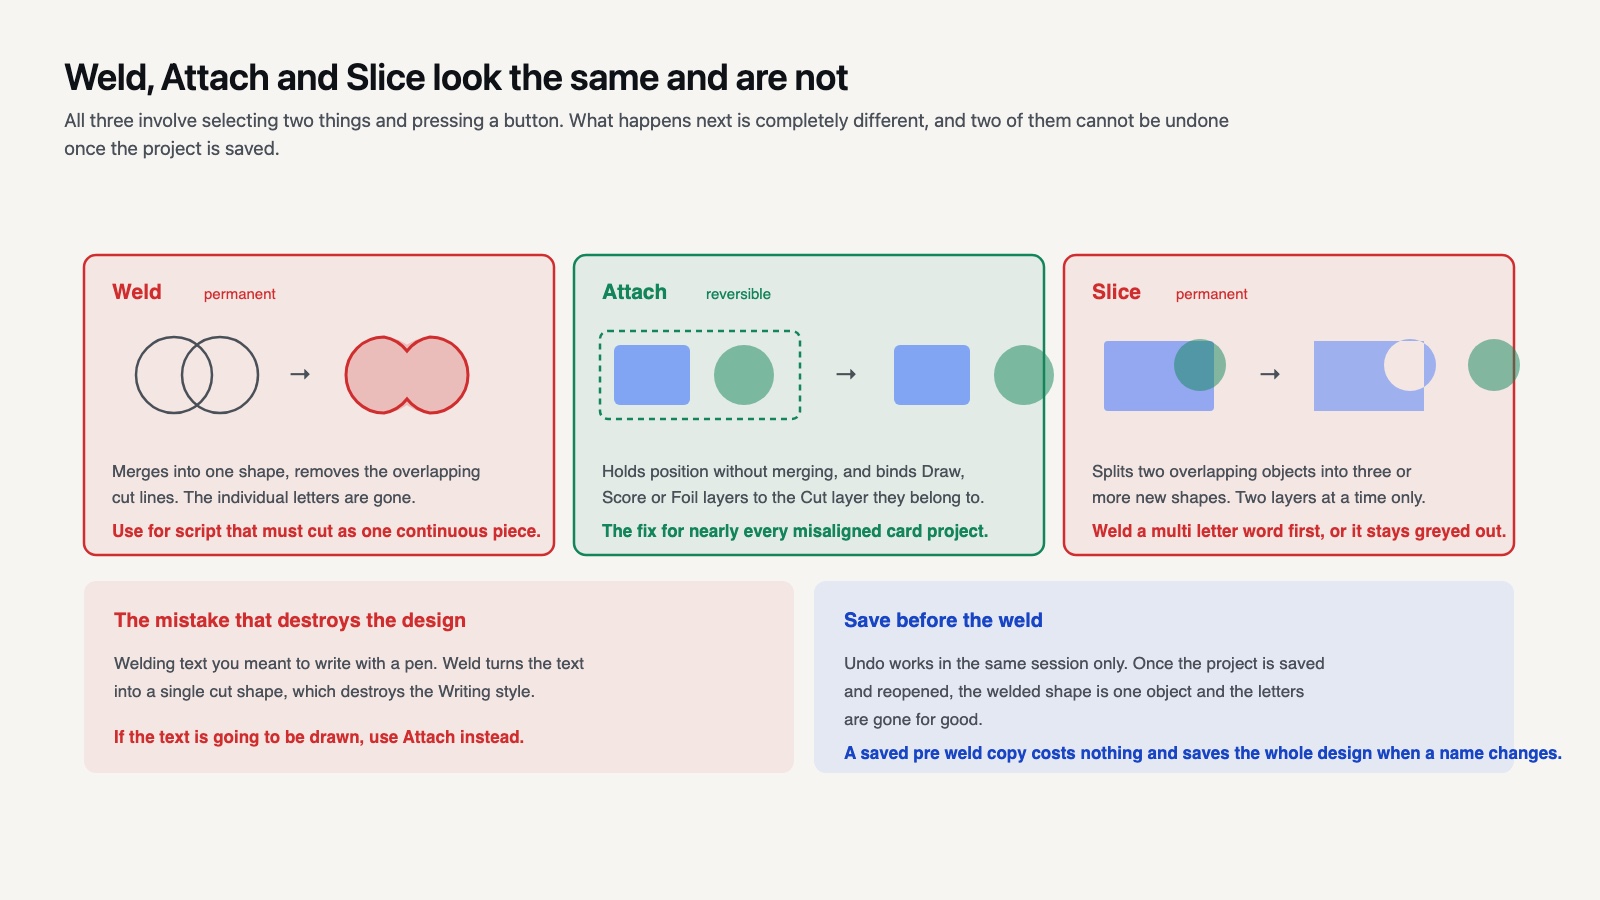
These three get confused constantly because all of them involve selecting two things and pressing a button. What happens next is completely different in each case.
Weld
Weld joins overlapping objects into one new shape and removes the cut lines where they overlapped. Cricut describes the action as permanent, and that word is doing real work: once welded, the individual letters are gone and there is no unweld beyond undo.
Use it on script text where connected letters should cut as a single continuous piece. Do not use it on anything you might want to recolor, resize individually or write with a pen.
Attach
Attach holds objects in position relative to each other without merging them, so they land on the mat exactly as arranged on the Canvas. It also binds a Draw, Score or Foil layer to the Cut layer it belongs to.
That second function is the one people miss. Without Attach, a pen drawn element and the cut outline around it are treated as separate jobs and the machine will place them independently, which produces writing in the wrong place on an otherwise correct cut. Cricut’s Attach guidance spells this out, and it is the fix for nearly every misaligned card project.
Slice
Slice splits two overlapping objects into separate parts, producing three or more new shapes from two. It is how you cut a word out of a rectangle, or trim a design to fit inside a circle.
Slice works on exactly two layers at a time, which is its main limitation. A word made of five separate letters has to be welded into one object before it can be sliced out of a background, and forgetting that step is why the tool sometimes appears grayed out. Cricut groups Combine, Slice and Weld in one reference because they are variations on the same idea.
⚠️ Common Mistake to Avoid
Welding text you intended to write with a pen. Weld converts the text into a single cut shape, which destroys the Writing style and leaves the machine tracing outlines. If the text is going to be drawn rather than cut, use Attach instead. This is the most common reason a card comes off the mat with hollow double stroked letters.
Tool comparison at a glance
| Tool | What it does | Reversible | Use when |
|---|---|---|---|
| Curve | Bends text into an arc | Yes, until welded | Circular lettering |
| Offset | Adds a larger or smaller copy | Yes, delete the layer | Outlines and borders |
| Weld | Merges into one shape | No | Joined script cuts |
| Attach | Fixes relative position | Yes, detach | Pen, score and layout |
| Slice | Splits two layers apart | No | Knocking text out |
Using These Tools on a Bought SVG
A purchased design arrives as shapes rather than live text, and that changes which tools are available.
Curve will not work on it, because Curve needs a text object. Offset will, and it is the fastest way to add a backing layer to a design that did not ship with one, which is how you turn a single color graphic into a two color layered cut without redrawing anything.
Weld and Slice work normally on imported shapes and are the usual repair tools. A design whose letters cut as separate overlapping pieces gets welded; a design that needs a section removed gets sliced. Both operate on the geometry, so the origin of the file makes no difference.
The one thing to check first is how many layers the import produced. A well built layered file arrives as a small number of colored layers matching the design; a file exported badly can arrive as dozens of fragments. Selecting all and reading the layers panel takes ten seconds and tells you whether you are editing a design or repairing one. Files supplied as clean layered SVG, such as the layered cartoon sets, import ready to cut and need none of this.
Can You Flow Text Along a Shape?
Not along an arbitrary path, no. How to curve text in Cricut stops at circular arcs. Design Space has Curve for circular arcs and Warp for distorting text into a shape outline, and neither is a true text on a path tool.
Warp, documented separately by Cricut, stretches and distorts the letterforms themselves to fill a shape. That is a different effect from flowing text along a line, and it changes the typeface’s proportions in ways that look deliberate on chunky display faces and wrong on anything delicate.
If a project genuinely needs text following a curve that is not a circle, the practical route is to build it elsewhere and import. A free vector editor handles text on a path properly, and the result comes into Design Space as an ordinary SVG. Once it is in, the usual grouping and attaching rules apply, and it is the same round trip anyone doing complex lettering ends up using.
Order of Operations That Actually Works
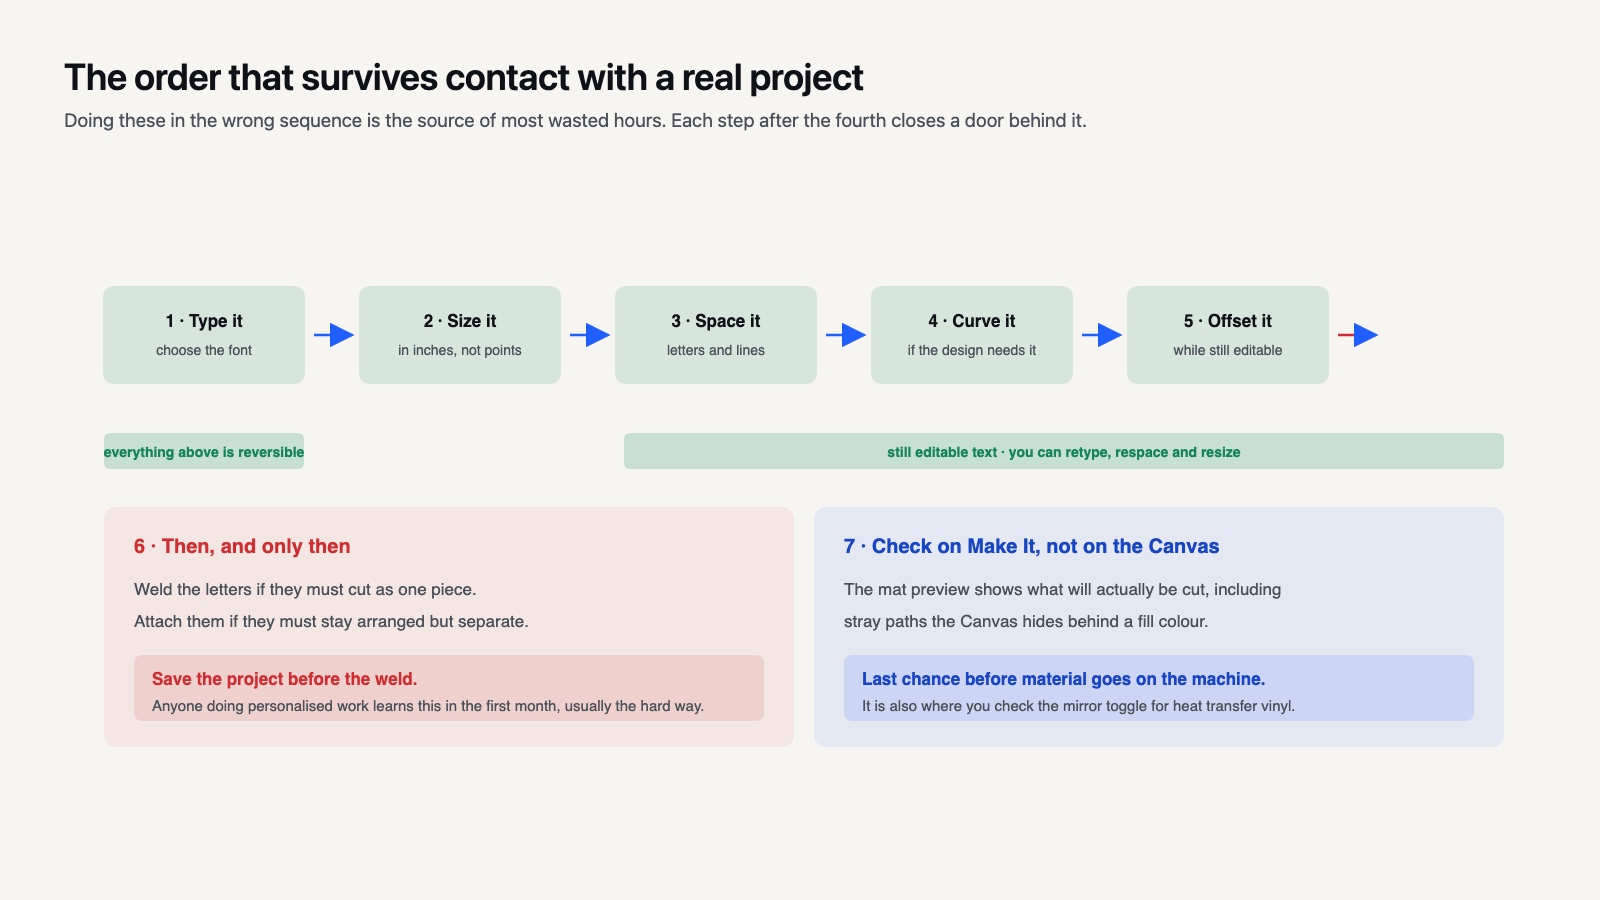
Doing these in the wrong sequence is the source of most wasted hours, so here is the order that survives contact with a real project.
Type the text and choose the font. Set the physical size in inches. Adjust letter spacing and line spacing. Apply Curve if the design needs it. Apply Offset if you want an outline, and size the offset now while the original is still editable. Then, and only then, Weld the letters if they need to cut as one piece, or Attach if they need to stay arranged but separate.
Save the project before the Weld. Welding is permanent, and a saved pre weld version costs nothing and saves the whole design when a customer changes a name. Anyone producing personalized work for other people learns this within the first month, usually the hard way.
Finally, check the result on the Make It screen rather than on the Canvas. The mat preview shows what will actually be cut, including any stray paths that the Canvas hides behind a fill color, and it is the last chance to catch a problem before material is on the machine. The same final check applies to every garment and decal project, where mirroring is checked at the same moment.
Small Text and Why the Tools Cannot Save It
None of these tools makes a fragile design cuttable. Offset can thicken an outline around text, but it does not thicken the text itself, and a hairline serif with a fat border is still a hairline serif that will tear when you weed it.
The honest fix for small text is a heavier typeface. Below about half an inch in vinyl, stroke weight decides everything, and a design that fails at that size will keep failing however many times it is re welded. Anyone producing name decals and small labels learns to keep two or three reliably heavy fonts for exactly this case.
Where the tools do help is in removing unnecessary detail. Welding a script word eliminates the internal overlap lines that would otherwise cut through the middle of the strokes, and that alone often turns an unweedable design into a workable one.
Putting It All Together
The pattern behind all five tools is that Design Space asks you to decide, early and irreversibly, whether a piece of text is still text. Curve and Attach keep the answer open; Weld and Slice close it. Most people learn this by losing a design, and the ones who work fastest are simply the ones who save a copy before they close the door.
Frequently Asked Questions
Why is the Curve option grayed out?
Curve works on a single text object. If you have selected two text boxes, a group, or text that has already been welded into a shape, the option is unavailable. Select one live text object and it returns.
Can I undo a weld?
Only with the undo command in the same session. Once the project is saved and reopened, the welded shape is a single object and the original letters are gone. Saving a copy before welding is the only reliable protection.
Why does my offset look lumpy on script text?
Because adjacent letters are close enough that their offsets merge. Reduce the offset distance, or weld the script first so the offset follows one continuous outline instead of several overlapping ones. Welding before offsetting usually gives the cleaner result on connected lettering.
Does Attach change how a design cuts?
It changes where pieces are placed on the mat, not how they are cut. Attached objects keep their Canvas arrangement instead of being repositioned for efficient material use. That costs material and is exactly what you want for a layout that has to stay together.